Showing posts with label Lingerie Sewing. Show all posts

Thursday, 28 February 2019

French Seamed Cotton Pyjamas


One area that is slightly lacking in my me-made wardrobe is pyjamas. I mean, over the past few years I have made 1 set of pyjamas and 2 nighties(here and here), but those don't all fit anymore, and even when they did, didn't see a lot of use, usually due to the fabric choice. So, for the week 5 fancy seams challenge of the 52 Week Sewing Challenge, I decided to make myself a set of fully french seamed cotton pyjamas, using this delicate floral print with birds. 


For the shorts I used Burda 7109 (previously used here) adding pockets and leaving off the leg elastics, and for the top I used Kwik Sew 3395 (used here for a slip) adapted so that the midriff and skirt pieces were cut as one piece (the same changes I made when making the slip previously). I was difficult to cut all the pieces I needed from the just over 2m length of fabric I had, which is why I had to add pockets to my shorts, as I couldn't fit the whole pieces on, so arranged them to have cut outs on the top, front sides, which I then made into pockets.


I cut the pieces out after my son went to bed one night, then managed all the sewing during his naps over 2 days, amongst other things I had to get done. As these were both patterns I had used before, they were quick and easy to put together, even with the additional pockets and french seaming. I managed to only partially sew one seam the wrong way, before realising and having to unpick. For an entire french seamed set, that's not bad at all.

After I finished them and tried them on it seemed that they had ended up a little too small for me, which bummed me out. However, after a couple of days I decided to wear them to bed anyway, and after a bit of wear, the weave of the fabric loosened up a bit and allowed the bias to give. After a couple of washes, the fit improved even more.

I have now fallen a few weeks behind in my 52 week sewing challenge (although I did get this one done in time, I am just last blogging about it) mostly due to being busy with my son and his first birthday, but I have also been seriously struggling with motivation and my own mental health. I had hoped that getting back to sewing would help with that, but it has been difficult to find the time with an active baby, and with university just begun for the year, that is probably going to get even harder.

Anyone else already behind in their plans for the year?

Dixie

Sunday, 13 January 2019

Underwear from Kwik Sew 2325 and 2101

The theme for Week 2 of the 52 Week Sewing Challenge was to sew a UFO. No that doesn't mean I had to sew a flying saucer (although if you wanted to you could) in sewing terms, as well as other crafting hobbies, UFO simply means Un-Finished Object. I tend to have a lot of these, as I am easily distracted by shiny new projects, and if a project isn't turning out like I hoped, I usually prefer to just stop working on it, rather than fix it or push through and finish something I don't like. For this challenge, I decided on this underwear set that I started making some time ago. I really have no idea how long ago, but it is somewhere in the ballpark of 2-5 years ago.


Here is what I had stashed away in a bag under a chair:


I had cut the pieces out from some nude power mesh type stuff, and a small bit of floral fabric of unknown content (probably polyester) that has a tiny bit of stretch, both sourced from op shops. I also had underwear elastic, bra straps, bra closure and suspender clasps. I had finished sewing the panties, and had the suspender belt half done. I think the reason I stopped working on it was that the panties ended up  a little too big and much more high cut in the leg holes than I would have liked (very 80's) and I wasn't sure if the picot underwear elastic I was using would have enough stretch to make the suspender belt fit well. Although I have put on weight and am a different shape than I was due to pregnancy, I hoped that I could still make this set fit.


I began working on the bra by french seaming the upper and lower cup pieces together, and then attaching the 2 cups together via the small front piece. Picot elastic was then sewn to the back pieces, which I was pleased to find I had cut a little longer than the original pattern piece, so I am optimistic that I will be able to get it to fit. The rest went together fairly easily following the pattern directions. I added more elastic to the top of the cups instead of using the suggested cup stabiliser, and the bra was done before I knew it!

The fit is surprisingly good considering I cut it out pre-baby, although the cups do have the sort of pointy 80's look to them. Luckily that also works with 50's styles, so I don't really mind. I have not quite managed to complete the suspender belt, but am considering it a win anyway, as the bra and panties can be considered as a complete set without it. Some of the construction is a little rough, and not quite as pretty as I would like, but they are still completely functional, and I think a little cute. At the very least I can consider these a wearable toile for the next time I want to use these patterns and extend my collection of me-made underwear.


Anyone been working on any UFO's or underwear sewing lately?

Dixie

Friday, 7 July 2017

A Nightie from Burda 7109 and some new vintage patterns

Recently, I found myself wanting a long cotton nightie, so I pulled Burda 7109 out (which I have used previously for pyjamas) as well as a length of floral cotton (purchased from an op shop) as well as a piece of pink lace and some bias binding.


This was a very quick sew, I had it completely finished in one afternoon, so I didn't take any progress photos. The construction is basically just shoulder seams, armhole binding, neckline lace and binding, then side seams and hem. I did add one in seam pocket to the right side of my nightie, as I am constantly needed a pocket to put my phone in, and sleepwear generally doesn't come with pockets. I made a size 22 this time (used 18 in the top last time) as I wanted this to be very loose and unfitted.


I was also super lucky to find 7 awesome vintage patterns while op shopping yesterday morning, for the amazing price of just 50c each! While they are all small sizes, that never deters me, and I know I will be grading some of these beauties up when I next get a chance.


Dixie


Tuesday, 14 February 2017

A comfy underwear set

A month or so ago, I kept seeing a new free soft bra pattern being posted in numerous Facebook sewing groups, so when I happened to pick up some 95%cotton 5% elastane jersey knit fabric from Big W on clearance for $5, I thought it was about time I gave it a go. The free pattern is the "Lovesick Bra" from George and Ginger, and can be found on their site, with the rest of their free patterns.  If you like a boyleg undie, George and Ginger also have a free pattern for those, as part of the "I heart you" set.

To make my matching undies, I chose to use the bikini bottom pattern from Golden Rippy's Mykonos collection, but adding about 1 inch in height to make it slightly high waisted (better for holding the jibbly bits in) There are also tons of free underwear patterns online you could use for your own version, I just chose this one as I had made them previously and liked the fit.


I chose to cut out the size 20 DD cup and back pieces, with the size 18 band and straps, working from the pattern's measurement chart, as well as the XXL in the bikini bottoms, with an extra inch height at the top. After cutting all my required pieces out, I had only used a bit more than half, so I should be able to get another pair of undies out of it, or another set, in a smaller size for someone else. If your measurements are smaller than mine, you may be able to squeeze out 2 sets for yourself out of 1 meter.

I didn't take any progress shots at all, as both items were quite straight forward. I did add a piece of 1" wide elastic to the bra band, but other than that made it straight from the pattern. Unfortunately, the bra has ended up a bit big, and lacking in any support. This seems to be a fairly common complaint I have seen from larger ladies who have used this pattern, so if you plan on using it yourself, I would highly recommend measuring the pattern pieces and sizing down. I did realise mine was looking a little too big after I sewed the darts in the front cup pieces, but decided to forge ahead and finish it anyway.

I figure I can now wear these as pajamas, especially on hot evenings, like some of the scorchers we have been having recently.

Other than the sizing issue, I have also found that I do not like the placement of the darts closest to the center front, as they seem to poke out at an odd place. Perhaps this is due to the bra being to big and not supportive enough, or maybe just due to my naturally wide set breasts (just like Marilyn Monroe had) I shall have to make a smaller version to test see, and perhaps move their placement.


I may or may not add a modeled photo at a later date, but for now, I cannot be bothered.

Anyone else tried the Lovesick Bra? how did it work for you?

Dixie

P.S. Happy Valentines day my Dear Readers!

Sunday, 12 February 2017

My first attempt at a Waist Training Corset

I have been interested in waist training for a few years now, but haven't begun for a few reasons. Mostly because of the cost of the corsets, but also because of the amount of times I was pregnant last year. My husband and I are still trying for a baby this year, but I've decided not to put things off because of it. Don't worry though, I will only be wearing a corset at times when I definitely know I'm not pregnant.

I had a good look online at a few corset brands, as well as Lucy's corset calculator, but none had a corset curvy enough and short enough for my body, Mystic City Corsets had a few that were close, but not quite small enough in the waist, or big enough in the hips, or short enough. So naturally I thought I would have a go at sewing one myself. As far as I could find, there doesn't seem to be any corset sewing patterns that match my measurements either, so I got out a pencil, paper and ruler, and got to work drafting my own.

First draft corset pattern

I aimed for a fairly short waspie style with only about 6" reduction in the waist, and I mostly kept the front pieces flat, putting the curves at the side and back where I need them. I added 1/2" seam allowances on each side, then once I was happy with the pattern, I grabbed some fabric scraps and cut the pieces out.

Clipping the curves while watching "Call the Midwife"

For this test version, I just sewed up the front instead of inserting a busk (as I don't have any on hand) each seam was sewn up, clipped and pressed open, then the two layers are put wrong sides together, matching up all the seams. I then simple sewed a line of stitching down either side of the seams to create the boning channels, adding an extra boning channel either side of the front seam for extra rigidity there.

Sewing boning channels between the 2 layers

Boning inserted, ready to insert the eyelets

Once I had the eyelets in, I laced it up with some red and black satin ribbing I happened to have on hand and tried it on. Unfortunately, it looked like I had added too much room in the hip spring, probably because the corset is so short, it doesn't hit the part of my upper hips that I measured. I fixed this easily with 4 small darts in some of the side and back panels.

Testing the fit, over my pajamas
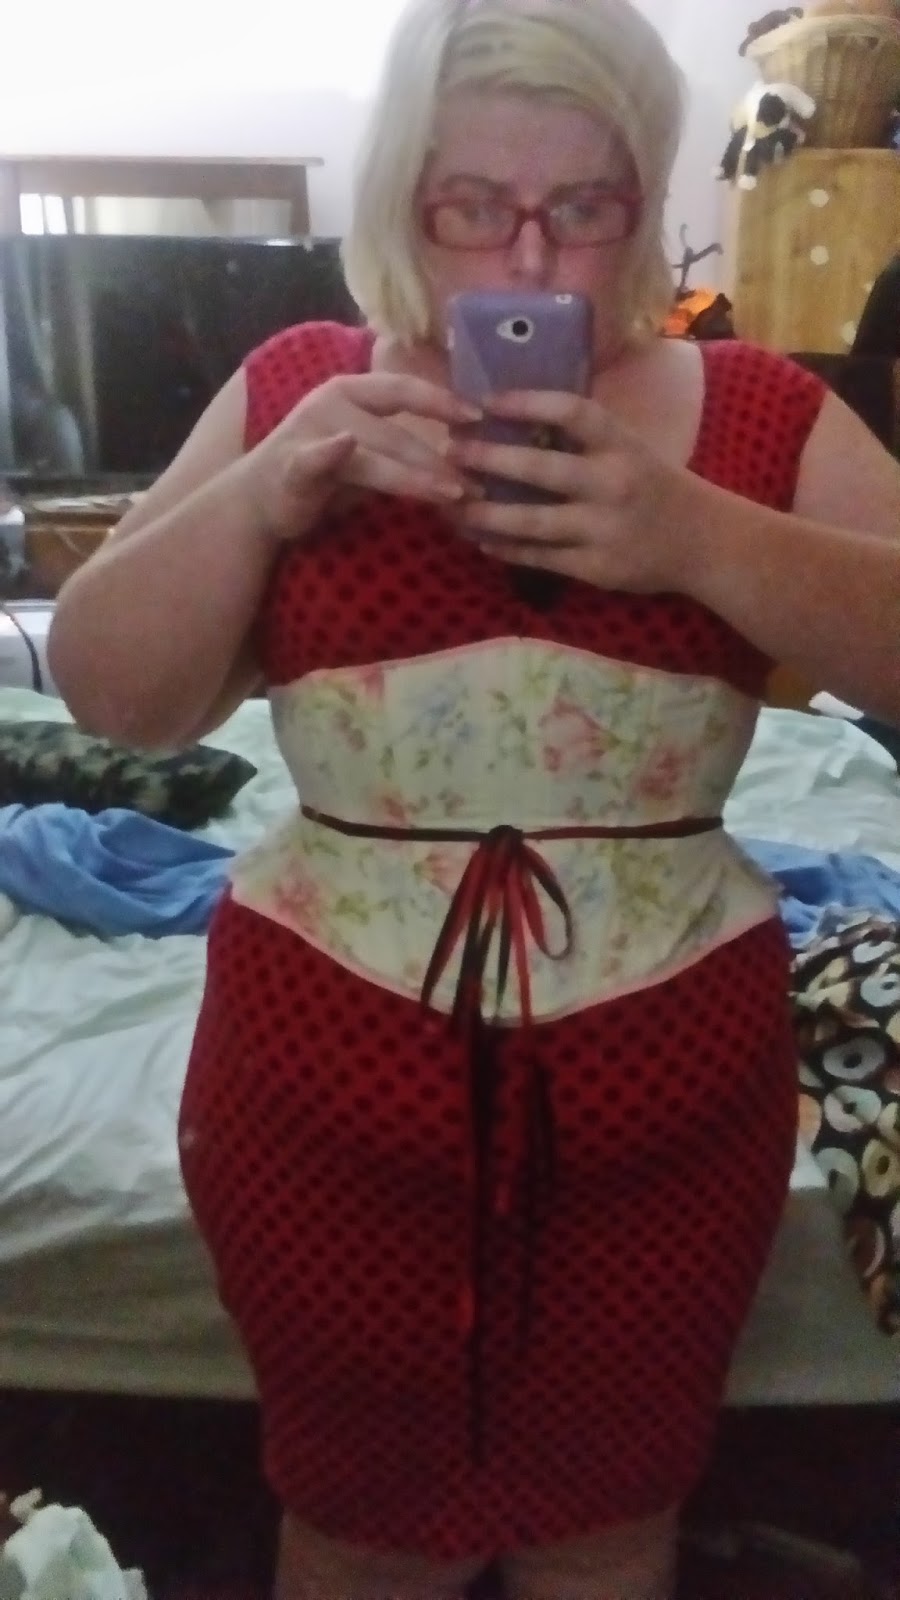
Once I had sewn in the darts and pressed them, I bound the top and bottom edges with a soft pink binding from my stash, the tried on the completed corset over a stretchy dress.

Finished, trying on to test fit

While I am happy with the fit of this corset as a first draft, there are lots of areas I want to change/improve for the next one. For starters, I think I will raise the top edge at the back in an attempt to minimise back fat and stabilise the top edge somewhat. I also really wanted a more dramatic hourglass shape initially, so I will also be changing the shape of the waistline, and possibly bring it in slightly smaller, as well as bringing in the bottom edge slightly so I don't need to add darts.

As with many plus size gals, my hips tend to spread out a bit when I sit down, so a fellow corset maker and wearer suggested I try using power mesh in small triangular gores on the bottom, to allow for extra room when seated. In order to make a corset that will be comfortable to wear sitting down, while sewing or perhaps doing Uni work, I will probably use this idea. Naturally I will also be buying a proper steel busk and spiral steel boning.

When I do fix up my pattern, I am thinking I will scan it in and upload it as a new free pattern for my readers. Admittedly it will only suit people with similar measurements to myself, but I am sure there are plenty of curvy short gals out there who will appreciate it.

Dixie


Tuesday, 9 August 2016

A Blue Princess Seam Slip

After making my last slip, I wore it nearly everyday, so I thought I should probably make myself another. Rather that use the same pattern again, I decided to use one that would count towards my Vintage Pattern pledge. I know I had a vintage slip pattern that I was in the process of grading up, but of course I could not find it anywhere. So I settled for this pattern.


While not my usual decade for vintage patterns, this one is from 1989, so it is still technically vintage. Besides, when a pattern is made up with the right materials, you can make it look like a completely different decade than when it was designed for. I chose to use a lovely royal blue satin printed with stylised pink roses, that I purchased from Spotlight, from the remnants bin, I think. I only had about 1.5m of it, so I had to shorten the slip a few inches, especially to cut out all the pieces on the bias, which I was fine with, as I found my last one does try and peek out from the hemlines of my dresses and skirts when I wear it underneath. To complement the satin, I searched through my stash for some lace and settled on this lovely soft pink design.


I began sewing by sewing the wrong sides together, as the basis for the French seams. I made the straps, using the same technique as my last slip, then pinned them on to check the fit. It was a bit roomier than I wanted, so I took it in an inch on either side seam. Once I was happy with the fit, I trimmed the seams, then turned the seams around and sewed them right sides together, then pressed all the seams flat. I once again pinned the straps on and checked the fit, which I was pretty happy with.


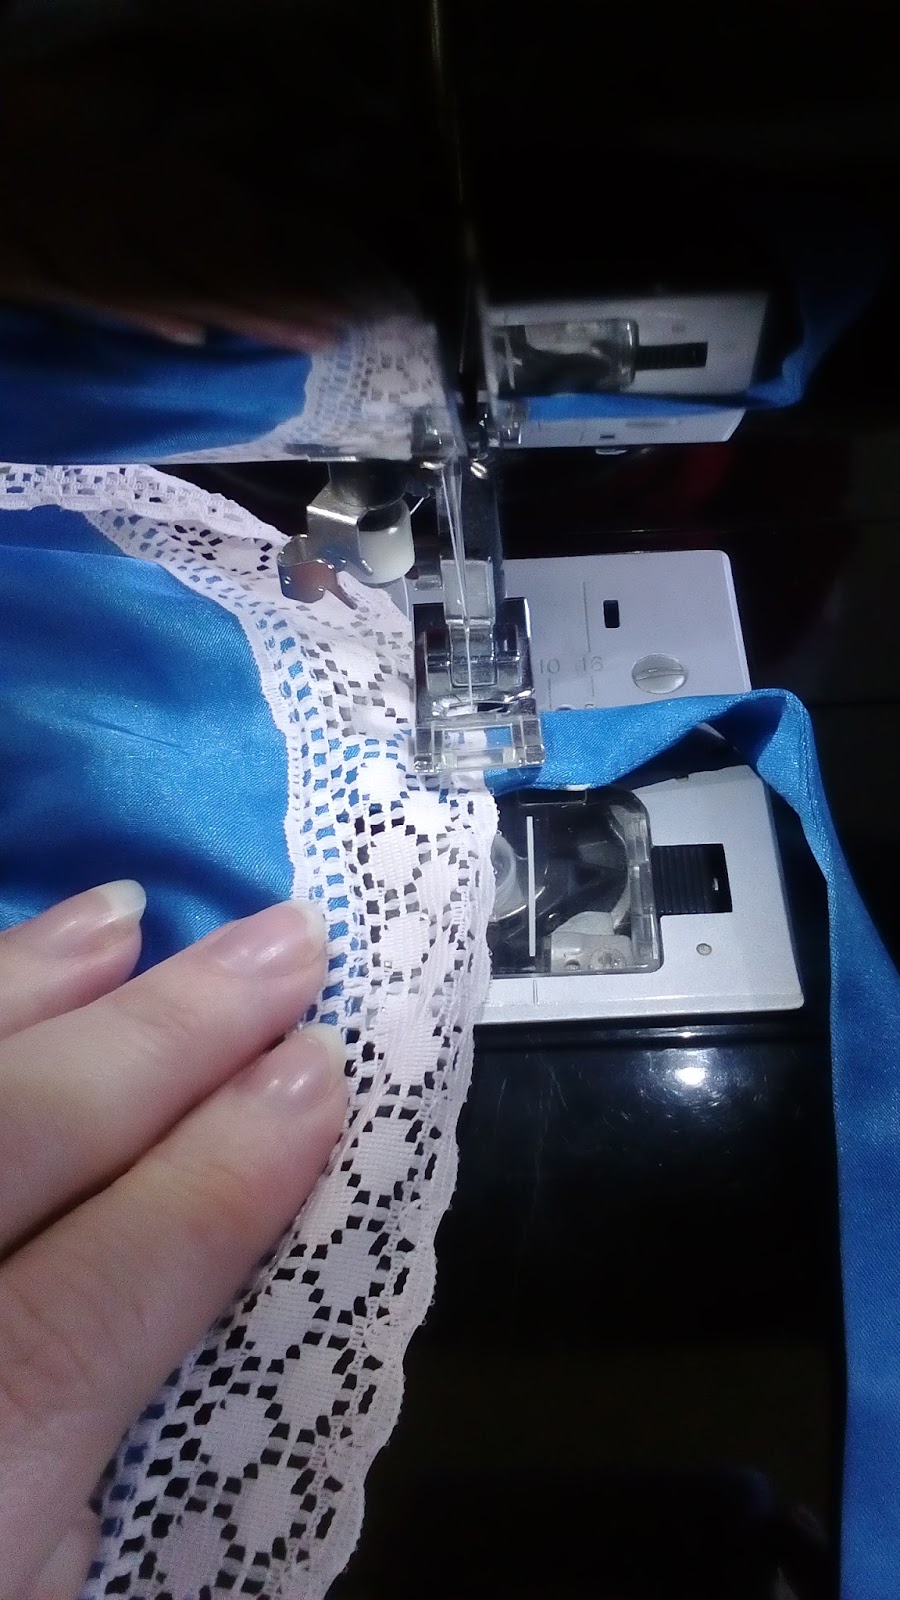
While overlocked seams would have been less bulky, I love the finish of French seams on lingerie. The next step of construction was to attach the lace along the neckline and hemline. The pattern instructions say to stitch the lace on, easing around curves and pinching extra out of the corner, then turning the raw edge down on the inside. So I decided to follow the instructions, overlocking the raw edges before adding the lace. The hemline was finished in the same way.


Unfortunately, while pressing the edges inside the slip, I accidentally melted a small part on the hemline. It's not too noticeable, but I'm still bummed I did it.


After trying it on, I realised the lace was falling down a bit along the neckline, so I stitched it in place on the straps, and that seems to be keeping it up.


While I am happy with how this slip has turned out, I think I prefer the design of the other pattern with the separate cup pieces, although I am sure I will get wear out of this one, as it will be less noticeable underneath my clothes because it is quite a bit shorter. It also looks great with my new Pale Blue Suit!


Anyone else as obsessed with making and wearing slips as I am?

Dixie

PS. This is my 4th Vintage Pattern Pledge make for 2016, so I am still a bit behind on my goal of 10

Sunday, 17 July 2016

A Fabulous Floral Slip!

Yesterday, at very short notice, my husband and I drove up to my mum's place to dog sit her great dane cross, Zeek, while she was at work. In the 10 minutes we had to get dressed and get on the road, I grabbed my janome sewing machine, a few patterns and a bag of fabric that I recently purchased from the op shops. I may have left the house wearing my pajamas and a cardigan......

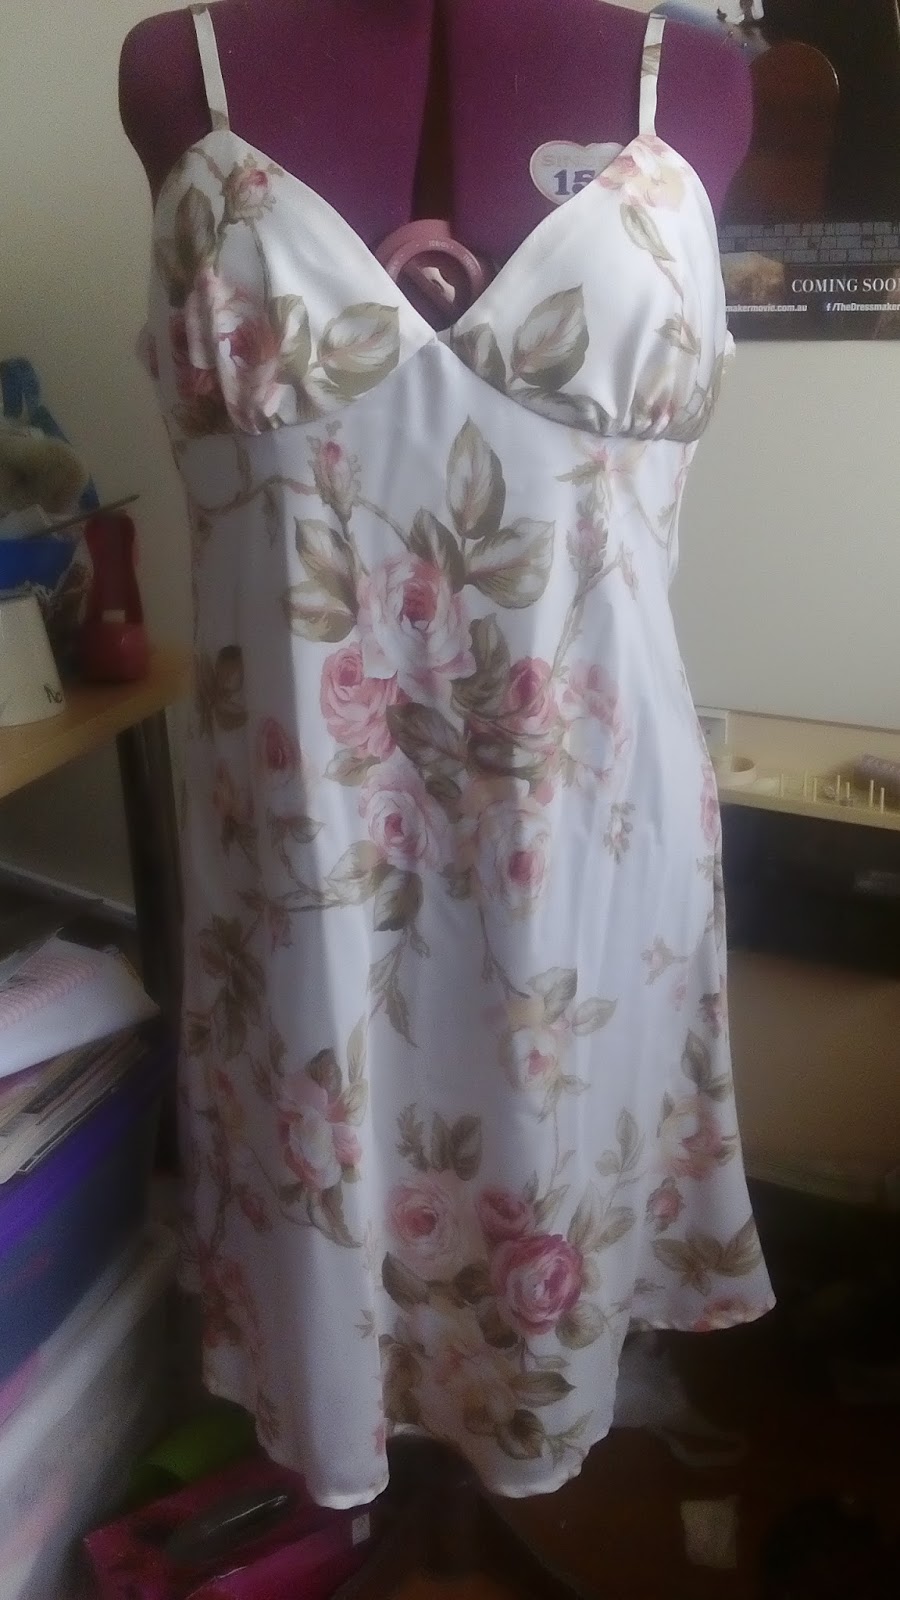
So when I got to my mom's house I had a look at what I had brought with me and chose to use this slinky floral polyeseter that cost me $2, and this pattern Kwik Sew 3395 (which I changed slightly) to make myself a slip.


I had some help from Zeek. I decided to cut the front and back panels on the bias, so my husband took Zeek outside and distracted him so I could cut out on the floor.


I used the pieces for view B of this pattern, but I cut the back bodice piece and skirt piece as one on the bias, and the front midriff and skirt piece as one on the bias, adding approx 12 inches in length. As I didn't have my loop turned with me for the straps, I pulled the top and bottom threads of my machine to a length longer than the straps, and place them within the inside of the folded strap, so that when I had sewed up the edge, I could just pull it through with the thread tail. 


The straps are then sewn inside the cup pieces, which are then turned right side out. I gathered each edge of the outer and lining of each cup separately, so that I could encase the raw edges inside when I attached the front skirt piece. I machine sewed the outer side, then hand sewed the lining down. The back piece was then hemmed at the top edge and french seamed to the front piece at each side. 

I pinned the straps in place at the back where I thought they should sit and tried the slip on. I then shortened the straps by about another inch, then sewed them in place, All that was left to do then was to even up the hemline, turn it up twice, press and stitch in place.

I took these photos today, so excuse the wrinkles from being chucked in a basket, I did press it while sewing it, I swear!


Anyway, I love how it turned out, the only issue is it gapes a little bit at the sides, under the arms, so if I make another, I will make it a little smaller there. Plus there are enough scraps left over that I will probably be able to make a pair of matching panties and bra as well

I can't wait to try it out under a few dresses soon. Has anyone else been sewing slips lately?

Dixie

Tuesday, 15 March 2016

Regency Underwear

Absolutely last minute (as in 3 days before the picnic) I decided I really couldn't wear my regency dress with the proper under garments, particularly a pair of stays to push my bust up to the proper heights for such a dress. I did a quick bit of research (probably not as much as I should have done) and quickly drafted a simple pattern consisting of a front piece, a back piece and bust gussets. After I had already started on them, I came across this tutorial for drafting your own Regency short stays pattern, and it is pretty close to what I have done. I also found this post helpful with the fit.

I cut these pieces from some smallish bits of calico, and quickly basted them together with a long machine stitch. I immediately realised I had some issues with how my straps were sitting in the front. If I had more time, I would redraft the front and fix this, but for this project, I figured I would just fix it up with a quick and dirty dart on each side and be done with it. I then used a regular stitch length and re-sewed the seems I had basted together.

Quick and Dirty Dart to fix the armhole gape

I wasn't sure I had added enough width with my bust gussets, as it was difficult to fit to myself, considering the stays are only supposed to come up to mid bust and allow a certain amount of "spillage" at the top, which is generally contained within the chemise. I won't provide a photo, but I'm sure you can imagine how awkward that is to try and check the fit on when things are only half made. But I continued on with what I had anyway. The bust gussets are sewn into 3 inch deep slits in the front bodice piece. I had 2 on each side, which seems to be pretty common, although I also came across ones with only one in my research, and I am sure there are some with more than 2 for rather busty ladies. After the gussets are sewn in my machine, I top stitched around them by hand.

Bust Gussets

I considered lining my stays, but as I was really pressed for time, I decided to be naughty and just stick with my one layer of calico. I figure I will probably make a better set of stays at a later date anyway, so this one really only has to survive one day. Once I'd made that decision, I cut some boning to size for my front edges, folded the excess fabric over them, encasing the boning with some extra room and pinned in place. I then marked points every inch or so along and used a small pair of scissor to puncture a hole through all the layers (next to the boning, not through it) then I used my needle and thread to bind around the edges of the hole, creating a hand worked grommet for my lacing.

Hand worked grommets

When I was only a few grommets in, I think I nicked myself with my scissors when puncturing the fabric and didn't notice, until I turned my work over and found this:

Argh!

Oh well, at least it was on the inside of the stays, and not the outside.

After all the grommets were finished, I just used some simple white ribbon from my stash to try it on to get a better idea on the fit. I have just tried it on over a modern bra and work shirt, and I haven't laced it quite tightly enough, but I think you get the idea.


After taking this, I realised that this really did need some more boning at the sides, but as this is just a rush job, it's going to have to do.

 I hand sewed binding along the neckline and armholes to finish the edges. I considered using the same blue binding that I used on the dress, but decided to go with white instead, so I wouldn't risk the colour being visible through the dress. The hem was just turned up twice in a narrow hand stitched hem.

When I was about half way through making my stays, I realised I was definitely going to need a chemise to help hold my bust in. As my dress was only short sleeve, I opted to make a really, really simple sleeveless chemise from an old off white sheet. I have no idea if sleeveless chemises are period correct or not, but it seemed the best option for my dress and time constraints. I simply pinned a rough pattern shape on my folded fabric, with a wide neckline and flaring out slightly towards the hemline, and cut it out. I did this just by eye, so I have no measurements to share with you.


The shoulder  and side seams were then machine sewn, I chose to use a french seam to enclose the raw edges, as they will be directly against my skin and I don't want them to fray. More bias binding was then used bind the armholes and also to create a drawstring casing along the neckline. I used a tip from this post from Tea in a Teacup about sewing a regency chemise, and made 2 hand worked eyelets in the casing at the centre front and back, with the draw string secured at the shoulders so that the front and back can be gathered independently. I used more of the same white ribbon that I used on the stays for the drawstrings.

I had intended to hand sew the hem, but as I had very limited time, I may or may not have left the chemise unhemmed at this point......

I actually only wore the chemise for the drive down to Sydney, while I finished hand sewing the hem on the stays as my husband drove. I found the chemise and the stays were very effective at giving me the correct shape and support for the period, but I will definitely use more boning in my next set, as I did find the sides riding up a little bit when I was sitting, and occasionally the bottom of the boning in the front would start curling up because of that. By the end of the day, I was finding I was holding myself in a better posture that stopped it riding up, but I still will put more effort into the next set.

I unfortunately didn't get a nice full length shot of my chemise and stays being worn on the day, but I do have a few progress selfies.


Before the bias binding and drawstring
(wearing a modern bra underneath)

After the addition of the drawstring

Still wearing a bra underneath


While they may have been a rush job, I was really happy with the result. I will try to get the chemise hemmed, and bribe my husband to take some better photos.

Dixie

Monday, 8 February 2016

New Jammies! Burda 7109

On my last trip to Spotlight I spotted this adorable pattern in the Burda Catalogue and decided I needed to have it. I still have quite a lot of fabric left from when I bought the drapey black polyester stuff with a print of white cats and hearts for my Valentines day dress last year, and I planned to use some of it to make some cute little pyjamas, but I hadn't got around to doing it, until now.


Luckily, the pattern goes all the way up to a size 24! So I didn't need to grade out the bloomers for my big derrière! Checking the size chart (which unfortunately is not on the envelope, but on the pattern paper) my hip measurement was spot on for the 24, and I chose not to size down like I usually would, as I figured it would be good to have a bit of ease in the shorts. I cut out and sewed up the shorts first and wore them to bed with a singlet top and found them to very comfy. Unlike store bought pyjama shorts, these ones didn't leave my butt cheeks hanging out, and the waistband didn't keep trying to ride up to my naturally high waistline, or twisting around when I rolled over in bed. I really think I need to make a few more!

Finished Bloomers

Gratuitous Crotch Shot

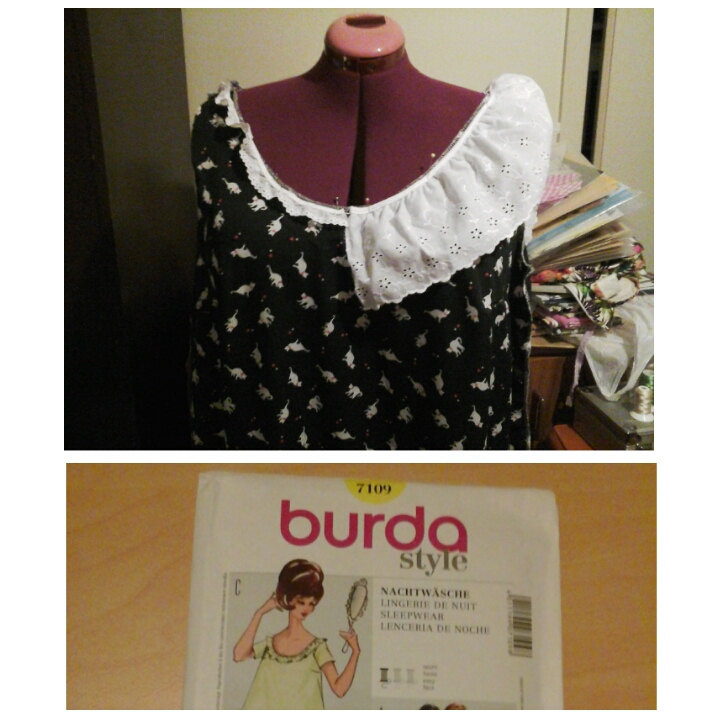
For the top I chose to sew up a size 18 in the sleeveless, top length version with a white lace ruffle on the neckline. It took me a few days to get around to cutting out and sewing the top, as I was not feeling very well, but I got there in the end. When it came to choosing the lace for the neckline, I found 2 suitable options in my lace box, and pinned them both on and asked on facebook for opinions. While a majority of people seemed to like the wider option, a few thought it would be impractical, and even clownish. I really liked the over the top look of the wider lace, but I did end up trimming approx 1 inch from the gathered edge, then I gathered and attached it to the neckline, sewing bias on over the top. I figured cutting off the original binding from the lace would reduce bulk in the long run.


Fabric Close up

Top laid out

Dart and armhole binding detail shot

Neckline detail shot

I doubt you'll be getting any modelled shots of these, so here are a couple of selfies, one at night before going to bed and the other one when I woke up in the morning.

Just before bed

First thing in the morning
All in all I am super pleased with how these pyjamas turned out. They are very comfy to wear and sleep in, and cute to boot!

While out running errands today, I scored a whole heap of assorted lace for only $5 from one of my local op shops, so I'm well and truly stocked up for any more pyjamas or nighties I might make!


Anyone else been doing some practical sewing lately? Or found any good op shop finds?

Dixie