Showing posts with label Vintage Sewing Pattern Pledge. Show all posts

Monday, 14 November 2016

40's style Swing trousers and another Kitty blouse

A few weeks ago, I found myself in need of more office appropriate clothing for a job interview. So I decided to make myself a quick pair of very wide leg, 40's style trousers. I used my graded up version of Vintage McCalls 9708, which I had previously used back in May, but which was now unfortunately too small for me, and a length of Navy Suiting fabric that I purchased from a fellow seamstress on Facebook.. I added an enormous extra 2 inches at the side of each pattern piece, flared the width of the legs as they went down, moved the center back edge upwards to allow more booty room, and increased the size of the darts. I cut the waistband to the size I needed, then gathered the top edge of the pants to ease in the extra fullness, I then used a side zip, and a button and loop on the waistband.

On my way to the job interview...... I didn't get the job

This were a very quick sew, and I had them done from initial thought, to finishing press, all in one evening. I love how they have turned out, and they are nice and loose fitting, so should still fit if I put on any more weight. I've already worn them several times to work and church. They look great with either of my pussy bow style blouses that I made from Butterick 5859, which is my favourite blouse pattern, I even went and made a 3rd version from the blue colour way of the Gertie polyester Kitty Print!

Front view

See how wide the legs are!

Back view


I have even had someone ask me at the shops, 2 days after they had seen me wearing them (people must notice me more than I realise) where I had got them from.
I still have some of this Navy Blue fabric left, so I think I might make a little cropped jacket to go with the pants, although, I don't think it will get much use until the weather cools down again next year (I really dislike summer...)

It is a little bit of a stretch, given how much I have altered the pattern, but I'm counting this towards my Vintage Pattern Pledge for 2016! Which puts me up to 7 of my 10 pledged makes. I have a few more on the go in my sewing room at the moment, so I might just make it!

Dixie

Wednesday, 21 September 2016

Floral Green Gingham dress

For my latest Vintage Pattern Pledge, I decided to make this lovely sundress pattern from the October 1957 issue of Australian Home Journal.


I didn't take any progress shots while making it, but it was a very simple and straight forward design. If anything, I may have rushed the grading up, so it is a little less than perfect and a bit snug, but its still works ok. I used 3m of Fabric, and managed to squeeze out 4 panels for the skirt, to give it a lovely fullness. I used Pink Bias binding for the armholes, neckline and tie at the back, but I unfortunately didn't have enough to trim the hem in it as well.


Naturally I added pockets in the side seams.


And for a pop of colour, I made them in a Pink Gingham!


My back neckline ended up being a bit more square-ish than I would have liked, but it is still quite nice


The skirt catches in the wind very easily


So I am now up to 6 out of 10 completed Vintage Pattern makes for 2016!!!!!  I just may reach my goal after all!!!

How is everyone else going with the Vintage Pattern Pledge?

Dixie

Wednesday, 24 August 2016

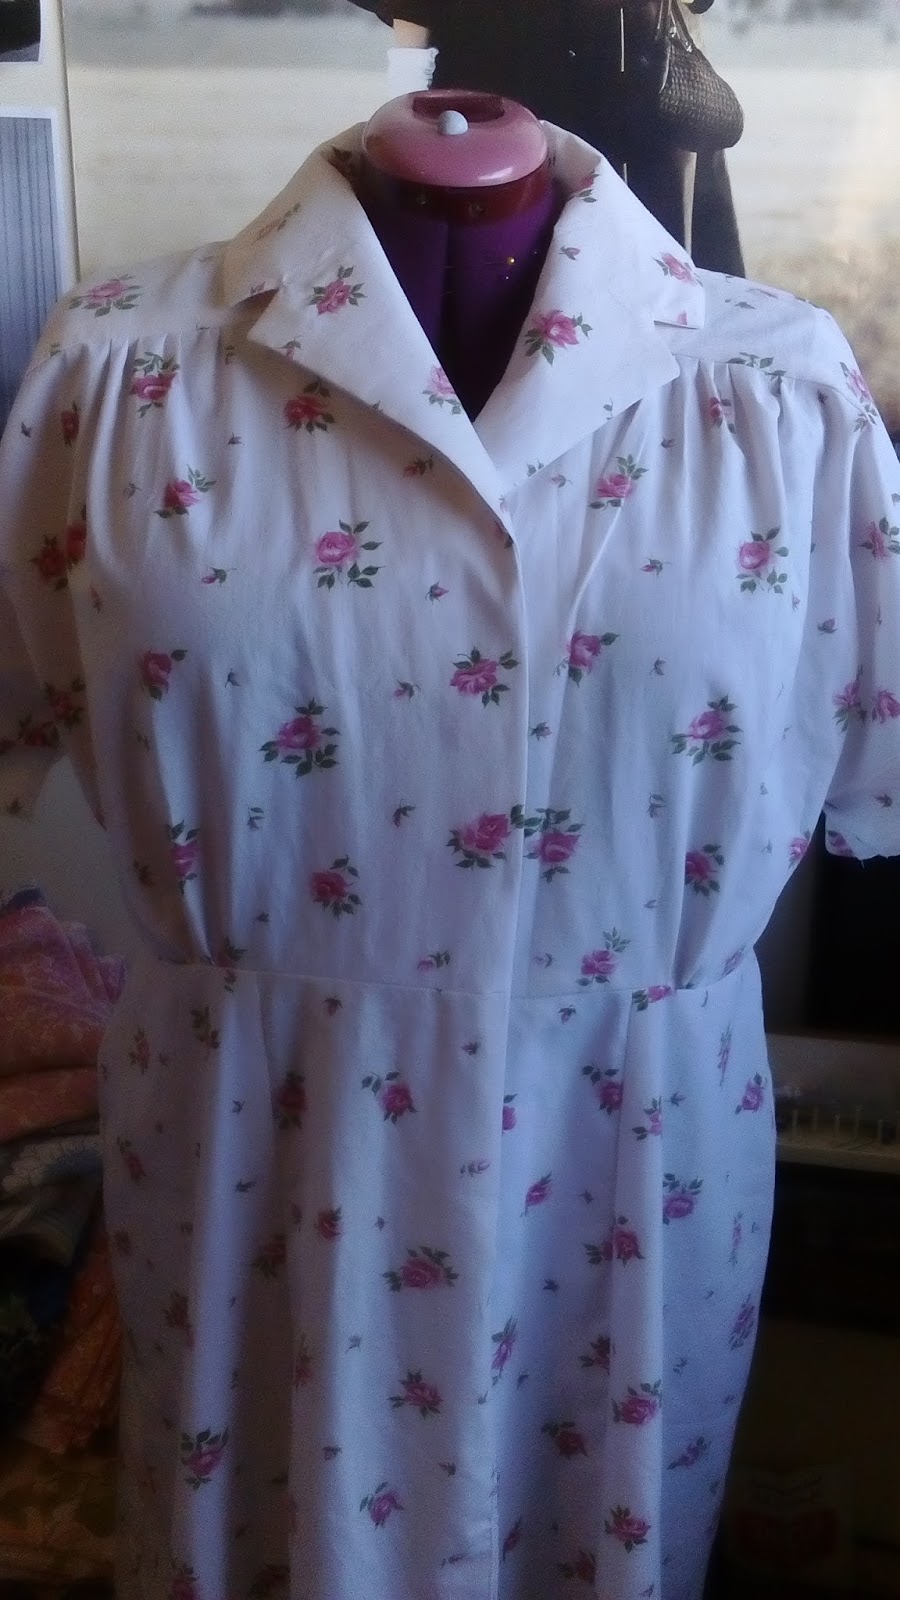
Vintage McCalls 6236 in Floral

Earlier this year I managed to purchase a couple of vintage patterns that were pretty close to my size, which is pretty rare, especially within my budget. One of those was a lovely little 1962 shirtwaister style dress with some gathering details on the bodice, and a gored or slim skirt, in a 41 inch bust.

Vintage McCalls 6236

During one of my local CWA groups handicraft meetings, I decided to take this pattern, a floral sheet from an op shop, as well as some pins and scissors along with me to work on during the meeting. I got it all cut out, adding a little extra room at the side seams as I went, by the end of the meeting, and began construction of it when I got home. I changed the design slightly to be an actual shirtwaister, with the buttons going down a little way past the waist, rather than having a button front bodice with a side zip as well. I sewed together the bodice and skirt pieces, leaving only the facings, collar, hem and buttons/buttonholes left to do, and hung it up in my sewing room while I did more work on my Vintage Suit for the Sew-Along.

Floral Sheet

Once I finished my suit, and another slip, I turned my efforts back to my dress. I put it on over my clothes to check the fit, and realised I had forgotten to shorten the bodice, and so it was much too long. So I simply sewed the waistline seam again, about 1.5 inches in, then chopped off the excess with the overlocker.

Just needing the buttons and hem!

Next up I sewed in the armhole facings, then ironed interfacing on to the collar pieces and sewed them on. Then all I had left to do were the buttons and buttonholes, front seam and the hem, which I finished up within an hour or so of leaving the house. I used some pale pink buttons from my stash that aren't quite a perfect fit, but are close enough for me.

Pink Buttons from a cheap mixed
button jar

I've already worn this dress out 3 times in 4 days, as it is lovely and comfortable. I think I need more vintage styles like this one that are slightly less fitted, for those days when I feel a little bleh.

Selfie with my new Erstwilder brooch

I haven't managed to get any nice full length shots wearing this dress yet, but here are a couple unflattering ones of me wearing it while sitting and learning to spin wool (which I will be posting about soon) I've also since found a nice pink belt on my wardrobe that works well with this dress


Has anyone else made McCall's 6236? How did you like it? Or made any dresses from pretty vintage sheets?

Dixie

P.S. I am now up to 5 out of my 10 pledged makes for this years Vintage Pattern Pledge, I might just make it!

Tuesday, 9 August 2016

A Blue Princess Seam Slip

After making my last slip, I wore it nearly everyday, so I thought I should probably make myself another. Rather that use the same pattern again, I decided to use one that would count towards my Vintage Pattern pledge. I know I had a vintage slip pattern that I was in the process of grading up, but of course I could not find it anywhere. So I settled for this pattern.


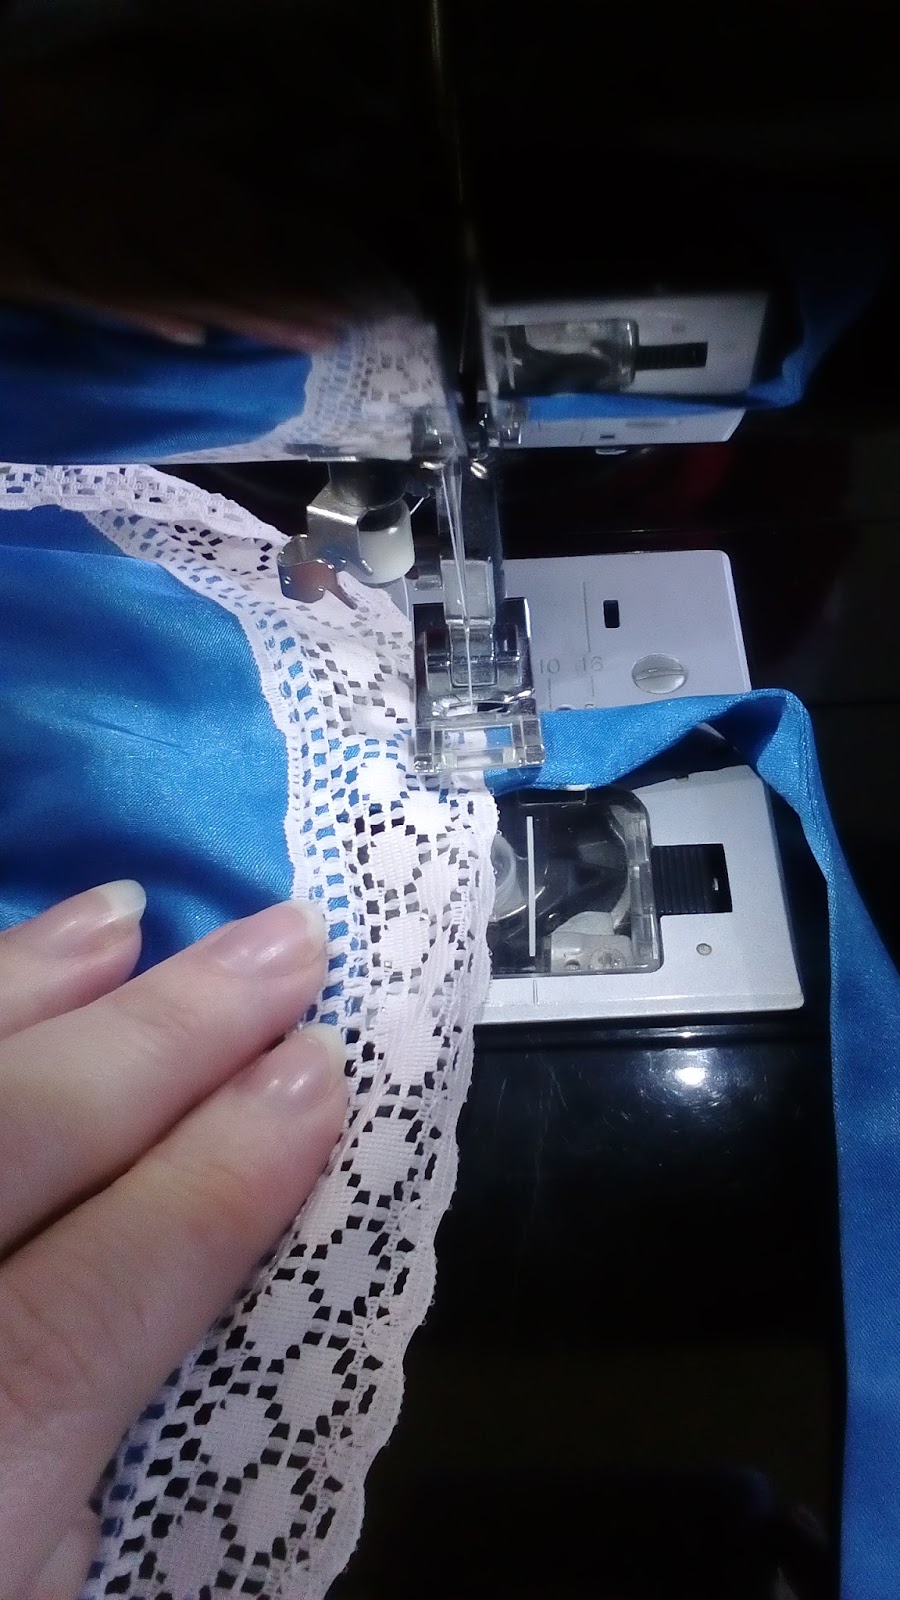
While not my usual decade for vintage patterns, this one is from 1989, so it is still technically vintage. Besides, when a pattern is made up with the right materials, you can make it look like a completely different decade than when it was designed for. I chose to use a lovely royal blue satin printed with stylised pink roses, that I purchased from Spotlight, from the remnants bin, I think. I only had about 1.5m of it, so I had to shorten the slip a few inches, especially to cut out all the pieces on the bias, which I was fine with, as I found my last one does try and peek out from the hemlines of my dresses and skirts when I wear it underneath. To complement the satin, I searched through my stash for some lace and settled on this lovely soft pink design.


I began sewing by sewing the wrong sides together, as the basis for the French seams. I made the straps, using the same technique as my last slip, then pinned them on to check the fit. It was a bit roomier than I wanted, so I took it in an inch on either side seam. Once I was happy with the fit, I trimmed the seams, then turned the seams around and sewed them right sides together, then pressed all the seams flat. I once again pinned the straps on and checked the fit, which I was pretty happy with.


While overlocked seams would have been less bulky, I love the finish of French seams on lingerie. The next step of construction was to attach the lace along the neckline and hemline. The pattern instructions say to stitch the lace on, easing around curves and pinching extra out of the corner, then turning the raw edge down on the inside. So I decided to follow the instructions, overlocking the raw edges before adding the lace. The hemline was finished in the same way.


Unfortunately, while pressing the edges inside the slip, I accidentally melted a small part on the hemline. It's not too noticeable, but I'm still bummed I did it.


After trying it on, I realised the lace was falling down a bit along the neckline, so I stitched it in place on the straps, and that seems to be keeping it up.


While I am happy with how this slip has turned out, I think I prefer the design of the other pattern with the separate cup pieces, although I am sure I will get wear out of this one, as it will be less noticeable underneath my clothes because it is quite a bit shorter. It also looks great with my new Pale Blue Suit!


Anyone else as obsessed with making and wearing slips as I am?

Dixie

PS. This is my 4th Vintage Pattern Pledge make for 2016, so I am still a bit behind on my goal of 10

Monday, 8 August 2016

Finished Vintage Suit!

So I bit the bullet and purchased more of the panama stretch suiting fabric from spotlight online, as I could not find it at any store that I visited, so that I could sew the matching skirt and finish my suit. I used my $5 scratchie voucher from my spotlight mail, so that almost made up for having to pay shipping.

Just to remind you, this is the pattern I used for the jacket:


To finish off my suit jacket I cut out and sewed the lining, then sewed it into the jacket, hand sewing a few sections, then sewing on the buttons and giving it all a final pressing.


For the skirt, I used the skirt pieces from Butterick B6094, with some added room at the hips, an extra 2 darts at the back (making 4 in total at the back) and a small kick pleat at the back hem.


While I do not have many shades of blue in my Zip stash, I did have a few pale blue ones. I settles on the vintage one still in it's original packaging. It was a bit stiff from disuse at first, but loosened up a bit after being unzipped and re-zipped a few times


Here is a selfie I took when checking the fit before pressing or adding the waistband or hem to the skirt. You can't tell, but I'm wearing it over my pajamas.


I also used matching self covered buttons and rouleau loops on the waistband for a neat finish. They aren't perfectly aligned, but I'm not unpicking now!


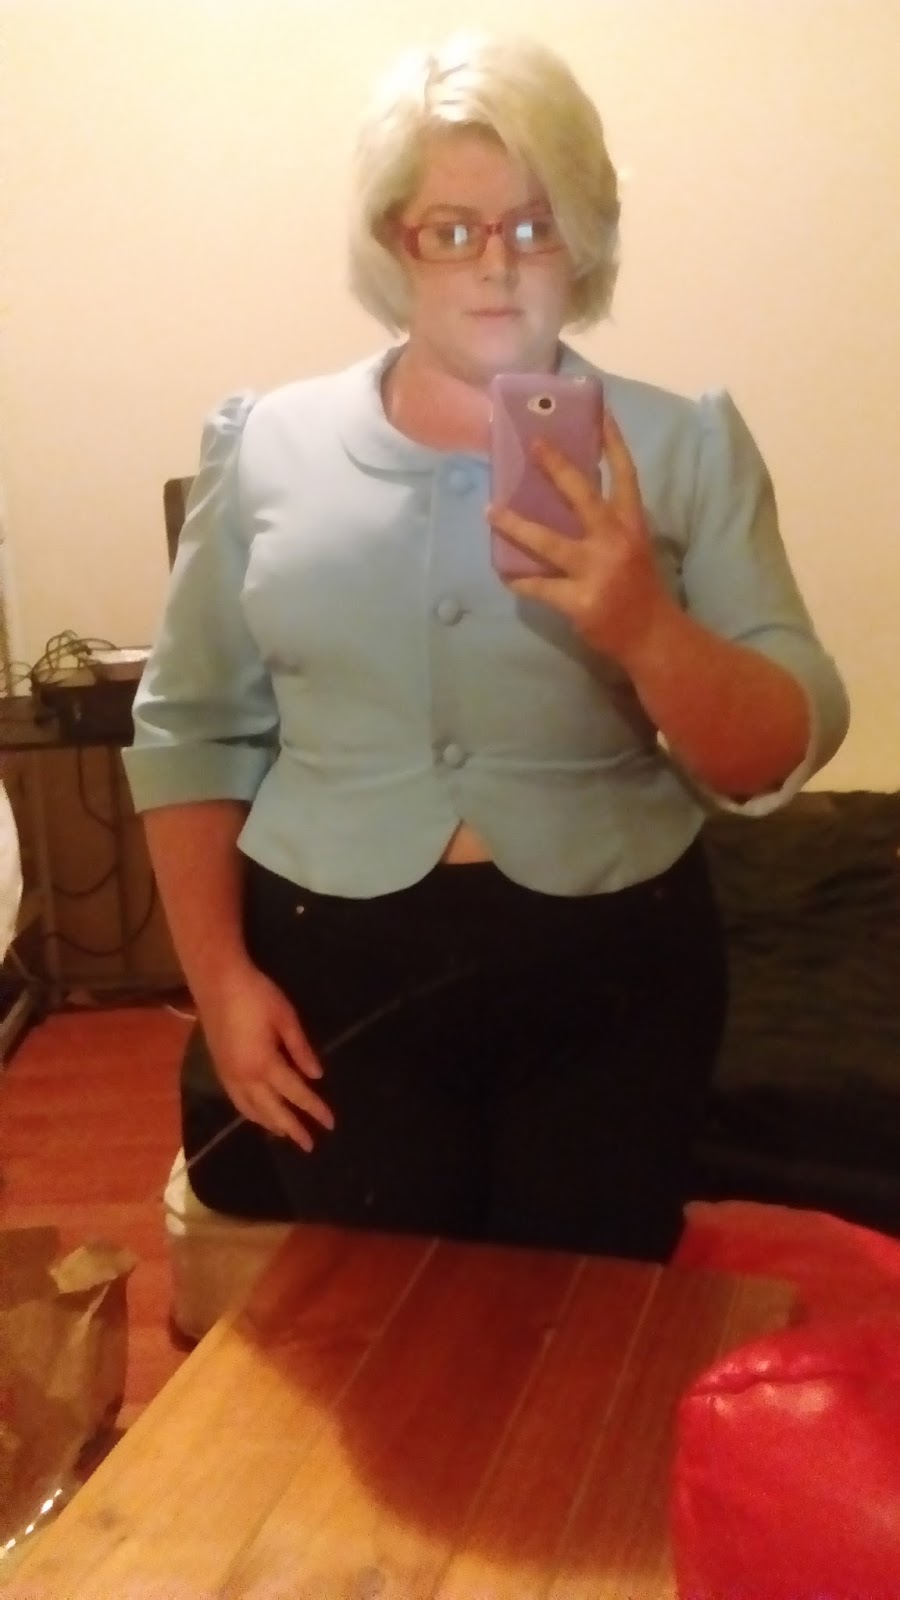
So here is the completed suit! I think we were supposed to finish the Vintage Suit Sew-along by July 30, but a bunch of us were running late, so I'm not doing too badly. I finally got myself a bluetooth remote thingy to take photos that aren't mirror selfies, yay! The lighting was less than perfect, but I still think it's an improvement, and I don't have to ask my hubby to take photos.


I am way way way behind on my goal of 10 Vintage Pattern makes for my pledge this year. This Suit only brings me up to 3! Although the slip I am wearing under my suit that you see in the last 2 photos is my next Vintage Pattern Pledge make, I just haven't blogged it yet. So I will really have to get sewing if I want any chance of making it to my goal.

Dixie
Friday, 22 July 2016

Vintage Suit Sew-Along Progress

Well I started very very late, but I have started! You may remember my inspiration was this lovely light blue suit, worn by the Fabulous Marilyn Monroe in the movie Niagara.


One of the many reasons I had not yet started, was because I have been unable to locate more of the fabric I need. I searched both my local Spotlight's months ago, and was only able to find 1 suiting fabric in a light blue, but unfortunately there was only 1.1m of it left. I have since Looked for the same fabric at any Spotlight store I find myself near, but no such luck, it seems to be a discontinued colour. So I decided to just begin work on the jacket, and if I found more of it at a later date, I could make the matching skirt.

So if anyone is at Spotlight and finds Light Blue Stretch Suiting, please, please let me know!

So anyway, I began by pinning my pattern to my fabric to see if I would actually have enough fabric. I had just enough, I will only have to use my lining fabric for one side of my sleeve cuffs, which I can live with.


After I cut out all my pieces, I used the scraps to cut out squares for bound buttonholes, as well as circles to cover some self-cover buttons. The buttons I found in my stash are a bit different that the ones I usually use that use grooves in the button shank to lock in the back, these ones are just a really really tight fit, so it took a bit of force to get them all done


I began construction by stitching the darts in the front and back bodice pieces, then by marking and sewing the bound buttonholes in the right front side, using the tutorial from Sew Retro Rose. Once the buttonholes were mostly done (just the 2 layers the hand sew together later) I then sewed the shoulder seams together, pinned the side seams and tried it on (then put it on my mannequin) I was pretty happy with the fit so far.


I then stitched the elbow darts in the sleeves and set them in. My pattern has turned out having more fullness at the head of the sleeve than my inspiration, and I initially liked how they turned out, and was going to keep them, but now it's bugging me, so I will probably be unpicking them, trimming the sleeve heads and re-setting them a bit later.


I then turned my efforts to constructing the cuffs and collar. I began by applying interfacing to one side of each, then sewing each of them right sides together along the outside edge. The curves were then clipped and the cuffs and collar turned right side out and pressed. Then I pinned them on the mannequin to see how things were looking. I probably would have been better off with a small shawl collar to get the same look as the Niagara suit, but I think this one will still look pretty cute.


So now I am just working on the facings, and still have to cut out and construct the lining. And of course source fabric for, and make the skirt.

How is everyone else suits coming along?

Dixie