Showing posts with label Nerdy. Show all posts

Thursday, 8 June 2017

A 14th century cotehardie

A few weeks ago, a friend of mine asked if I would sew him a fitted cotehardie. Well actually he asks me to sew plenty of things for him, but this one I actually did. He had already bought Reconstructing History's men's cotehardie pattern about a month beforehand, and had the fabric (calico lining and off white herringbone weave cotton for the outer) so on an organised "making day" at his house, while others worked on archery related projects, I measured him up and got to work.

He fell almost spot on in the size chart for the 38 inch chest, but his waist measured for the size above, so I cut the calico lining out based on those sizes, although I needn't have worried about the waist, as we ended up taking the waistline in quite a bit to make the cotehardie well fitted through there. Once I pinned the pieces together and he him try it on, I took in about 1/2 an inch at the waistline at the back and both side seams. I also trimmed almost an inch off the shoulders, as they were sticking quite far off. Based on the measurement of his upper arm, I cut out the next size up for the sleeves, but found they were still a bit too small for him, so cut them out again, another size up, and adding extra width at the fore arm and wrist, and about 2 inches extra length.

Once I was happy with the fit of the lining, I then cut out the outer pieces, and only just had enough fabric, with very little wastage. The construction was very simple once the fit was sorted out, as we were only making the shorter version (so no gores to deal with) so it was just the shoulder and side seams of the bodice, then sewing around the outside of the lining and outer, then turning right side out, pressing, sewing the sleeves together, then to the bodice. Then all that was left to do was the hand worked eyelets and to hand sew the turning hole closed.


I got about half the eyelets done by the time I called it a night (I had been working on it at home that evening) but then finished them up in the car ride to Blacktown Medieval fayre the next day, and my friend then wore it while we were there, and we were both super happy with the look and fit of it. 


While overall the pattern was quite good, and included a couple of pages of research into the cotehardie at the beginning of the pattern, and I did like that it didn't have massive amounts of ease (except maybe in the waist) like some patterns, there were a couple of things that could have been better. On each pattern piece, the size is only marked on the line in one place, and all the lines are the same plain black line (no differing colours, weights or dashes/dots) which made it difficult for my friend to follow which line he was supposed to cut (yes, I'm mean and made him cut out the paper pattern) However, I did like how they explained how to fit the pattern, and think most of the instructions are quite good for beginners.


Dixie

Thursday, 20 April 2017

Rowany Festival

Sorry for the lack of updates lately, I have been a very busy little bee!

This Easter Weekend just past, I attended Rowany Festival, which is the biggest SCA (Medieval re-enactment) event in Australia. There were around 1000-ish attendees, all dressed in medieval garb, some even with period accurate camp set ups. I unfortunately didn't take any photos, as I didn't want to lose or damage my camera, and turned my phone off for most of the event to conserve power. So here are a few photos from other members of my camp.

The Barony of Mordenvale's campsite
Photo by Alexous Ofuri

Watching court, you can see my big bum in the blue plaid,
with 2 other people from my camp
Photo by Nicole Flood


2 of the guys demonstrating some swordplay
Photo by Nicole Flood


Me and Nicole
Photo by Quinn Ortega-Edwards


One of the Artisans building a forge

One of the teams during morning war
Photo by Nicole Flood

I managed to quickly make a houppelande from a doona cover set I picked up second hand for $12 a few days before the event. Most of the cutting out of the pieces I did during some spare time at uni, and a majority of the construction happened during meeting time for the uni SCA group, with only the hem being done at home, and the neckline and belt hooks and eyes being hand stitched on the bus ride to festival.

On the line drying after being washed. There is also a belt in
the same gold flocked brocade.

Bell sleeves and a very full skirt

 With this additional dress, I had 3 complete outfits to wear, which only meant I would have to re-wear 2 of them. My first outfit of course was the one I made for Winterfest last year, the second was one I made for the SCA newcomers event earlier this year and haven't blogged about. It consists of a white chemise, this time made from essentially an over sized T-tunic with a gathered neckline, a bodice/pair of stays made from calico and a brown wool petticoat.

Also on the line drying, and in desperate need of a press.

This does lace fully closed, and the next one I'm working on I
am working on is a bit smaller and shorter in the back

I had a few other items I had started making for festival, but either didn't get finished in time, or I lost interest in them as they weren't turning out as I had hoped. I may or may not get them finished in the future, we'll see I guess.

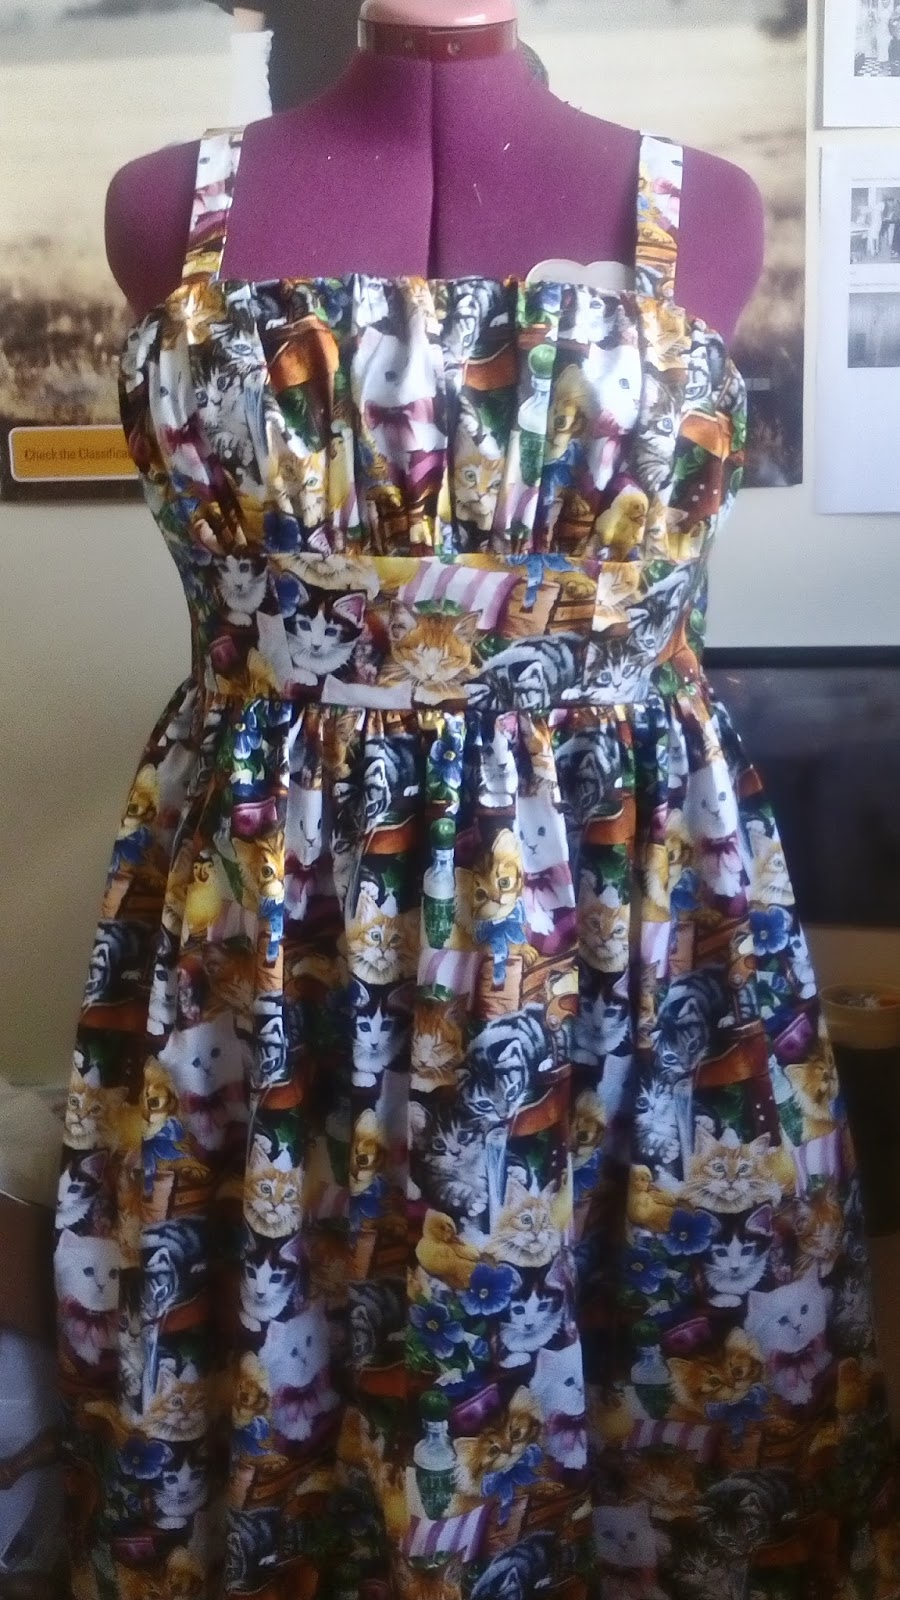
Other than preparation for festival and the festival itself, I haven't been up to much else apart from University study. I have been trying to limit myself to not sewing anything if I have assessments that need to be done, otherwise I would never get them finished on time. I have started on another Butterick 6167 (yes, another!) in an adorable Cat print quilting cotton from Spotlight. After being away from my sewing machines so many days, I really needed a nice quick sew to feel some accomplishment. It's almost finished, with just the zip and hem to go.


I am already dreaming up plans for garb and camp set up for festival next year, so hopefully I get myself organised during the year and don't leave it til last minute (like I usually do)

Dixie

Thursday, 7 July 2016

A quick cloak and coif, and photos of WInterfest

After finishing off my Kirtle and Chemise to wear to Winterfest, I knew I was going to need something to wear over the top, as it was in the middle of winter. So I decided to make myself a cloak, with a faux fur lined hem and hood. I chose this light green/brown fabric from my stash, which I am fairly certain is wool or a wool blend, and some grey white faux fur.

I initially wanted to make the cloak a full circle, and I thought I had enough fabric to do so, but after I cut the first semi-circle, I realised I did not actually have quite enough.

Bummer.

However, I grabbed the piece I had cut, draped it over my shoulders, and realised I could get away with the half circle instead. Which also meant there would be half the hem to attach the fur to. Win win I think. So I then used the leftover corner section from cutting out the semi-circle, and roughly pinned out a hood shape. I checked the measurements against myself, making sure it would be nice and oversized, then cut it out. I also cut 2 strips approx 2" x 14" for ties at the front of the neck. All in all, I used just over 3m of fabric, So I still have about 2.5m left for other projects.

Cutting Diagram:


I began construction by machine sewing the 2 sides of my hood together along the back seam. Once I had sewn it, I then hand sewed each seam allowance down, pressing the seam open and folding under the raw edges. This gives a neat finish, concealing the raw edges, and is also somewhat period correct. I then eased the bottom edge of the hood to the neckline of the cloak body. To neaten this seam, I trimmed the excess allowance from the curved neckline edge, then pressed both seam allowances downwards, folding the seam allowance from the hood section under, concealing both of the raw edges. The front edges of the hood and cloak do not need to be hemmed, as I have utilised the neat selvedge edge of the fabric, which will not fray.

I then used a ladder stitch to fold in the edges of the strips to create the ties.


Then came the messy part

Sewing with Faux Fur!

I began by measuring how long the hemline on the cloak was.

I then cut four 5 inch strips of fur, joining them together at the short ends, ensuring the pile of the fur was all going in the same direction.


Which I then pinned, right sides together, along the hemline. Once it was all pinned, I machine sewed along that edge, then turned the fur to the inside and handstitched up the other edge, trimming the excess from the ends and turning them in to conceal all raw edges.


Then of course I had to try the whole outfit on and see how it looked! These were taken at night, so the lighting isn't great. Also, excuse my blue shoes!


I still haven't added the fur trim to the hood, but I do have just enough left from the hem to do it, so I will probably add it on a bit later. In the end, I am glad I only made this a half circle cloak, as I would have had to cut my fur strips half as wide, which I don't think would have looked as good. Also, it would have made the cloak a fair bit heavier too, and it is already pretty heavy.

As I only have shoulder length hair, I thought it would be difficult to style my hair into a medieval hairstyle, so I thought it would be easier to just shove my hair up into a coif.  I used some calico scraps and this tutorial, which I found through pinterest. The process was very simple, and very similar to my regency bonnet, just without the brim and the bias ties. I used a rectangle 14" by 25" (folded in half lengthways, with a slight curve cut out of the long edges) and a oval-ish circle with a circumference of about 40" and hand stitched the whole thing together during my lunch hour at work, as well as some time that evening while watching a movie with my mother


The ovalish crown is gathered and sewn to the rectangular piece. I sewed one side of the brim to the crown at a time, so that I could encase all the raw edges inside the brim. A good press, then it was ready to go! I divided my hair into 4 sections, which I then plaited and pinned across each other with Bobby pins. This held my hair fairly neatly and flat all day under the coif.

Here is a photo from Winterfest with the brim folded back (and a unicorn)


And another selfie, but this time with the brim unfolded, to keep the sun out of my eyes.


Of course my friends, my husband and I all had lots of fun at Winterfest. They Birds of Prey display was much bigger this year than the last time I attended (way back in 2009) This little guy pictured is Brian, and it was his first show.


Here is Lauren getting to hold Zorro, who is the same bird I had a photo with back in 2009.


Steve having a go at Archery.


Watching the Jousting


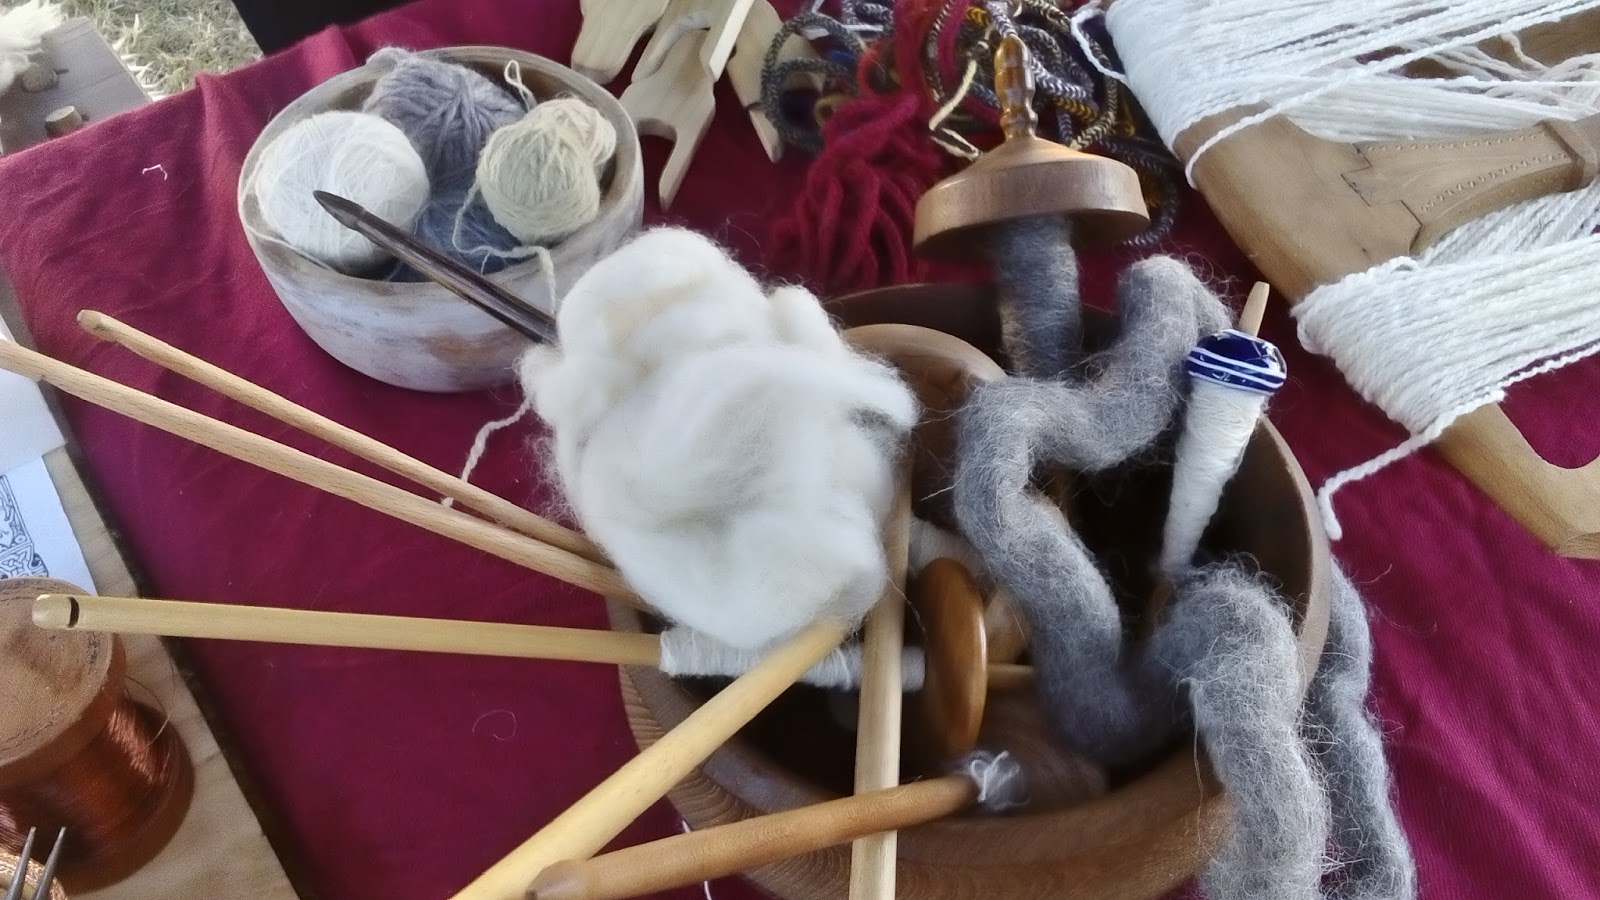
I also got to have a go at a few medieval/viking handicrafts, with a re-enactment group from the Blue Mountains. Including Viking wire weaving, loom weaving, drop spinning, fork knitting and more!


Photo by Cliff Dorian

Photo by Cliff Dorian


Lauren and I both managed to win free passes for next year's Winterfest in the Costume Competition, so we will have to make even more impressive outfits for next year's event!

Dixie

Tuesday, 28 June 2016

Firmoo Eye wear Review

Just a quick post today, reviewing a new pair of glasses from Firmoo

A little while ago, I was lucky enough to win a free pair of glasses through Maria from How Good is that? However I decided my husband was in more need of new glasses than I was, so I entered his prescription instead of my own and let him choose a pair he liked.

This is the style he chose for himself.

The website is quite easy to read, and it categorises the glasses into lots of different categories, so you can narrow your search by only looking at a particular style, gender, colour, width, etc. My husband has quite a large head, so we decided to go for a wide pair of glasses, and they fit him quite well. If you are unsure the size you need, they have a handy chart, where you just need to measure an existing pair of your own glasses and compare.

The delivery was reasonably quick. The longest part of it's journey ended up just being the short distance from the Newcastle Depot to me. TOLL seemed to have difficulty in finding my work address (even though we regularly have stuff delivered through TOLL, and we are located in the centre of town) and they didn't try contacting me to say they hadn't been able to find me (I found out by checking the tracking) but after a sternly worded phone call from me and a few more days, it finally found it's way.

I am now looking forward to ordering myself a pair or 2, as I would love to have a pair of vintage style glasses, and a pair of prescription sunglasses would be very helpful to have.

Dixie

Tuesday, 21 June 2016

A quick Historical costume for Winterfest

Some friends and I decided, with only a few weeks to go, that we wanted to attend Sydney's Winterfest and that we wanted to go in costume

I began looking around the internet for suitable patterns and tutorials for a medieval ensemble.

I began my outfit with a chemise, using an old, off-white cotton sheet and this tutorial for an Italian Chemise. I was slightly limited with my fabric, so my sleeves are unfortunately not as delightfully full as in the tutorial, but they will do. I french seamed the entire thing. I'm not sure if that is period correct, but as overlocking the edges would be so very historically innaccurate, I decided french seams would at least have been possible. I also did not have enough fabric for the binding along the neck edge, so I just used some pre-made bias binding, which I think is close enough to the fabric I used to not stand out.

While simultaneously working on my chemise, I also began working on a kirtle. As I was just working from my stash, I chose a plain brown heavy cotton type fabric (that I think I got from my mother-in-law) as I had just enough to cut out all the panels I needed. I decided to go for an open front kirtle, which while it wasn't a very common design, it did exist, as researched in this blog post that I found. I wanted princess seams, so I used the bodice pieces from this Burda pattern for a Dirndl, taking away the overlap for the buttons, shortening the bodice pieces and extending the pattern down into a full skirt.


Once I had all the side seams sewn up, I tried it on over my regency chemise for a look. While it was awkward to hold for this photo, the waist fits well, and the bust section will do up for a nice fit once the lacing is added.


When I knew the bodice fit well, I went and cut it out again from some calico to line the bodice with.


With the half made chemise underneath.


I hand sewed a boning channel either side of the front opening, then began hand sewing my lacing eyelets. I found some tutorials through pinterest, to sew these with a sort of reverse blanket stitch, so these ones look much more polished than the ones on my regency stays


I also hand hemmed the front 2 edges. My thread colour matches so well, that it is invisible from the right side.


As I like to finish my historical costumes fairly accurately, I have hand stitched all of my seam allowances down to stop any fraying, instead of using my trusty overlocker. To do this I used a blanket stitch, catching the outer fabric to keep the seam laying flat.

Here is how the outfit looked, laced up with some cotton tape from my stash (I will try to find something more suitable later) I decided to go for a more period correct lacing by utilising spiral lacing.


Ideally I would like to also sew up a heavy petticoat skirt to wear over the chemise but under the kirtle, and also a nice cloak to wear over the top of everything if it is cold, but I guess I will have to wait and see if I can find the time!

Anyone else coming to Winterfest or working on any costumes lately?

Dixie

Wednesday, 12 August 2015

Completed Cosplay, May the Forks be with you!

We went to see the final showing of Stirworz on Saturday night, but unfortunately weren't allowed to take any photos. Luckily a few were posted to the Facebook page for me to steal and show you here.

So here it is, the whole costume together on stage!

Talking with the Padewans (and androids)
I think we can all agree, that even if you haven't seen the animated series "Star Wars the Clone Wars" you would still look at that costume and think she was a Star Wars Character. I loved how the wig/headdress looked on stage. From a distance you couldn't really tell it was fabric, and much to the delight of my friend, you couldn't see where she smudged the paint.

Wiping Ventress's memory
Unfortunately, we didn't know she would have to wear that cheap brown robe over her costume, if we did we could have left out a lot of details that didn't get seen. Also I probably would've made her a better quality robe, as these ones were quite sheer when the stage lights were on them, and still had the crease marks from being in the packet (even after 5 performances and many dress rehearsals) oh well. At least she will have a nicely detailed costume if she ever wants to dress up as Ahsoka again.

I think this was right before a big fight scene...
As you can see, the sets were really effective, as were most of the costumes (that R2D2 was handmade!) The script was reasonably well written, with a lot of jokes that seemed beyond kids that age (due to parodying movies and characters much older than the kids) but were appreciated by the adult members of the audience. Probably a few too many song and dance numbers that had nothing to do with the story line (and made the production run for over 3 hours) and too many extra's on stage during scenes that didn't need them, which just made the stage look messy. But that's nitpicking. It was a huge production to be undertaken by middle school students.

A Snap from Back stage
I think this is easily the craziest thing I have sewn for a while, time for me to go back to concentrating my efforts on Vintage style frocks and skirts I think.

Dixie


Tuesday, 28 July 2015

A Little Cosplay - Part Two!

Again, this post is a little late, Sorry guys.

So when I left off last, we had a tunic and an unpainted wig/headpiece. Then, with less than 2 days to prepare, I find out she needs her costume finished for Cast Photos (seriously, what kind of school production is this?) So I packed up all the bits I thought I may need, took them to work with me, then headed over to my friend's parents house after work, so that we could all work on the other parts of the costume, and have bogface there to measure whenever we needed her. Just to refresh your memories, we are making a costume for this character:


And our list of things to finish looks like this:
#Paint Headpiece
#Make and attach Beaded strands to headpiece
#Make Belt, Pouch, Loincloth and Belt Buckle
#Make Armbands and Gloves/Cuffs
#Make Boot Spats
#Sew Orange felt diamonds to Leggings

I decided to firstly work on the belt and pouch. I had a corner piece of some rusty red/brown matte vinyl, that with some very careful cutting, I was able to get all the pieces needed out of.


It was all hand sewn together, with a snap fastening to keep it closed.


Felt Diamonds for the leggings

Belt Buckle Pieces
For the belt buckle, we didn't have much that we could use to make look like gold-toned metal, so we decided to keep with the medium I like best, FABRIC!! My Friend's mum found some yellow toned vinyl in her fabric stash (which I think she said was actually leftovers from a project her mother had done) so we cut 2 buckle pieces, one of which I hand stitched snap fastenings for the belt to, then we sandwiched a piece of cardboard in between (with some glue) and I stitched up around the edges, attaching the loin cloth piece as I went (which was just 2 pieces of fabric sewn right sides together, then turned right sides out and pressed) The other side of the snap fasteners were stitched to the end of each belt piece (after we tried it on an trimmed them to size) and that was the belt done! I only hope those snap fasteners are going to be strong enough to withstand her running around.

Ccompleted belt
My friend then glued orange felt diamonds to the grey leggings while her daughter was wearing them, so that the fabric was stretched, and wouldn't distort like if we had glued them on while the leggings were unstretched. This did mean that the leggings kinda got glued to her legs.... but that was easy enough to peel off.

Here's what the tunic, belt and leggings look like together:


Out of the scraps of brown stretch fabric we had, I quickly traced around my own hand and made her fingerless glove thingies. While my hand/arm is much bigger than hers, I didn't add any seam allowance, so it ended up being a good fit for her.


While I had been working on the belt and glove thingies, my friend's mum made the upper arm cuffs. We decided to make these using brown cotton fabric, sewn into strips, which were then sewn together, spaced out, onto strips at either end (that way they would stay even distances away from each other and not slip down) with velcro along the end strips to get them on and off and keep them tight.

Add the Arm bands and Glove/cuff things and you have this (except she had already peeled her leggings off by this point):


Now the reason she didn't wear her wig/headdress is any of these photos is because while we were sewing, my friend had been hard at work painting the blue stripes. She took the stuffing out and had re-stuffed it with scrunched up newspaper while it was being painted (which is why it looks so lumpy)


So at this point I still need to make the boot covers/spats and my friend still needs to paint the front metallic bits along the hairline of the wig. The play is on in only a couple of weeks. Hopefully we get it all done in time


Dixie