Wednesday 28 September 2016

Experiments in spinning

Of course, once I started spinning wool, and learnt the basics, I begun thinking of all sorts of other interesting ways to spin.

I had already had a few goes at dyeing spun wool, but not un-spun wool, so I purchased 2 small amounts of coloured wool from Spotlight. Not the cheapest option, but not too terrible for a first go. about $6.99 for a 25g pack, there are quite a few colours to choose from, so I went with a blue and a pink.


Once I plied the 2 colours together, they became somewhat muted, but still quite pretty, it reminds me of unicorns and magic


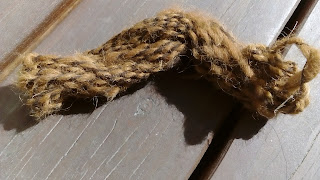
I ended up with quite a bit of blue left over (not sure how that happened) So I decided to ply it with some very dark brown that I had leftover on a bobbin from my uncle. I absolutely love how this turned out, and I think in future if I ply 2 colours together, I will aim for one dark and one light colour.


Then I plied some of the dark brown with the little bit of leftover chunky brown alpaca I had spun. While there was not much at all of that, I like the texture of the chunky alpaca with the fine spun wool.


All the different coloured plies.


After these experiments, I decided to have a go at dyeing some un-spun wool myself. I measured out 2 lots of 30g each of some lightly scoured white sheep's wool. I used the same microwave dyeing technique that I used previously, soaking the wool in vinegar water, and adding vinegar in the dye. I only used 1 mug of made up dye on each lot of wool, letting it be a bit uneven and variegated with the colour, then heating in the microwave for about 3 minutes, then rinsing after. I did one lot in a teal and one in a purple

I forgot to take any progress photos of any of this, so here is the 2 colours spun onto separate bobbins. I have not yet decided if I will ply these 2 together, or with a different colour.


My Uncle and I also took a bunch of spinning wheels along to my most recent CWA meeting and let the ladies have a go at spinning themselves. It was a very interesting evening, and one of the ladies did seem to get the hang of it quite easily on the night. If there is anyone around the Hunter Valley area that would like to learn how to spin, I would be happy to show you how!

Dixie

Thursday 22 September 2016

Polka Dot Pants!

Like many people, I own a copy of Butterick 5895, the Gertie Pattern consisting of a button up, tie front shirt and Capris. I have previously attempted the capris out of a stretch fabric, but forgot to do a full butt adjustment to the back pieces, so it was severely lacking in that area, and got shoved in a drawer in my sewing room and forgotten about. I decided it was about time to give it another go, so I pulled the pattern out, and chose a piece of polka dot denim fabric that I had purchased from an op-shop for $5.


Since I last made this pattern, I have also increased a few inches in my hip size. So I cut my pieces with an extra 2 inches at the side seams, plus I also did a full butt adjustment, by raising the centre back edge to give more coverage. I also added a second set of darts to the back pieces, to bring the waistband in a bit more snuggly above my butt.

I decided to make these a bit more like a traditional pair of jeans, by adding a fly front zip opening. I did this by adding a section along the centre front seam edge as I cut out the front pieces, then re-watching the little tutorial/animation from Series 1 episode 2 of the Great British Sewing Bee. I used a navy metal jean zip from my stash.


Once I had sewn the crotch seams and inserted the fly front zip, I sewed the inseams using a flat felled seam. I then pinned the sides seams, tried on for fit, then sewed the side seams, also used a flat felled seam. At this point I realised I still did not have quite enough coverage at the back.


I fixed that problem by cutting the back waistband pieces on a curve, with it being deeper at the centre back seam, and narrowing towards the side seams. The front waistband pieces are just straight rectangles.

I sewed the waistband pieces together, pressed them with the seam allowances folded in, then pinned them to the pants, and topstitched into place with a double row of top stitching. I had a look through my buttons to find a suitable button for the waistband. I was originally leaning towards a plain white button, but then decided on a white on white polka dot button from spotlight that I had. The hems were then pressed and top stitched in place with a double row of top stitching. Even though it was night time when I finished these, I took a few quick selfies to show the fit.


I am really pleased with how the back waistband sits. Look! No Gaping!


And here's a few fly detail shots:


As this fabric was not a stretch fabric, I have made these pants to have a relaxed fit, without being too baggy (I think) So they are quite comfortable to wear. Anyone else conquered pants recently?

Dixie

Wednesday 21 September 2016

Floral Green Gingham dress

For my latest Vintage Pattern Pledge, I decided to make this lovely sundress pattern from the October 1957 issue of Australian Home Journal.


I didn't take any progress shots while making it, but it was a very simple and straight forward design. If anything, I may have rushed the grading up, so it is a little less than perfect and a bit snug, but its still works ok. I used 3m of Fabric, and managed to squeeze out 4 panels for the skirt, to give it a lovely fullness. I used Pink Bias binding for the armholes, neckline and tie at the back, but I unfortunately didn't have enough to trim the hem in it as well.


Naturally I added pockets in the side seams.


And for a pop of colour, I made them in a Pink Gingham!


My back neckline ended up being a bit more square-ish than I would have liked, but it is still quite nice


The skirt catches in the wind very easily


So I am now up to 6 out of 10 completed Vintage Pattern makes for 2016!!!!!  I just may reach my goal after all!!!

How is everyone else going with the Vintage Pattern Pledge?

Dixie

Thursday 15 September 2016

A day trip to Dubbo

Over the weekend, my cousin, my husband and I made the long drive to Wellington, near Dubbo, and back home again in the one day. The reason for this insane mini road trip was to collect some old weaving looms, that I had seen offered for free on Gumtree, and as I was interested in getting into weaving, it seemed like the perfect opportunity! We left quite early in the morning, so that my cousin could log a few more night hours in her L plater log book.

It was a pretty rainy old morning, but the clouds cleared by midday, to a beautiful spring day. As we were driving along the Golden highway, we came across many of these bright yellow fields, which looked so out of place amongst the grey/green colouring of inland Australia. The only thing we could think it might be was Canola flowers, and some googling when we got home confirmed it. They were just so bright! Even brighter than the wattle trees! I guess that's why it's called the Golden Highway....


Here are 2 of the 3 looms we picked up! The other is what is known as an "Inkle" Loom and is used to make long straps and belts. Most Inkle looms I have seen have been quite small, but this is a monster of a thing, over a meter tall! These 2 are table top looms, and I see them getting a fair bit of use in the future!

Small table top loom, Approx 15 inches wide

Large Table top loom, about twice
as wide as the small one

The next day, after catching up on a few Z's, I decided to have a practice run on the small loom. I didn't want to use any of my hand spun wool for my first try, so I pulled 2 100g balls of 8 ply acrylic yarn from my stash to try a plaid weaving pattern. It took my most of the day just to string it up with 170 warp strings. As I was just testing it out, I used a warp length of approximately my arm span (so roughly 1.5m)

Partway through setting up

Starting the first few weft threads

A few inches in to my weaving


I am thinking of using this piece to make a tote bag, so I will be weaving a narrow piece for the shoulder strap, but I think I will need a bit more black yarn for that.

Completed! This is folded into 4

While we were in Dubbo, we also checked out the local op shops, and I found a few goodies, including some fabric.


As well as a large Beatrix Potter Sampler, 2 sewing patterns, 2 sets of bag handles, 2 sets of bra straps and a light blue metal Zip.


I keep buying bag handles, but I haven't gotten around to using many of the yet, so I will have to remedy that soon!

I am really looking forward to trying my hand at weaving my family tartan on the big table top loom, anyone have any tips for weaving a tartan?

Dixie

Friday 9 September 2016

Dye!(ing)

After spinning enough wool for my first hand-spun knitted project, I knew I wanted to dye the wool, but I wasn't sure what colour or how. I purchased a few different colours of powdered RIT dye from Spotlight.

I researched online different ways to dye wool, and there are a few. Originally I was going to dip dye an ombre effect with a large pot on the stove, however I didn't have a pot I was willing to sacrifice, nor did I have the money or time to go and buy one. So I decided instead to use a microwave method. Basically, you create a steam pouch with glad wrap to heat set the dye. I laid down 2 layers of glad wrap, then arranged my skeins (one or 2 at a time) that I had soaked in a vinegar and water solution, on top of the glad wrap. I mixed up my RIT dye in old coffee mugs. For the Fuchsia, I used a 1/2 teaspoon of powdered dye, approximately 250ml of boiling water and a dash of white vinegar. For the Purple I used a bit less dye, about 3/8 of a teaspoon (using a 1/4 teaspoon measure, 1 full spoon, then one half one) and the same amount of boiling water and vinegar. I then used plastic spoons to apply the dye to the wool. I dyed my wool half fuchsia and half purple for a variegated look. I did try to saturate my wool in dye, for a fairly even colour, but there was still some patchiness. I also sprinkled a bit of each colour onto the opposite sides for even more variegation. Then you just fold up the sides of the glad wrap to make a neat little package, and put onto the rack in your microwave, and microwave it on high for a minute at a time.


Once you have microwaved it long enough (I did about 3 minutes) carefully take out the pouch, cut a section open, pour out the water, taking care not to burn yourself, as it will be very hot, then rinse the wool in warm water.


I dyed one skein that was a little lumpier than the rest, in another colour just to try it. I used RIT Teal, but unfortunately it has come out more like an army green type of colour. But it is still quite nice, and I am super happy with how my variegated skeins have turned out. I wound one up into a ball by hand to start knitting with, then wound the rest into cakes when I borrowed my uncle's wool winder.


The pattern I chose to use my wool for is this shrug pattern, which was written up, based on a vintage photo. The sizing provided in the pattern goes up to a very generous 52" Bust! I have chosen to make up the second largest size which says it will fit a 38-48" bust. I have only just started knitting it up, so I have no idea how long it will take for me to finish, but we will see!


Here's the wool being wound into a "cake" on my uncle's wool winder.


And here is all my handspun wool in a basket together! The colour in the next 2 pictures is a little odd, and they look more blue than they are, the colour is much closer to the picture of the skeins on my kitchen bench a few photos up. But here they all are wound into yarn "cakes" ready to be knitted up. I also round up my skein of chunky teal, my super fine un-dyed wool, as well as my first skein of brown alpaca.


So far I am loving my foray into the world of wool spinning, and it is definitely inspiring me to up my knitting and crocheting skills, which are pretty limited at the moment. Does anyone else spin their own wool? Or have a sheep they want to send me fleeces from? Hehehe

Dixie

Friday 2 September 2016

Butterick B6167 version 2!

As many seamstresses do, I had a feeling that I really wanted to make myself a new dress. I also didn't want to put too much thinking and effort into this new dress. So I reached for a pattern I had previously made, Butterick B6167. I know from the previous time I made this dress, that the gathered bust section was a little on the small side on me and finished only part way down my bust, despite using the D cup pattern pieces. So, for this version, I cut the bust pieces with approx 1 inch extra along the bottom and each side, then took the same amount off the bodice pieces. Unfortunately I forgot to photograph the process, but it is pretty simple if you have the pattern. I also shortened the bodice by about 1/2 inch, but honestly, could have taken a bit more off.

John Kaldor Fabric I purchased for $2

The construction was really quite simple, and as per the pattern instructions, with one major difference. I did not put any boning in my dress, as I made this to just be a comfortable, throw-on-and-go dress, so I didn't want the extra structure from any boning. I also added side seam pockets, because I add pockets to everything, as pockets are awesome. The dress came together very, very quickly this time around. I began working on it when I got home from work around 2pm (including going through my patterns and fabric to decide what I wanted to make, as this was not planned ahead) and I had it finished by the time I went to bed around 11pm (including some time for dinner and a shower in there as well)

Bust detail

Mannequin Shot

While I was not organised enough to get nice photos of this dress at the time, and now it is raining quite heavily, here are some snaps from the changing room at the Salvos Store. You can see the bust on this version fits much better, and as such, even though I didn't add any extra coverage to the neckline, I don't feel like my bust is going to fall out of this one as much as the first one.


I'm really happy how this dress turned out, and I really love this pattern, so I think I may make more versions of it in the future. I have some adorable kitty border print fabric that I think will look amazing made up with this pattern.

As luck would have it, this dress also fits perfectly into this month's Social Sew at Allie J! The theme this month is Tried and True, and this pattern is certainly a tried and true pattern for me.

While Op-shopping wearing this dress, I picked up 2 adorable woven baskets for $2 each to use as handbags during the summer months, as well as a zip front corselette for $5 in my size! I'm not sure if the elastic will hold up for too many wearings, but if it doesn't, I will take it apart to use for a pattern.


Dixie