Showing posts with label Knitting. Show all posts

Wednesday, 12 October 2016

Fibre Fest!

Last Sunday, I had the pleasure of checking out the Australian Knitting Guilds 30th Birthday Fibre Fest!! I went with my uncle, who taught me to spin, as well as his friend, who he also taught taught to spin, but who also felts. I wasn't sure what it would be like, or even if there would be much for us spinners to look at and buy, but I was pleasantly surprised. The 30 or so stalls were arranged in a few rooms, corridors and verandahs of the Sisters of Mercy Convent in Singleton, and there was so much to see! Plenty of yarns and knitting needles, but also felting supplies, raw fleeces, carded and dyed wool, silk caps, spinning wheels, carders and looms as well as many beautiful finished products for sale such as afghans, baby booties, scarves, berets, bookmarks, brooches and handbags.

The knitting guild had put together a lovely display of novelty knitted food items, including a birthday cake, and many assorted fruits and vegetables, which I thought were just darling.


We all easily spent our money on lots of goodies, and went home full of ideas and inspiration for our next projects, and even had an invitation from one of the vendors, to come visit her and make use of her drum carders if we wished.

Here's an overview of my purchases for the day:


Fabric. Yes, at a knitting event, I found fabric. Did you doubt that I would? These pieces all look roughly 2m each and were $3 a piece or 5 pieces for $12. Some of them are even Michael Miller prints, so they were a total score!


Hand dyed merino in assorted colours, from Gail at Pleasant View Fibres. I'm planning on making rolags from these and trying a variegated spun yarn.


Silk Caps, the leftover ends of the cocoons, made into these cap things and had dyed. Probably one of the most affordable ways to buy silk to spin.


Recycled Sari Silk. Even cheaper way to buy silk, but will probably need to be blended with something else for strength. $9.50 for 100g (and its very light, so 100g goes a long way)


Some hand dyed merino bits and hand dyed Silk from Susanne's House of Wool


All in all I am super happy with my purchases, and have already began stretching out my silk to prepare it for spinning, as well has combining colours into rolags to spin variegated coloured yarns. I am also planning what to make out of those lovely fabrics, I think the Michael Miller ones will have to be dresses for sure!


Anyone else go to Fibre Fest?

Dixie 

Friday, 9 September 2016

Dye!(ing)

After spinning enough wool for my first hand-spun knitted project, I knew I wanted to dye the wool, but I wasn't sure what colour or how. I purchased a few different colours of powdered RIT dye from Spotlight.

I researched online different ways to dye wool, and there are a few. Originally I was going to dip dye an ombre effect with a large pot on the stove, however I didn't have a pot I was willing to sacrifice, nor did I have the money or time to go and buy one. So I decided instead to use a microwave method. Basically, you create a steam pouch with glad wrap to heat set the dye. I laid down 2 layers of glad wrap, then arranged my skeins (one or 2 at a time) that I had soaked in a vinegar and water solution, on top of the glad wrap. I mixed up my RIT dye in old coffee mugs. For the Fuchsia, I used a 1/2 teaspoon of powdered dye, approximately 250ml of boiling water and a dash of white vinegar. For the Purple I used a bit less dye, about 3/8 of a teaspoon (using a 1/4 teaspoon measure, 1 full spoon, then one half one) and the same amount of boiling water and vinegar. I then used plastic spoons to apply the dye to the wool. I dyed my wool half fuchsia and half purple for a variegated look. I did try to saturate my wool in dye, for a fairly even colour, but there was still some patchiness. I also sprinkled a bit of each colour onto the opposite sides for even more variegation. Then you just fold up the sides of the glad wrap to make a neat little package, and put onto the rack in your microwave, and microwave it on high for a minute at a time.


Once you have microwaved it long enough (I did about 3 minutes) carefully take out the pouch, cut a section open, pour out the water, taking care not to burn yourself, as it will be very hot, then rinse the wool in warm water.


I dyed one skein that was a little lumpier than the rest, in another colour just to try it. I used RIT Teal, but unfortunately it has come out more like an army green type of colour. But it is still quite nice, and I am super happy with how my variegated skeins have turned out. I wound one up into a ball by hand to start knitting with, then wound the rest into cakes when I borrowed my uncle's wool winder.


The pattern I chose to use my wool for is this shrug pattern, which was written up, based on a vintage photo. The sizing provided in the pattern goes up to a very generous 52" Bust! I have chosen to make up the second largest size which says it will fit a 38-48" bust. I have only just started knitting it up, so I have no idea how long it will take for me to finish, but we will see!


Here's the wool being wound into a "cake" on my uncle's wool winder.


And here is all my handspun wool in a basket together! The colour in the next 2 pictures is a little odd, and they look more blue than they are, the colour is much closer to the picture of the skeins on my kitchen bench a few photos up. But here they all are wound into yarn "cakes" ready to be knitted up. I also round up my skein of chunky teal, my super fine un-dyed wool, as well as my first skein of brown alpaca.


So far I am loving my foray into the world of wool spinning, and it is definitely inspiring me to up my knitting and crocheting skills, which are pretty limited at the moment. Does anyone else spin their own wool? Or have a sheep they want to send me fleeces from? Hehehe

Dixie

Thursday, 25 August 2016

Spinning!

So, over the weekend, I was lucky enough to have had my uncle teach me how to spin wool. He now has 4 spinning wheels, and so has agreed to lend me one, possibly for keeps if I really like it. I warned him I tend to pick up skills like this very very easily, but he still thought it would take me some time to get the rhythm of the wheel. However it only took me a matter of minutes and I was off and spinning like a pro (or at least not a complete novice) He was very surprised at my natural ability, and could not wait to tell people at the spinning guild he meets with.

It was difficult to spin and look at the camera


I had my first bobbin half filled within 30 minutes (you only half fill it, as you then ply 2 spun strands together)


I then took the wheel, its accessories and 500g of un-spun wool home. I didnt get any more spinning done that afternoon, as I was too tired, but the next morning, I was awoken early by one of my cats, and so decided to get up and see what I could manage before leaving for church. I managed to spin a second half full bobbin, ply the 2 together, wrap the yarn around the niddy noddy, then twist and tie it into a skein.

2 strands plied together

on the Niddy Noddy

My First Skein!

4 completed skeins

By the time I went back to work on Tuesday morning, I had completed 4 skeins! Out of interest, I weighed them on my kitchen scales and they average 30g each, which is a lot lighter than I thought they would be. I still need to wash each skein to set the ply so it doesnt unravel, which will shrink it a bit. I will then be dyeing them some sort of bright colour (I haven't decided what colour yet) and knit up something fabulous! I already have a cute little bolero/shrug pattern in mind.

Does anyone else spin their own yarn?

Dixie

Sunday, 31 May 2015

Finished 3 Hour Sweater and adapted pattern

Here is my finished 3 hour sweater! Ok, it may have actually taken around 10-12 hours, but for a beginner knitter, that is still really awesome! I guess I could call this the 3 skein sweater, as I only used a bit less than 3 balls of yarn

And as promised, I have written up my version of the pattern, should anyone be wishing to attempt it and wants to use the changes I used. I did try to stick as closely to the original pattern as I could, just making changes for the difference in size and also to make my stripes even.

You should all be used to my dodgy selfies by now, but I will apologise for my lack of make up and just general tired looking-ness.


Dixie's 3 Skein Sweater (adapted from the 1930's 3 hour sweater pattern)
Size 40-42" Bust
Needles: 4mm for Rib and 5mm for stocking stitch
Yarn: roughly 3x100g skeins 8ply (but 5ply works too)

Back
Cast on 80 stitches. K2 P2 to form ribbing for 24 rows (changing colours every 8 rows if you wish to create stripes like mine) then alternate knit and purl rows to make a stocking stitch for the next 54 rows, casting off 6 stitches at the beginning of the next 2 rows. Now change back to rib stitching (K2 P2) decreasing 1 stitch at each end of the next 3 rows, then one every second row, for a total of 24 rows of rib stitches and cast off

Front
Cast on 84 stitches and knit up the same as the back until you're up to the neckline ribbing. Then continue knitting up half the stitches, with the other half on a stitch holder, decreasing 1 stitch every second row on the armhole edge. After 18 rows, cast off 8 stitches at the center front of the neck edge, then decrease 1 stitch on the neck edge every row, and 1 stitch every second row on the armhole edge, until all stitches have gone and cast off the last stitch. Repeat for other side.

Sleeves
cast on 6 stitches. K2 P2, increasing 1 stitch at each end of every second row. Change colour after 10 rows if doing stripes, you should have 14 stitches
K2 P2 for another 8 rows, increasing 1 stitch at both ends of every second row, ending with 22 stitches, and changing colour again.
K2 P2 with increases for 8 more rows, ending with 30 stitches. Change colour again
Change to knit 1 row purl 1 row for 8 rows, still increasing each end of every second row, ending with 38 stitches on your needle and change colour again
Keep alternating knit and purl rows for 8 more rows, stil increasing, ending with 46 stitches, then cast on 7 stitches each side of the sleeve t give you a total of 60 stitches.
knit a further 16 rows of stocking stitch (8 rows each colour)
For the last 8 rows change colour and go back to a K2 P2 Rib.
Cast Off

Join all your pieces together and finish off with a row of single crochet around the whole neckline. Make a button loop on one side of the front neckline opening with a few chain stitches, and attach a button to the other side. Now you're Done!


After I finished my first sleeve I realised I had a problem. The way I had cast off my knitting had left my sleeve edge quite tight with no stretch, and absolutely not able to fit around my upper arm. So I carefully undid the casting off, and re-cast it off using a method that would allow stretch. I used this Youtube tutorial to learn how. I believe there are other methods to do this, if you have a preferred one, please use that. I knitted up the second sleeve, leaving out the decreasing before the ribbed edge, and decided I liked the fit much better, so I undid the edge of the first sleeve and re-finished it without the decreases (which is how I have written my version of the pattern)


I finished my sweater with a cute little purple ship's steering wheel button, and wore it with a pink singlet underneath as the large guage knit has left it a tiny bit sheer.

And now, just because I haven't posted any Cat Photos in a while, here's a snap of my girls

Tessa using Mabel's butt as a pillow

Dixie


Monday, 25 May 2015

Another Knitting Project!!!

I know, I know, I haven't even finished my first knitted garment yet! But it is almost finished, I promise! Only the collar left to do, but I got bored and needed another project to entertain myself.

The 3 Hour sweater, a 1930's raglan short sleeve sweater, has had me tempted to try it for a while, so I thought I would give it a go with some odd balls of yarn that I had, bought in a mixed bag from an op-shop for a few dollars. I used an 8ply Mint Green acrylic with a 5 ply purple acrylic. Technically I don't think you're supposed to use 2 different ply yarns, however I did and found it to work out ok, the purple stripes are just a little thinner than the green ones. A quick google search will show you that there are quite a few forum and blog posts around about this one, and I, like most people who try this pattern, did find the needle guage to be way too big for the suggested yarn weight. I did find someone, somewhere (I can't remember where) saying that the needle sizes listed were wrong, as they were old needle sizes and not the mm measurement of the needles, but I'm still not sure what ones should have been used, instead of the 5mm and 10mm ones the pattern says. I chose to use 4mm needles for the ribbing, and 5mm for the stocking stitch. I think normally there should be a bigger size difference between the needles you use, but this is what I decided to do. Also, due to using smaller needles than recommended, and me needing a bigger size than the original 36" bust, I cast on 80 stitches, instead of the original 52. I just guessed this amount, with no idea whether it would end up fitting or not.

Lunch Time!
I love that with knitting projects (rather than sewing projects) they are small enough to take to work with me and work on during my lunch breaks

Progress so far
At the moment I have completed the back and I am half way through the front and so far the sizing seems to be working. A lot of people I found who had tried this pattern were not happy with how it turned out, but as far as I can see, the pieces look about right for a raglan sweater. When I'm finished I will post the pattern with my changes for anyone who wants to try it.

Dixie

Friday, 17 April 2015

New Knitty Kitty Skirt

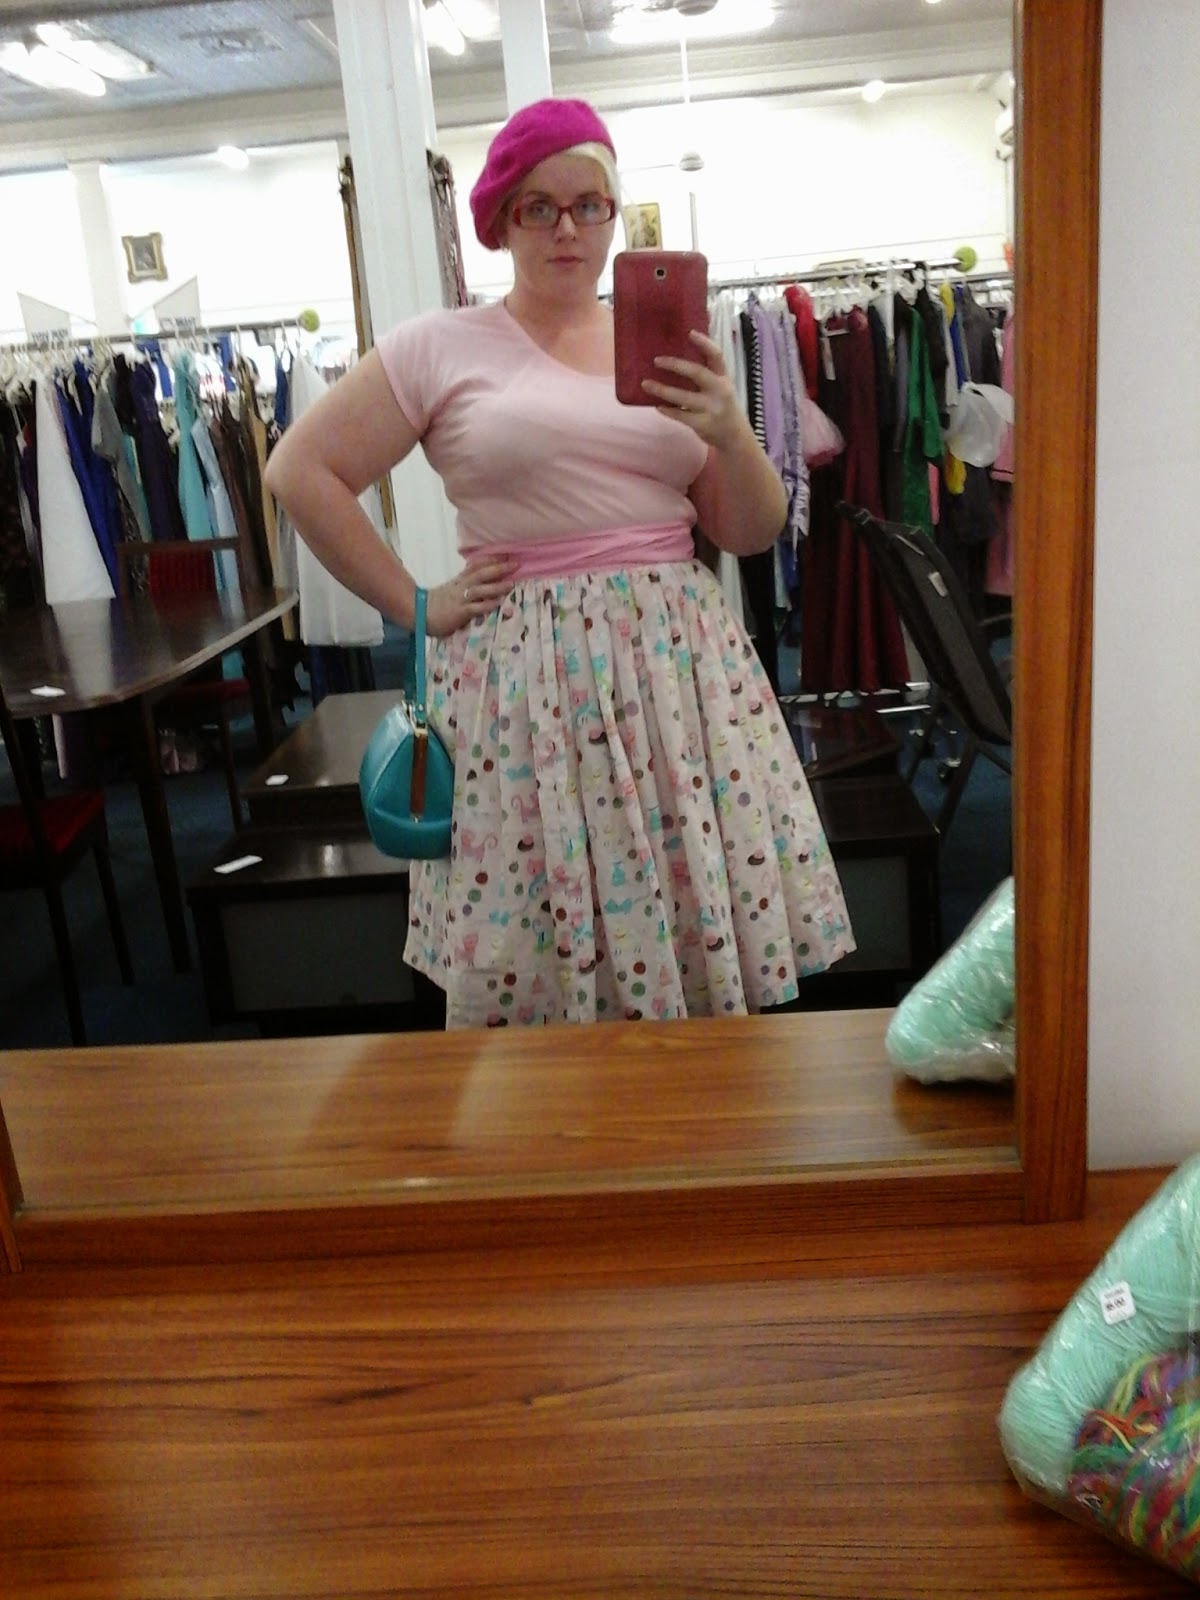
So I (like all people who sew their own clothes, I think) have a few fabrics in my stash that I know exactly want I want to make from them, but I just haven't gotten around to sewing them yet. One of those was this darling quilting cotton that I purchased from Spotlight some time ago. It features a pale pink background with a print of cats knitting, playing with yarn, wearing scarves, etc and considering my foraying into knitting lately, what could be more suitable?. I bought 2 meters of it, with a definite plan to make a gathered skirt from it. I paired it with some medium pink slinky fabric (perhaps polyester?) that I scored from an op shop, with plans of using that to create a waistband that ties in a big bow at the back of the skirt. And those 2 fabrics have just been sitting in my sewing room cupboard, folded together waiting.


Among my other projects, I have also been trying to make a Hawaiian shirt for my Husband. So far, I have only ever sewn him 2 ties (that match dresses of mine) and I have really been wanting to make him something a little more casual to wear, that he can still match me with (we are a bit odd like that)  But I ran into a few issues with the front button stands, so work on it kinda halted (as I avoided unpicking) and I looked for something quick, easy and hassle free to sew.


And what's more hassle free than a gathered skirt? I think this skirt went together in less than 2 hours. I cut the cat fabric into 3 lengths, sewed them together end to end, then sewed in a zip and a back seam. Ran a gathering stitch around the top and gathered it in to my waist size. I cut the 1m of medium pink fabric in half, joined them together to make one long strip, folded it in half, sewed the ends up, then turned right side out and sewed on to the gathered section at the top of the skirt. All I had to do them was the hem, and it was done!

I have worn it quite a few times since I finished making it, but haven't managed to get any photos. So while I was out op shopping this morning, I snuck in a few quick snaps in a mirror at Vinnies.


You can't see it, but the waistband sash ties in a lovely bow at the back. I wore the skirt with my pink shirt I made earlier this year, Teal bag from Elsie George Boutique and Pink Beret from JayJays. What you also can't see is my pink flats from Big W, and my home made Petticoat (that I made to go with my Floral pleated dress a few weeks ago)

Not much to report from my op shopping today. I bought a mix bag of knitting yarns for $5, 2 sets of kitting needles for 50c each and 2 stitch holders for 50c. I was really happy to have found the stitch holders, as I am almost up the the shoulders of the back piece of the blouse I'm knitting, and I need to put half the stitches on a holder and work each shoulder separately.


See! I've actually managed to stick with it! I might even have it finished by the time Winter starts!

I admit, as I have finally grasped how to follow a knitting pattern, I have gone a little crazy looking for more patterns to make up in the future. I found this great 1930's 3 Hour Sweater pattern that I want to try next. I originally found it through the free pattern links on the VaVoomVintage Blog but after googling "3 hour sweater" I have found the link posted on The Vintage Pattern Files Blog (which recently featured my Free PDF for a Vintage home Journal Frock) as well as finding a knit-along that people did in a forum on Craftster that started back in 2006! As I suspected, it took most knitters much more than 3 hours to complete, but it is still a very quickly knitted sweater, as it uses large gauge needles. I am also hoping to try my hand at knitting a Beret, as well as crocheting a snood (or 5)

Anyone know any good knitting or crochet patterns I should try?

Dixie

Friday, 10 April 2015

Attempting to knit......

Anyone who know's me (or has been reading my blog for a while) will know that I love sewing. I'm good at it, and it just makes sense to me. I also dabble in many other creative pursuits (with reasonable success) but one thing I have always struggled with is knitting.

That's not to say I can't knit at all. I have been able to sew plain squares and rectangles since I was a little girl. I've made many a scarf, including a long black one I wore most winters throughout High School. But that's where my talents ended. No matter how much I tried, no matter how many knitting books and how to's I read, I just couldn't get beyond that.


Then I saw this Cute knitted blouse pattern on The Vintage Pattern Files Blog. I thought, well it looks simple enough (perhaps I'm in denial) and I have quite a few balls of red yarn given to me some time ago by my Sister-in-law (ok, my brother hasn't put a ring on her finger yet, but they've been together for about as long as my husband and I have, so she's as good as) I also have a decent collection of knitting needles that I pick up from time to time from op-shops, so I already had the right sizes needed.


I'll admit, I almost gave up a few times. I pulled the whole lot off the needles 3 times because I kept stuffing it up in the beginning. But, as my Mother will agree, I am Stubborn. I was adamant I was going to make this knitted garment. So I kept at it, and eventually the ribbing started to take shape. I repeatedly told my husband how excited I was that it was actually looking like it was supposed to, I think he got sick of hearing it. I still have a long, long way to go with it, and I doubt I'll finish this year, but I am so excited to finally be able to knit a garment (hopefully) and not just squares or scarves!

To any of you who regularly knit clothes, I applaud you!

Dixie