Showing posts with label Historical. Show all posts

Thursday, 23 April 2020

A new Tudor Kirtle

For my birthday last year I was lucky enough to receive a generous Spotlight gift voucher from my dad, and not long after that Spotlight had a sale that included 50% wool fabrics. As I was in need of new medieval garb (as my pre-baby stuff is all a bit snug) to attend more events now that my son is getting a bit older and easier to take along. I realised a lot of my garb so far has been brown, not intentionally, it was just what I had found at op shops that could work for the era, and I am really more of a bright colour person. The range of wool at Spotlight is a bit dismal, so the brightest I could find was this lovely red wool melton. Unfortunately is is a blend 50% wool and 50% polyester, but I think it passes ok. To go with it, I also bought some black cotton velvet and a few meters of off white linen for a new chemise (which I still haven't finished). I bought the remaining 2.8 meters of the red melton, with the intention of making a Tudor kirtle, but it does seem to have turned out more Flemish than English due to the guards on the skirt. Good thing I am not too picky about that.


To begin, I prewashed the fabric, in case of shrinkage and colour run. I didn't notice any shrinkage, but there was definitely colour run, in fact, if I were to buy this fabric again, I might even wash it several times before sewing.

After my last garb attempt didn't work out as I had planned, I decided, to hell with period accurate patterns, and just used a princess seam bodice pattern that I had previously used for my brown kirtle. I was too lazy to go find the pattern in my super messy sewing room, so I just traced the pattern directly off my brown kirtle, adding a little extra width for recent weight gain, and then seam allowances. I cut the skirt portion out along the full 2.8 meters, long enough for a hem as well as a fold of fabric underneath the pleats to give them more body, then cut the bodice pieces from the remaining piece, as well as a lining from calico.

The dress went together fairly easily, and I didn't really take any progress photos at this point. The faux cartridge pleats were acheieved through very large, regular gathering stitches


At this point I realised I had actually made it too large to be able to lace it tight enough to support my bust. As I did not want to undo all the hand stitching on the black velvet trim, I simply unpicked the skirt at the side seams, carefully took it in about 1.5 inches on each side, then redistributed the gathers/pleats of the skirt and sewed it back to the bodice in those sections.

I had intended to sew a matching chemise in linen for this dress,, but have not managed that yet, however it looks pretty good with one of my existing chemises anyway. The dress was finished in time to wear to an event last September called Spring War. I even hand sewed a faux french hood to go with it, after purchasing some lovely beads from a stall at the event.


All in all, I am pretty happy with the result, and have already worn it to other events since (although not recently with the Covid-19 restrictions, obviously).

Dixie

Sunday, 12 March 2017

The start of more Medieval garments

As I am studying at Newcastle University this year, I decided to join the campus SCA group, which is essentially Medieval re-enactment and other fun stuff. I have always had an interest in historical clothing, and did actually attend a few SCA meetings almost 10 years ago when I lived in Sydney, but until Winterfest last year, hadn't really made much in the way of (mostly) historically accurate garments. Now, after only 2 meetings with this new club, I already have 3 more pieces of garb underway (some of which may take longer than others to finish) My inspiration for my new pieces is to create a complete wardrobe for a specific time and place, and taking inspiration from my husband's last name, I have chosen to focus on Scotland, probably around the 15th or 16th centuries, as any earlier than that seems even harder to find reliable information on (and later is no longer medieval)


The first item I began on is a yellow leine, which is essentially the medieval gaelic version of an undershirt. They were worn by both men and women, throughout Ireland and Scotland, particularly by those who refused English rule. According to the research I have been finding, they were quite often dyed bright yellow, although I am finding conflicting information about whether they were dyed with saffron to get the colour, or merely dyed a saffron yellow, by way of a description of the brightness. From what I have been looking at, they fairly often had long, bagged sleeves and simple necklines. There are many variations of course, but I wanted a fairly simple design, but liked the bagged sleeves, as they can also be used as pockets.

I found a piece of light yellow cotton in my stash, that was just over 2m in length. Ideally I would have liked more fabric to work with, but I also like to work from my stash instead of buying more fabric, and I also believe that trying to make historical clothing work from as little fabric as possible would be quite in the spirit of historical accuracy, as working class people would not have been able to afford to be extravagant and wasteful with their cloth. Traditionally the leine would be made from linen, but I can't really afford that sort of fabric, so cotton will suffice just fine for my needs. To start my leine, I simply folded my fabric into quarters, so that the middle of the fabric, where the neck opening will be, was at a corner, then using my measurements and pins, marked where I was going to cut. I cut the front, back and upper sleeves as one piece, with no shoulder or sleeve seams. I then pieced some extra length onto my sleeves from the fabric next to the skirt, to make sure they would be (almost) full length, and also to utilise the most out of the fabric. The way I have cut and constructed my leine is almost certainly not historically accurate, however, with such limited fabric, this is they way I chose to do it.

Sorry for the wrinkles, but this gives you
an idea of the sleeve shape

Here is a rough diagram of how I cut to make the most of my smallish piece of fabric:


The construction was very simple, sewing on the extra sleeve lengths, then just sewing the 2 side seams. I plan to use a simple facing for the neckline, which I will hand stitched down once it has been turned in and pressed. The sleeves and bottom still need to be hemmed by hand. I can leave it there, but I am considering trying my hand at a little bit of decorative embroidery along the hem as well.

I also decided to make a bodice/corset/stays/pair of bodies, or whatever term you wish to use, as so far my kirtle is the only support garment I have, and I thought a second one, without an attached skirt, would be handy to have. I decided on a simple design, back lacing, sort of straight Tudor style front, with tabs at the waist and ties on the front of the shoulder straps. I quickly drafted a pattern for these straight onto my calico when I was at my brothers one day, but when I pinned the pieces together to check the fit, discovered I had made quite an error in my measurements and needed to add an extra panel either side. so I then used those initial pieces to trace out new pieces, cut out 2 layers, sewed the seams, pressed them open, then sewed the 2 layers right sides together along the back edges only. I then turned it right side out and began carefully hand sewing boning channels along several of the seams and back edges. I used a tiny prick stitch, which should be fairly strong.

Prick stitching the boning channels

Progress shot. Tabs will be cut into the bottoms of the panels

Once I had added boning channels and boning to both front seams and the 2 back edge seams, I began working on the lacing eyelets, stretching them out with an awl (actually a knitting needle, but whatevs) and hand stitching around them with the same sort of reverse blanket stitch I used on the eyelets for my kirtle. After I had inserted a couple of the eyelets, I tried it on to get an idea of the fit. It wasn't perfect, but it certainly wasn't bad either. There seems to be a little too much room under the arms, but that may sit better when the rest of the eyelets are done and it is fully laced up, if not, I can remove some of the excess with a dart on each side. Also, the shoulder straps are far too short, however, I can just use a longer piece of sting to tie them to the front, so that isn't too detrimental. At the moment I am thinking of using some dark green cotton for the binding around the edges, but I am not completely decided on that yet.


The third garment I have been working on is a pair of socks! I know, how exciting! I saw another SCA member using a technique called nalbinding at the first meeting I went to, so the next day I decided to find some of my rougher handspun and a wool needle and give it a go. It essentially gives you a fabric similar to knitting, but is made with shorter lengths of yarn and done with a yarn needle, where you pull the entire length through a loop each stitch. It is a technique that predates knitting, so definitely could have existed in the 15th/16th century in Scotland. Looking in my collection of handspun, I found 3 cakes of some brown alpaca that I had spun, 2 that were quite chunky and rough, and 1 which was a lot finer. I started my first sock, using some guidance from online tutorials, using one of the chunky cakes, but as it was forming, I realised I would finish the cake before making the sock anywhere near as long as I wanted. In an attempt to keep things even between 2 socks, I made the decision to start each sock with each cake of chunky yarn, then finish each with half of the yarn of the finer spun cake, thus keeping the sole, toe and heel thicker and more hard wearing, then making the leg a finer, more delicate weave.

Sock progress. cake in use on the left, finely spun cake in the
middle, and the second rough spun cake on the right
I have also already made an Arisaid, but as that is just a rectangle of fabric, it's not really much on an achievement. I purchased 2m of a blue, black and white polyester woven tartan, that is lovely, soft and warm. It naturally has a small fringe along the selvedge edge, so I machine stitched down each cut end, about 1/2 and inch from the edge, and purposely frayed the fabric. These are usually worn pleated and belted to the waist, so I will have to find or make a suitable belt to go with it.

I still have plenty more garments in the planning stages for my SCA persona, which I will share once I get started on them. Has anyone else been working on any historical clothing?

Dixie

Friday, 24 February 2017

Edwardian Fantail skirt by Scroop patterns


I have been wanting to make myself a new historical outfit for some time, but I have been lacking the motivation to do much sewing at all. However, when I found out about this new pattern from Scroop patterns by the Dreamstress, I knew I wanted to make it, and even had a perfect olive green linen to use for it.

It did take quite a bit of paper and space to put the pattern together, as it is a full length skirt with a fair bit of volume at the hem, but it was worth it. I found this pattern went together sooo easily, with really clear illustrated steps. I especially love how the placket and pleats at the back sit.

Amazingly, I did not have to make any alterations to this pattern at all. I was originally going to make the waistline a size smaller than the hips, but ended up making a straight size 46, and it fits great, including the length. Usually I have to shorten things a few inches, so I'd say if you're on the taller side of 5'5" you may want to think of extending the skirt pieces (or just using a smaller hem)

The pieces all cut out

I didn't take many progress photos, as it was such a straight forward make. So here is a photo of my progress pinning the pleats into place before basting and pressing them.

Working on the pleats

Once I had the skirt done, I realised I needed a suitable blouse to wear with it. Searching through my stash, I initially found some lovely light floral cotton, however some members in my historical sewing group did not feel the print was suitable for the time period. So instead, I decided to use a silky cream fabric with grey pinstripes. To begin drafting the blouse I used my own measurements to make a pattern piece similar to the one used in this post, with the exaggerated curve along the waistline to gather in.

Initial bodice piece

Once I tested that the front piece worked (and trimmed a bit off the sides and armholes) I made the back using the same piece, just trimming off about 2 inches in length at the waistline in the middle and drafted some simple, full, straight sleeves. Once I had sewn these pieces together, I gathered the neckline and waistline, put elastic bands over my wrists and tried on the skirt.

Blouse half done, checking how
the outfit looks

At this point I felt that the overall silhouette was pretty spot on. So I finished the front edges for the button stands, as well as the collar and waistband pieces, then attached the buttons and sewed the buttonholes. Lastly, I gathered the sleeves into cuffs, each with 2 buttons.

To accessorise the outfit, I paired my blouse and skirt with a pair of black boots I purchased from Big W some years ago, a small pearl brooch, and a lace parasol my grandmother made from an old umbrella and some curtains, more than 20 years ago. In future I may also add a necklace as well. My hair isn't really long enough to style into a period correct Edwardian hairstyle, so I just did my best with some sort of bastardised victory/gibson rolls, which I think turned out ok. In the future, I will be making a period corset to go with this outfit, to improve the silhouette.

As this was our first proper shoot with our new Nikon camera, my Husband and I decided to go out to the property behind my grandparents place, so we could try out both lenses, and not have too many modern things in the background of the photos. As a result, we were joined by Bonnie, my grandparent's west highland terrier.


While the style of the blouse is certainly not doing anything particularly flattering for my figure, I like how the overall outfit looks, and I'm pretty happy with these photos. I may still make another blouse to go with this skirt from a more historically accurate fabric, I'd also like to make a matching vest from some of the leftover skirt fabric. I will be endeavouring this year to improve the quality of the photos on my blog, so this seems like a great start. I am also looking forward to debuting this outfit at the next Historical event I attend.

Dixie

P.S. In all fairness, I did get to test this pattern, so I didn't have to pay for it, but I definitely think it is worth the US$15 (or just US$10 for just the historical length)

Wednesday, 19 October 2016

Frida Kahlo and Diego Rivera at the Art Gallery of NSW

Last weekend, some friends and I went to the Art Gallery to see the Frida Kahlo and Diego Rivera exhibition. It washout of a last minute plan, so I didn't have time to sew up a new outfit, but I managed to put together something I think was a reasonable effort, I just put together a quick floral hair comb. I couldn't find my glue gun, so I had to use a very sharp needle to piece through the plastic flower stalks. I stitched them to a piece of felt, which I folded over with a small length of boning inside, then attached to a hair comb.


While at the Art Gallery, using their free WiFi, I discovered the sad news that Jessica from Chronically Vintage, had lost her home, possessions and heartbreakingly, her kitty, to an arson attack. For anyone wishing to help Jessica and her Husband at this difficult time, there has been a Facebook page set up, with details. I myself am hoping to sew up a few things to send to her.

I love going to the Art Gallery, but I don't get there as often as I would like. I didn't take many photos of the exhibition, although I could have. There weren't quite as many paintings as I would have liked to have seen, about half of the display comprised of photos set out in chronological order, detailing both of the artist's lives


The paintings that were there were exquisite, and had so much more texture and life than what is portrayed through the numerous photos and copies of them. It was also very interesting comparing their work side by side, and although I know Rivera was a much more accomplished artist at the time, I find Frida Kahlo's work to have much more detail and technical skill. I realise Rivera was mostly a mural painter, but I find his style kind of flat and almost childlike.


I did get a quick snap in front of a big blown up photo of Frida Kahlo and Diego Rivera, so you can see my hastily put together outfit. I did have a fantastic beaded orange shawl that I was going to wear with it, but it ended up being a bit warm, so I left that in my bag.

My Frida Inspired outfit
On our way from St James train station, we came accross these endangered animal parade floats, which we discovered were for a celebration of the 100 year birthday of Toronga Zoo! I had no idea it was that old!


I really liked the Tiger one


Anyone else been to the Art Gallery recently? (or seen giant endangered animals in the park?)

Dixie

Tuesday, 12 July 2016

Birthday goodies for my 26th!

So I recently turned 26 (Sunday before last to be exact) and as like previous years, I have treated myself to a small shopping spree to celebrate (this year funded by my wonderful husband) I began by purchasing several pieces of leather from a stall at Winterfest. Leather is not something I would usually go for, being a dead animals skin, but as I delve a little further into historical re-enactment, I've realised it is kind of necessary for certain things such as boots and satchels. During the day at Winterfest, I really felt the main things letting down my outfit were my shoes and bag (and lack of petticoat, but that was just due to time constraints)


So I bought 5 reasonable sized pieces from the $2 a piece scrap bin (a few of which I think may have been there by accident, and actually were small full hides)

From left to right: a long matte black piece which I think will be perfect for belts, a really thick piece of off-white that I intend to use as boot soles, a lovely soft to the touch caramel coloured piece, a kinda stiff chocolate brown leather I thought I would use for boots and a super shiny dark brown piece which might not be suitable for historical stuff, but is quite a large piece, so I couldn't resist


After seeing the Marilyn Monroe Exhibition, my wonderful husband encouraged me to spend up some money at Spotlight, so we found our way to the Bendigo store. I found this interesting flesh coloured stretch mesh with gold and bronze sequins that reminded me a bit of the nude/silver beaded/sequined dress from the movie "Some like it Hot". It was on the sale rack for $20p/m and Spotlight was having a 40% off clearance fabrics, which brought it down to $12p/m. I bought 1.5m as well as half a meter of plain flesh coloured stretch mesh for the neckline.


My other bargains include some oriental crepe which was down to $3.60p/m, some blue printed poly voile down to $1.80p/m, 2 of the Gertie print polyesters down to $3.60p/m and an assortment of velvet ribbons for 10c p/m


I also picked up a few patterns from some op-shops we came across in Bendigo, including some Kwik-Sew patterns that will work nicely for nightgowns, a nice princess seam dress pattern in large sizes, a McCalls Retro pattern, an 80's maternity pattern as well as a smart men's blazer pattern.


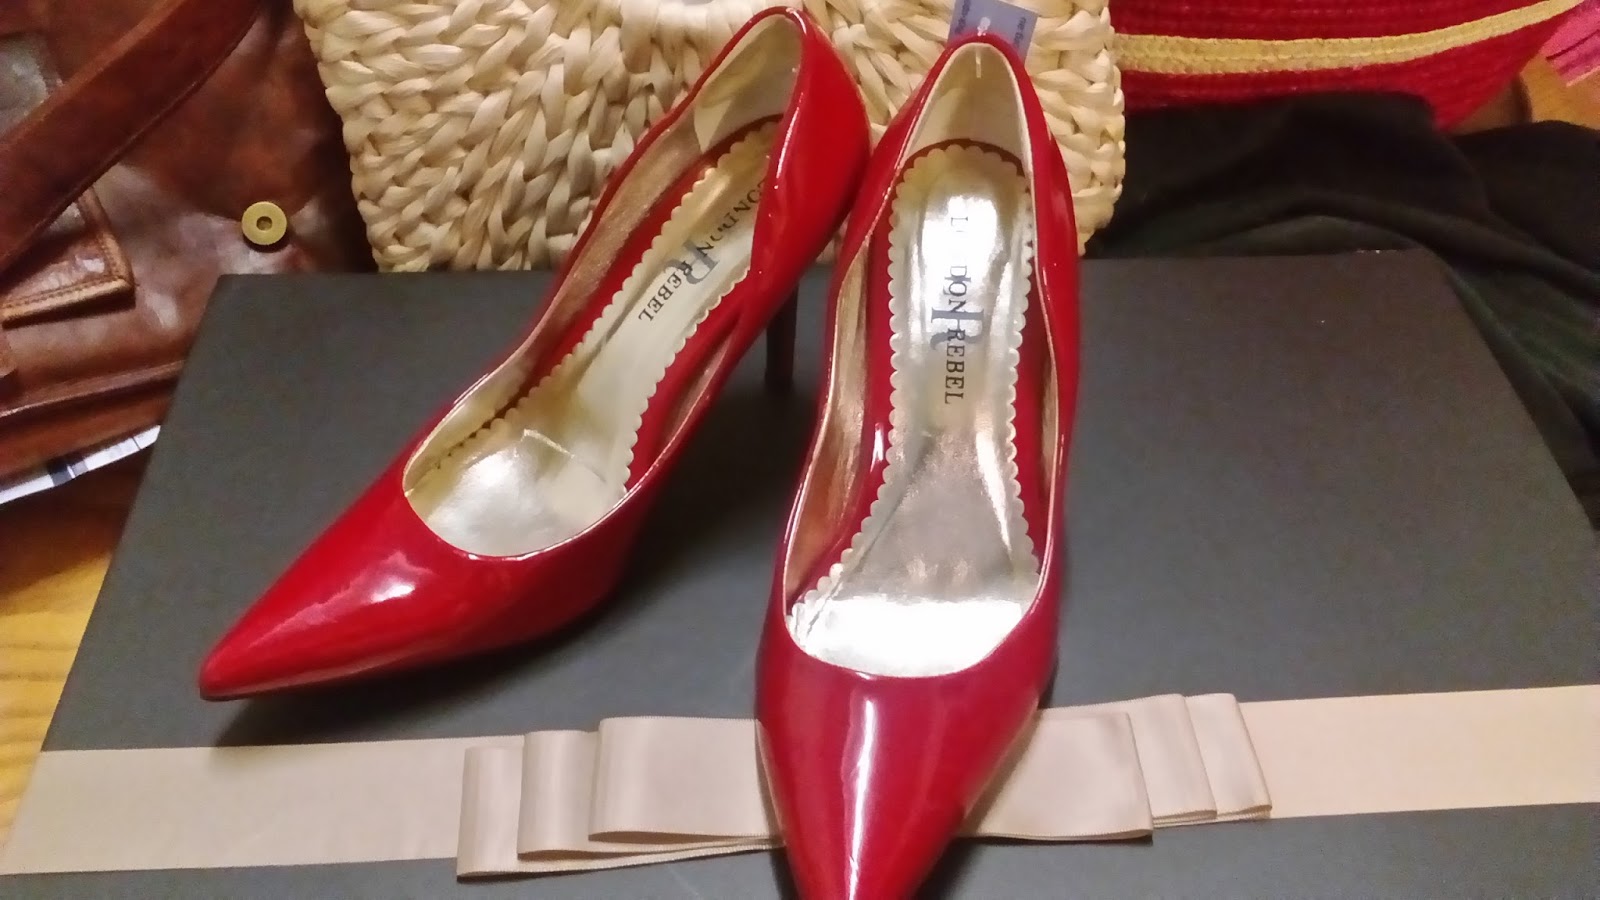
I also found another pair of red London Rebel Heels, exactly the same as the pair that I already have, but have almost worn to pieces!


When we finally got back from Bendigo, I had to go by my local post office to pick up a couple of parcels. The first of which was from my Nanna and contained a beautiful sweets plate and serving bowl from Peters of Kensington.


The second was a sumptuous hamper from my Dad and his wife. By the time I took this photo, I had already eaten a box of chocolates from it.....


All in all, between the roadtrip to Bendigo, my shopping and presents, I had a pretty enjoyable birthday. Here's to the next year of my life!

Dixie