Showing posts with label Sewing. Show all posts

Friday, 11 October 2019

Log Cabin Quilt from fat quarters

So back around the beginning of May 2019, Aldi stores Australia had their sewing specials that they have every once in a while (yearly I think?) After finally finishing my sons quilt last year before Christmas, I had been thinking of making one for myself as well, and not just my giant scrap patchwork one that I am planning to make from my dressmaking scraps (as I am going to need to make a few more dresses before I'll have enough fabric for that one) I fell in love with 2 of the fat quarter bundles on offer at Aldi that week, and purchased myself 2 of each (so 4 packs of 6, equalling 24 fat quarters in total) as well as a 45mm rotary cutter and a few other bits and pieces. The designs feature florals, stripes and dots in coral, light green, light blue and light mustard yellow. Since then I have discovered the Pantone colour of the year for 2019 is "Living Coral" so it seems the choice is on trend, not that I particularly care....

I looked on pinterest to find a tutorial for a quilt block which would use most of the fabric of my fat quarters with minimal wastage. I found this tutorial for a basic log cabin block, where each fat quarter provides enough pieces for 2 blocks (excluding the centre square) and just cut up all my fabric and sewed them together randomly. I found an extra fat quarter in my stash, as well as a small scrap, that coordinated with the fabrics, to make the 48 3 inch squares I needed for the blocks. I constructed the blocks using the chain stitch method, just grabbing random pieces for the first few pieces, but when I got up to the 4th piece and above, I went through and matched each partial block with a piece to sew on, in a neat stack, to make sure I didn't end up with doubles, and to keep things a little bit neater. I didn't take any progress photos, as this was all happening late at night after my son had gone to bed, and the thought didn't really occur to me....


The blocks all went together very quickly, but then I was faced with the problem of finding the space to lay out 48 blocks to work out how I wanted the layout. Although all of the blocks are made of random pieces, some still have more lighter colour or darker colours, so I wanted to make sure they looked balanced once laid out next to each other. My house is far too cluttered to find enough space, so after completing the blocks, I sewed them together in strips of 6, then I put them aside until the next time I went to visit my brother and his wife at their lovely home they purchased earlier in the year.


At the time my older brother and his girlfriend were staying at my younger brothers house, so his girlfriend helped me to lay my strips of blocks out on the office floor, trying to find an arrangement that had none of the same prints touching. Unfortunately we couldn't manage that perfectly, but still came up with a fairly balanced, pleasing layout. At this point, I sewed the top together, and put it aside until I had the chance to go shopping for backing, wadding and binding. 

My mother helped me pick out an orange backing fabric and a perfect floral for the binding one day at spotlight, so I began laying out the backing, wadding and quilt top when I got home and cleared enough space on my dining room floor. At this point I actually decided to unpick and remove 1 row and 1 column of squares, as the blanket just looked too big compared to my single size duvet. Once I had removed those squares, it felt like the perfect size.

Once I had all the layers laid out and weighed down (with big cans of baked beans) I decided to hand baste the quilt together, instead of using safety pins, as I had pins rust in a previous project, and really did not want to risk that with this one. It was a bit of a tedious job. and my back was killing me after, but I think it was worth it to ensure I wouldn't get any rust marks damaging my beautiful quilt. 

I then did some basic free motion quilting using my Brother Innovis, removed the hand basting, then sewed on one side of the binding, using a tutorial which I cannot locate anymore, in order to achieve the nice mitred corners. Then all that was left to do was to hand sew the opposite side of the binding, which was quite enjoyable to do while sitting under the quilt watching some TV.


I took the quilt once again to my little brother's house to take completed photos, and as soon as I put it down, my son tried to help by rearranging it.


Absolutely love how it has turned out.


Admittedly, I actually finished this some weeks ago, and only just now got around to finishing writing the post. I have been using the quilt most nights, and even took it away with me this past long weekend. Again, with more help from my son..


How would I ever get anything done without his help?

I think I have been enjoying this quilting kick lately, as it is a project I can achieve in small increments, plus I don't have to face the reality of my larger post-partum body.

Any other dressmakers experimenting with quilting lately?

Dixie


Tuesday, 14 May 2019

Talia Tank from Rebecca Page

So I am running a little late on this one, as the pattern was released a few days ago, however, between car troubles, several trips to the emergency department, an overnight stay at the hospital as well as a university exam, I just didn't have the time to be doing any blogging

Long time readers will know I have been lucky enough to test a few Rebecca Page patterns in the past (as well as Mummykins and me, before the name change) but here is a brand new one!

Introducing the Talia Tank from Rebecca Page!

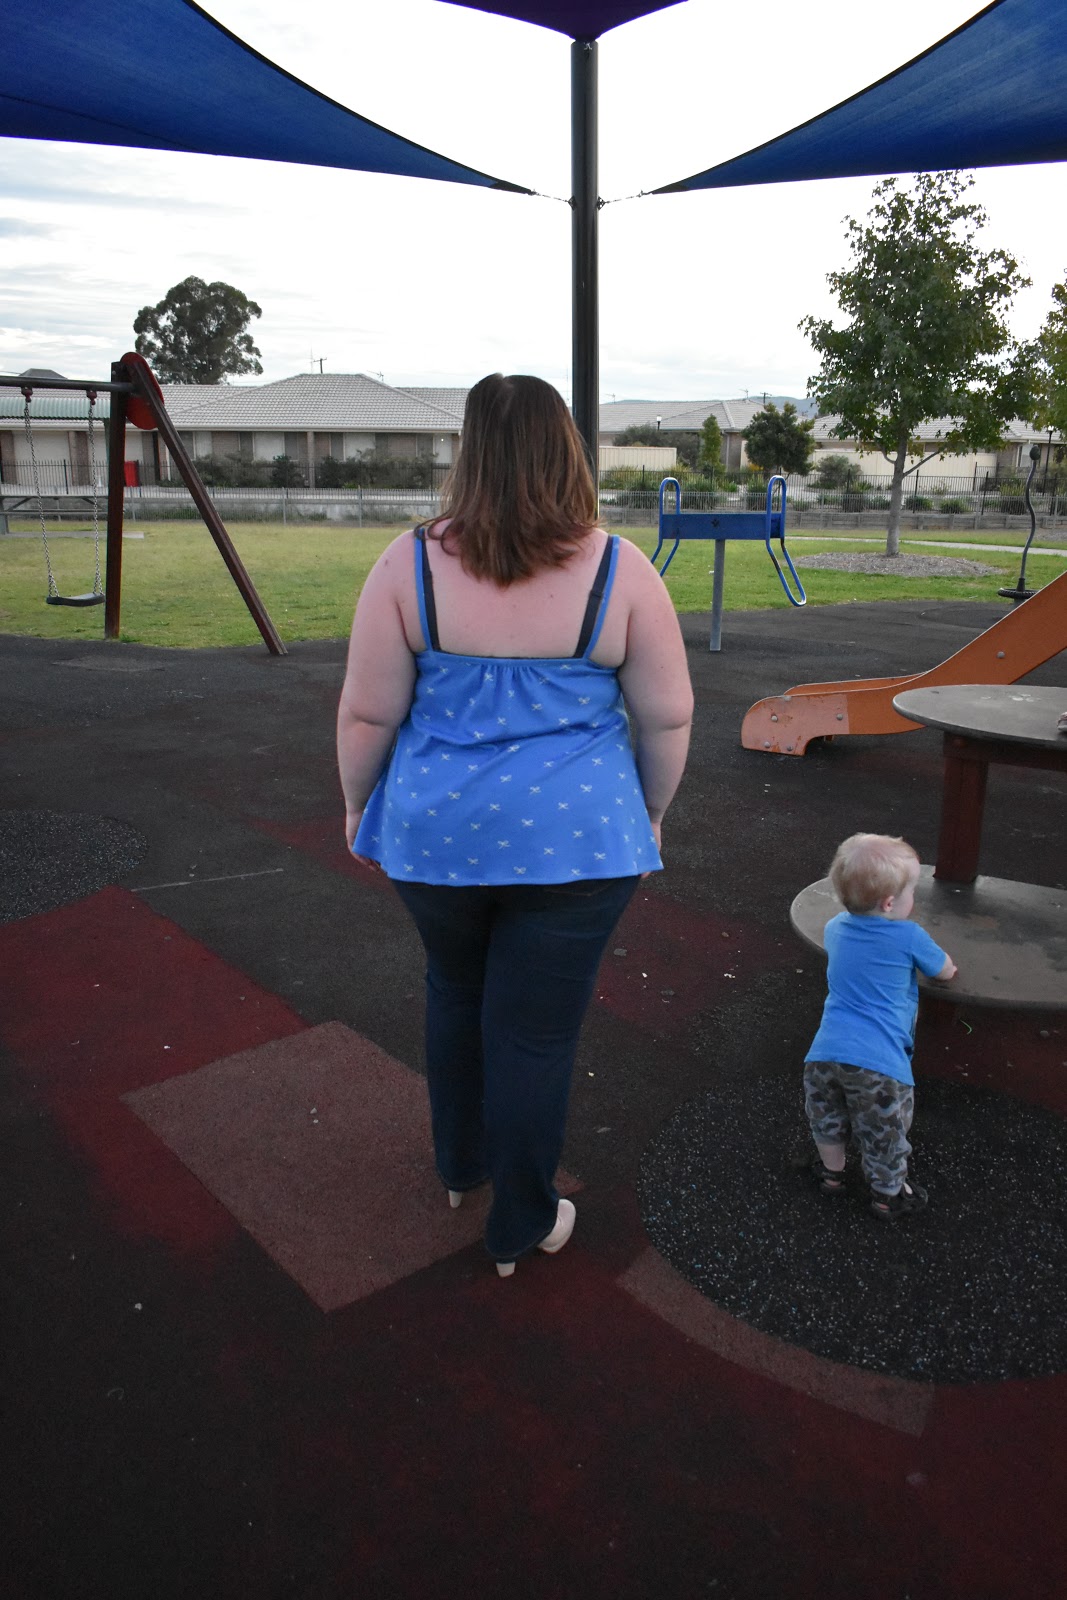
I had been searching for a quick sew for a comfy singlet top for a while.Although I sport a dress most days, some times a gal just wants to throw on jeans and a top and go casual. This pattern is absolutely perfect for that. It has flattering bust gathers and is loose fitting so doesn't cling to the tummy rolls. Best of all, if you piece together the strap piece, you can squeeze a top out of only 1m of fabric. So far I have struggled finding decently priced knit fabrics, so when I do buy them, I only get 1 or 2 meters. In fact, mere days before this test, I had been to spotlight and purchased a few knit fabrics from the sale table, so I was well prepared to make this top.

I cut the pieces out one night after my son went to bed, and then sewed it together the next night, and finished it, while also watching Netflix and eating dinner, in less than 2 hours total.

For this version I used 1m of a blue bow printed organic cotton purchased from Spotlight, for about $4 p/m. You can buy the same fabric from Etsy. I have made a 3xl, graded to 5xl at the hips (for my post natal 49 inch bust figure)


I have already worn the Talia to University, the day I managed to blow 2 tyres on the car, and was thankful not to be wearing a dress (like I usually am) while trying to change them.

I have also sewn a second version in a colourful dotted knit, as well as started on a dress length version in a floral mustard coloured woven rayon, which I am hoping turns out OK. Pretty sure this pattern is going to become a staple in my sewing room

Dixie

Monday, 28 January 2019

Feeling good in McCall's 6920

Yay! New Dress!


It has been a while since I have sewn a dress that both shows off my figure AND makes me feel good about it, but here it is! The week 3 challenge of the 52 week sewing challenge is to use a pattern you own but have not made before, and I have had McCall's 6920 sitting, paired with 2m of a large floral cotton sateen, since I bought it last year some time, just waiting to be sewn up.


The pattern goes up to a 24w, and has convenient shortening lines for those of us who are a little bit petite in the height department. I cut the largest size, shortening at the petite lines, grading out about 1/2 inch at the hips on most of the pieces, and shortened the hem by 7cm. I probably could have left the length at the hem, but I was worried I wouldn't be able to get all the pieces from only 2m of fabric. I also did not bother with pattern matching or placement, due to the limit of fabric, but really with such a large print, I would've had to waste a hell of a lot of fabric to do so.

Construction was super simple, I didn't fuss about with much fitting, as the fabric had stretch which would hide some flaws. I found the perfect green zip already sitting on top of my zip box waiting, and all in all this dress went together very quickly, during a few moments I could sneak away into my sewing room while my son was napping, or after he had gone to bed.


I probably needed to cut a smaller size for the bust and chest area, so it is a little roomy there, but I am very happy with the fit at the waist and the hips, which is usually my problem area. While this is far from one of my best sews, I love how quick it was to put together, and I think it looks great on me (and so does hubby!)

I did go to wear it out last weekend, but realised the split at the back very nearly shows off my bum, so have out this back in the sewing room for a quick alteration before it gets worn out of the house, which is why this post is so late (woops) but rest assured I have still been keeping up with the weekly challenges from the 52 Week Sewing Challenge. I will update this post with modelled photos of this dress when I get a chance.

Dixie

Sunday, 13 January 2019

Underwear from Kwik Sew 2325 and 2101

The theme for Week 2 of the 52 Week Sewing Challenge was to sew a UFO. No that doesn't mean I had to sew a flying saucer (although if you wanted to you could) in sewing terms, as well as other crafting hobbies, UFO simply means Un-Finished Object. I tend to have a lot of these, as I am easily distracted by shiny new projects, and if a project isn't turning out like I hoped, I usually prefer to just stop working on it, rather than fix it or push through and finish something I don't like. For this challenge, I decided on this underwear set that I started making some time ago. I really have no idea how long ago, but it is somewhere in the ballpark of 2-5 years ago.


Here is what I had stashed away in a bag under a chair:


I had cut the pieces out from some nude power mesh type stuff, and a small bit of floral fabric of unknown content (probably polyester) that has a tiny bit of stretch, both sourced from op shops. I also had underwear elastic, bra straps, bra closure and suspender clasps. I had finished sewing the panties, and had the suspender belt half done. I think the reason I stopped working on it was that the panties ended up  a little too big and much more high cut in the leg holes than I would have liked (very 80's) and I wasn't sure if the picot underwear elastic I was using would have enough stretch to make the suspender belt fit well. Although I have put on weight and am a different shape than I was due to pregnancy, I hoped that I could still make this set fit.


I began working on the bra by french seaming the upper and lower cup pieces together, and then attaching the 2 cups together via the small front piece. Picot elastic was then sewn to the back pieces, which I was pleased to find I had cut a little longer than the original pattern piece, so I am optimistic that I will be able to get it to fit. The rest went together fairly easily following the pattern directions. I added more elastic to the top of the cups instead of using the suggested cup stabiliser, and the bra was done before I knew it!

The fit is surprisingly good considering I cut it out pre-baby, although the cups do have the sort of pointy 80's look to them. Luckily that also works with 50's styles, so I don't really mind. I have not quite managed to complete the suspender belt, but am considering it a win anyway, as the bra and panties can be considered as a complete set without it. Some of the construction is a little rough, and not quite as pretty as I would like, but they are still completely functional, and I think a little cute. At the very least I can consider these a wearable toile for the next time I want to use these patterns and extend my collection of me-made underwear.


Anyone been working on any UFO's or underwear sewing lately?

Dixie

Sunday, 6 January 2019

52 Week Sewing Challenge, Week 1

Last year, I joined the 52 week sewing challenge for 2018 on Facebook. However, due to being heavily pregnant, and then having a newborn, I did not actually manage to complete any of the weeks challenges at all. Luckily for me, the challenge has been renewed this year, with a new list of 52 challenges to complete.


This year's week 1 challenge was "Organise your sewing room" which could be taken literally, or in the way I chose to, and that was to sew something to help organise your sewing room. My sewing room has been neglected for some time, so I knew there was no way I would be able to get it all tidied up in time.


 After a little bit of pinterest searching, I settled on this "Undercover Maker Mat" pattern from Lillyella. However, as my machine is so much larger than a normal machine, I had to make my mat about 50% larger than the pattern. So I mostly just used the pattern as inspiration, and came up with my own. The main area is made up of 3 fat quarters (1 and a half for each side) and the pockets and binding were made with scraps from other projects.


During the little bit of sewing I have done since, I have found it super helpful to have my pins and scissors on hand (I am always misplacing my scissors) and I even found another use for it, as a make shift pin cushion for when I leave my proper one in another room.


Next week's challenge is to "Sew a UFO" so I have been looking through some of my half finished projects in my sewing room to complete. Hopefully I can keep on track with these challenges this year, and post my makes in the facebook group, as well as a blog post here each Sunday.

If this sounds like a challenge you would be interested, head to the 52 Week Sewing Challenge Facebook group and join in!

Dixie

Sunday, 23 December 2018

Family Christmas Outfits for 2018!

Just like every year, I have made myself a new Christmas dress. Unlike other years, I now have a young son to dress up matchy matchy with my husband and I. This year, while at spotlight looking at the range of Christmas fabrics, I actually let my husband choose which one he liked best. He fell in love with a Aussie native animal design on a cream coloured background. In order to offset the cost a little (it was on sale 40% off, but still a bit costly when you need enough for 3 outfits)  we also purchased a coordinating red Prima cotton.

I began by cutting out the main back and front pieces out of the print for my husband's shirt, using the same Lekala men's business shirt pattern that I have used before, as those are the largest pieces we need. I then cut all the pieces for view C of Kwik sew 3730 as well as the upper collar and facings of Butterick 5747 out of the print as well. From the red I cut the yoke, sleeves and collar pieces for my husband's shirt, and the bodice skirt and under collar pieces of my dress.

I have really been struggling with motivation for pretty much anything these days, so on a rare day when I had both the motivation, and the time (my son and husband were both napping) I quickly sewed together most of the shirt for my son. I found the pattern went together really easy, so didn't really see the point of taking any progress photos (plus I am completely out of the habit) I then cheated and had my mother-in-law sew the buttons and buttonholes for me (as well as on Hubby's Christmas shirt from last year that I never finished, oops) All that was then left to do was a tiny bit of hand sewing on the inside of the collar and it was done! 

I chose to make the 18-24 month size (the largest in this pattern) even though my son will only be 10 and a half months at Christmas, as he is already wearing 12-18 month clothing, and this will hopefully still fit him for next Christmas. I figure I can easily run the side seams in a little if it is way too big on him for this year, but I'm not too worried.


Pretty happy with the pattern matching on the pocket (although I didn't bother along the front edge)


I began work on my dress, Butterick 5747, as usual, by sewing the bodice darts, then the shoulder and side seams. Collar was sewn together, then clipped and turned right side out, and facing pieces sewn together. Bodice, collar and facing were then pinned and sewn together


As I seem to have misplaced the pattern for my husband's shirt, and I really could not be bothered printing it out again, I took his Christmas shirt from last year and traced each piece as accurately as possible, adding 1/2 inch seam allowances afterwards. When I cut the print pattern pieces earlier, I actually just pinned the shirt to the fabric and carefully cut around, adding seam allowance, and extra fabric for the button stand as I went. I had hoped to have found the pattern by the time I needed to cut out the yoke, sleeves, collar and collar stand, but didn't have that much luck. Once I had created new pattern pieces, and had already begun sewing my own dress, I cut the rest of the pieces for hubby's shirt from the red cotton. His shirt went together quite easily, especially as I have sewn it 3 times before. Like previously, I followed this post on constructing the collar. I also sent this shirt to my mother-in-law's for buttonholes.

When I managed to find the time to, I sewed my skirt pieces together, adding in seam pockets, which was then pleated and sewn tot he bodice. The pattern actually has a waistband piece between the skirt and bodice, but I chose to omit this. At this stage I decided to cut a skirt border from the leftover Christmas fabric, which I sewed along the hemlines, turned to the outside, pressing under the seam allowance, and top stitching in place. I couldn't find any suitable buttons in my stash for my dress, so instead decided to make some coordinating fabric covered buttons from the Christmas fabric. A few button holes, and my dress was finished!


We had planned to get family photos taken in our matching outfits, but time has gotten away from us and we still haven't done them. If we ever get around to taking them, I will write another post to show them off!

How is your Christmas sewing going? Have you made matching family outfits?

Dixie

Saturday, 13 January 2018

Adorable Baby Sets from Simplicity 5982

With less than 10 weeks left of my pregnancy (this was back a while, just a bit over 4 weeks left now!), a family friend (who is also due less than 2 weeks after me) was having her baby shower. At this point I hadn't heard what gender her baby was going to be, so, while trying to figure out what to give her for her baby shower, I went through my limited collection of baby sewing patterns, as well as my fabric stash. I managed to decide on Simplicity 5982 made with this lemon and white polka dot poly cotton. 


I figured, if I was going to sew up a set for her, I may as well sew up a set for my little Jellybean as well. I decided to use the smallest size, which should fit around 6 months old, but may run big, as a lot of commercial patterns tend to, so I'm hoping it should fit our bubs around next spring/summer. For a little extra cuteness, I added a couple of little embroidered designs using my Brother Innovis 1200. A cat playing a fiddle on ours and bluebirds on my friends'.


Just the shoulder buttons left to add

I went for the simple singlet top and shorts (shorts aren't pictured), and they both went together very easily. I can't say much about the sizing or fit yet, as I have no models to try them on, but regardless of that, they have turned out very cute, and I think my friend liked the set I made her, as she asked if I could also make one in her size. As I still have quite a few meters of this fabric left, I am now thinking we could both have a matching set, using the Burda Pyjama pattern that I have used previously.

Any other ideas for cute unisex baby outfits?

Dixie

Saturday, 9 December 2017

New Portia Party Dress by Rebecca Page

I recently tested yet another pattern for Rebecca Page, this time the newest Party Dress pattern, the Portia Party Dress. I made a 3xl, graded to 4xl at the hips (instead of my usual Xxl graded to 4xl at the hips) due to my larger bust and waist from this pregnancy. The pattern can be made in either knit or woven, but I like my woven fabrics, so made mine using a grey poodle print polyester crepe from Gertie's range at spotlight a few years ago.


I made the knee length version, but as I am a bit on the short side, it falls just past my knees. Happily, I did not need to shorten the bodice on this pattern, which is unusual for me. I left the back bodice open, so found I didn't actual need to bother inserting a side zip, which is great, as they usually irritate my skin. I thought the dress had a slight 1940's feel to it, so attempted some victory rolls in my hair, but as I haven't done them in a few years, I was a bit rusty.


Hubby and I went for a bit of a drive around our local area, looking for a new spot to take some photographs. We happened upon a park in one of our town's surrounding suburbs, with a reasonable size pond that had a fairly new looking jetty. Whilst taking these photos, we also got to see an adorable family of black swans, who came over to where we were. I think they were hoping for some food, but unfortunately, we had nothing for them.


This dress is a very quick sew, with minimal pattern pieces, as the sleeves are cut on with the bodice. The trickiest bits are the point in the middle of the underbust seam, and the V neckline, but like every Rebecca Page pattern, this one comes with extensive instructions with full colour photographs to help. Even better, Rebecca Page has decided to release the Knee-Length Knit version for FREE! It is slightly more fitted than the woven version, and all of the tester's dresses I have seen look amazing. I especially love some of the versions I have seen that have been made with stretch velvet, they look so opulent! I think I will be sewing one myself next winter (maybe as a birthday dress?)

Dixie