Friday, 9 September 2016

Dye!(ing)

After spinning enough wool for my first hand-spun knitted project, I knew I wanted to dye the wool, but I wasn't sure what colour or how. I purchased a few different colours of powdered RIT dye from Spotlight.

I researched online different ways to dye wool, and there are a few. Originally I was going to dip dye an ombre effect with a large pot on the stove, however I didn't have a pot I was willing to sacrifice, nor did I have the money or time to go and buy one. So I decided instead to use a microwave method. Basically, you create a steam pouch with glad wrap to heat set the dye. I laid down 2 layers of glad wrap, then arranged my skeins (one or 2 at a time) that I had soaked in a vinegar and water solution, on top of the glad wrap. I mixed up my RIT dye in old coffee mugs. For the Fuchsia, I used a 1/2 teaspoon of powdered dye, approximately 250ml of boiling water and a dash of white vinegar. For the Purple I used a bit less dye, about 3/8 of a teaspoon (using a 1/4 teaspoon measure, 1 full spoon, then one half one) and the same amount of boiling water and vinegar. I then used plastic spoons to apply the dye to the wool. I dyed my wool half fuchsia and half purple for a variegated look. I did try to saturate my wool in dye, for a fairly even colour, but there was still some patchiness. I also sprinkled a bit of each colour onto the opposite sides for even more variegation. Then you just fold up the sides of the glad wrap to make a neat little package, and put onto the rack in your microwave, and microwave it on high for a minute at a time.


Once you have microwaved it long enough (I did about 3 minutes) carefully take out the pouch, cut a section open, pour out the water, taking care not to burn yourself, as it will be very hot, then rinse the wool in warm water.


I dyed one skein that was a little lumpier than the rest, in another colour just to try it. I used RIT Teal, but unfortunately it has come out more like an army green type of colour. But it is still quite nice, and I am super happy with how my variegated skeins have turned out. I wound one up into a ball by hand to start knitting with, then wound the rest into cakes when I borrowed my uncle's wool winder.


The pattern I chose to use my wool for is this shrug pattern, which was written up, based on a vintage photo. The sizing provided in the pattern goes up to a very generous 52" Bust! I have chosen to make up the second largest size which says it will fit a 38-48" bust. I have only just started knitting it up, so I have no idea how long it will take for me to finish, but we will see!


Here's the wool being wound into a "cake" on my uncle's wool winder.


And here is all my handspun wool in a basket together! The colour in the next 2 pictures is a little odd, and they look more blue than they are, the colour is much closer to the picture of the skeins on my kitchen bench a few photos up. But here they all are wound into yarn "cakes" ready to be knitted up. I also round up my skein of chunky teal, my super fine un-dyed wool, as well as my first skein of brown alpaca.


So far I am loving my foray into the world of wool spinning, and it is definitely inspiring me to up my knitting and crocheting skills, which are pretty limited at the moment. Does anyone else spin their own wool? Or have a sheep they want to send me fleeces from? Hehehe

Dixie

Friday, 2 September 2016

Butterick B6167 version 2!

As many seamstresses do, I had a feeling that I really wanted to make myself a new dress. I also didn't want to put too much thinking and effort into this new dress. So I reached for a pattern I had previously made, Butterick B6167. I know from the previous time I made this dress, that the gathered bust section was a little on the small side on me and finished only part way down my bust, despite using the D cup pattern pieces. So, for this version, I cut the bust pieces with approx 1 inch extra along the bottom and each side, then took the same amount off the bodice pieces. Unfortunately I forgot to photograph the process, but it is pretty simple if you have the pattern. I also shortened the bodice by about 1/2 inch, but honestly, could have taken a bit more off.

John Kaldor Fabric I purchased for $2

The construction was really quite simple, and as per the pattern instructions, with one major difference. I did not put any boning in my dress, as I made this to just be a comfortable, throw-on-and-go dress, so I didn't want the extra structure from any boning. I also added side seam pockets, because I add pockets to everything, as pockets are awesome. The dress came together very, very quickly this time around. I began working on it when I got home from work around 2pm (including going through my patterns and fabric to decide what I wanted to make, as this was not planned ahead) and I had it finished by the time I went to bed around 11pm (including some time for dinner and a shower in there as well)

Bust detail

Mannequin Shot

While I was not organised enough to get nice photos of this dress at the time, and now it is raining quite heavily, here are some snaps from the changing room at the Salvos Store. You can see the bust on this version fits much better, and as such, even though I didn't add any extra coverage to the neckline, I don't feel like my bust is going to fall out of this one as much as the first one.


I'm really happy how this dress turned out, and I really love this pattern, so I think I may make more versions of it in the future. I have some adorable kitty border print fabric that I think will look amazing made up with this pattern.

As luck would have it, this dress also fits perfectly into this month's Social Sew at Allie J! The theme this month is Tried and True, and this pattern is certainly a tried and true pattern for me.

While Op-shopping wearing this dress, I picked up 2 adorable woven baskets for $2 each to use as handbags during the summer months, as well as a zip front corselette for $5 in my size! I'm not sure if the elastic will hold up for too many wearings, but if it doesn't, I will take it apart to use for a pattern.


Dixie

Friday, 26 August 2016

Vintage Cyclops pram restoration project

Recently, as my husband were clearing out some old furniture and taking it to our local waste management centre, I spotted this Vintage Pram frame at the  tip shop. It was marked at $30, and needs a clean up, new tyres as well as a new bassinet part for the top. I didn't buy it when I saw it, but I thought about it overnight, plus I did a little bit of research, and decided I really really wanted to have it to restore and use for my future babies. So I went back the next day and luckily it was still there. The lady who worked there said she was surprised it hadn't been sold sooner.

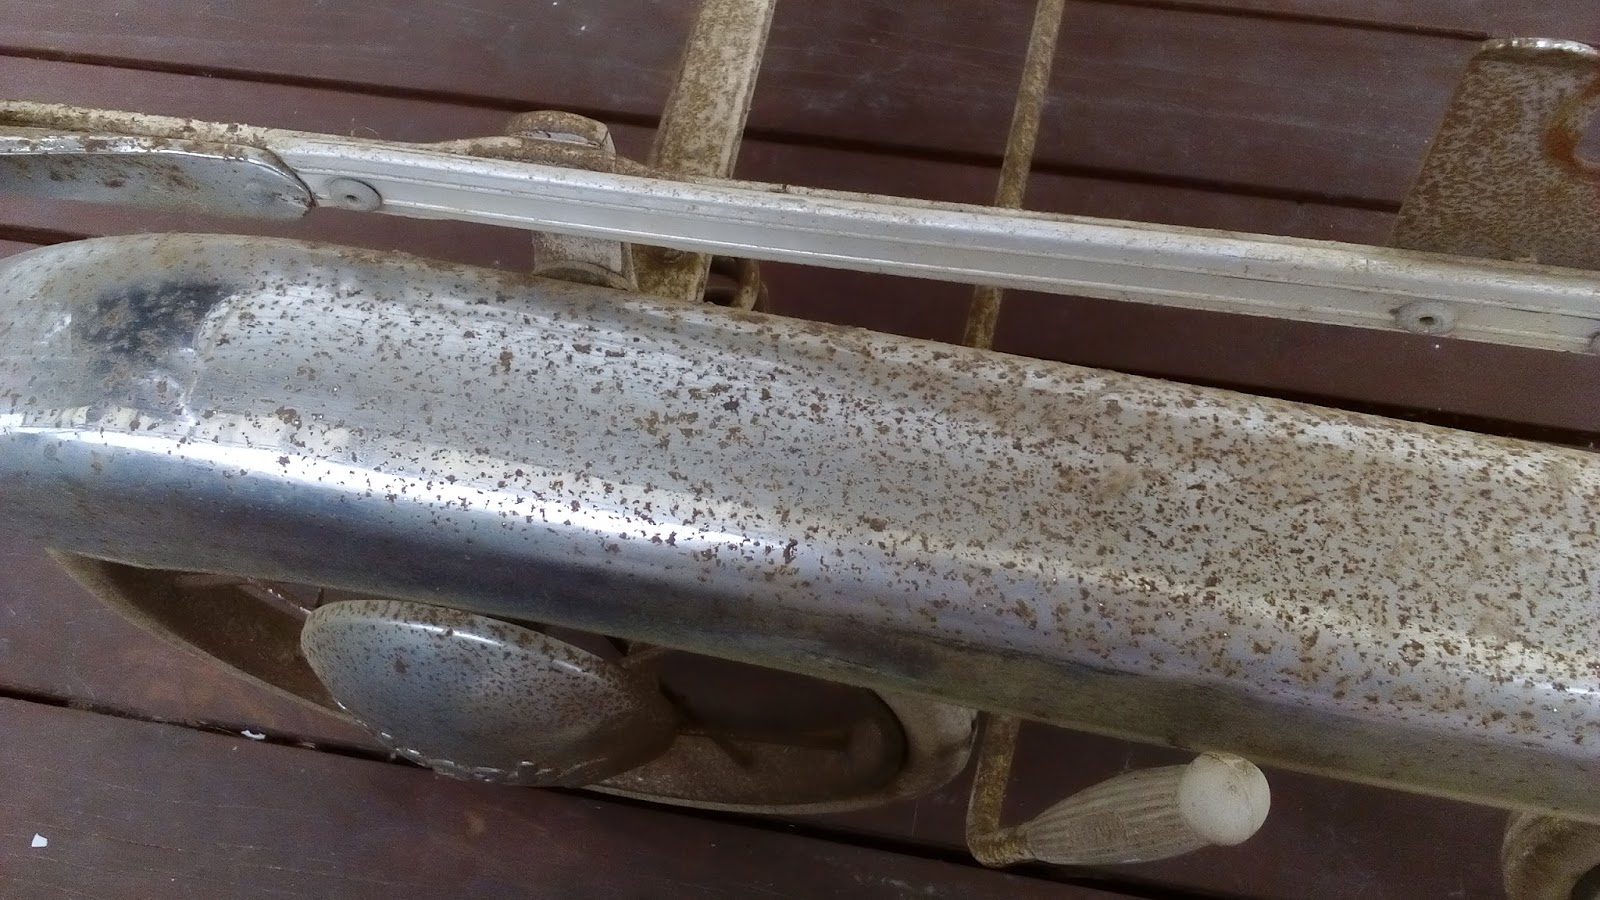
Before I paid money for it, my hubby and I had a good long look at it, to determine whether it would be a feasible project. Luckily the rust spots on the chrome are quite superficial and should come off. Other parts of the frame that are more covered in rust were not originally chromed, so we can scrub them back a bit harder, then paint them (I think they were originally a cream colour) One wheel has a pinched spot on the rim, however as these are solid rubber tyres, not inflatables, it should be OK, but hubby says he should be able to reshape it anyway.


This photo shows how much rust came off by just rubbing
with a dry cloth

After some research, and advice from my husband, I purchased Autosol Metal Polish to help remove the rust and polish up the chrome.


I decided to start on the hubcaps, as they were reasonably easy to remove from the pram. As I had heard steel wool can be too abrasive to use on chrome, I had a go at the back side of the hubcap first.

Here you can see the difference. The left one I had just started
polishing, the right one I hadn't begun yet.

The backs of the hubcaps are not quite as shiny and polished as the fronts, and the rust there was much worse, so I wasn't able to get them perfect, but still a lot better than they were. As the hubcaps were already pretty scratched up, and they aren't really something people look at, at close range, I though I would have a go at polishing the front sides with the steel wool as well.

Front of the hubcaps before polishing

1 quick go made a huge difference, as you can see, so I decided to go ahead and polish them all up, starting with these 2, then the other 2 a bit later.


There is still some rust left, particularly along the edges of the hubcaps and the lettering, but hubby think he can get that off when he finds the right attachment for his dremel. If not, I don't mind, as this was never going to be a Rick's restoration level of perfectness.

Next up were the wheels. I wasn't sure these would come up nice at all, but after a quick scrub with the polish, I was pleasantly surprised.

Starting to clean the wheel

This is going to be a bit of a long term project, as I only work on the polishing for short time periods, as the metal polish has a strong smell, and tends to get everywhere, so I have to regularly take breaks from it. But I am very optimistic that it will be finished before I have a baby to put in it.

I initially struggled to find much on this particular model of Cyclops pram, but I have since found a few more photos of similar prams. The wheel arch design seems to be fairly rare, with most dipping down in between the 2 tyres, having separate wheel arches for each tyre, or not having them at all. Here is what I have been able to find so far:

Brochure circa 1969
Found here on The Pram Man site

Found here on Pinterest from an expired Gumtree listing

Found here on Pinterest from an expired Ebay listing

Doll size Cyclops pram
Found here on Pinterest from an expired ebay listing

As you can see, ours is clearly missing the bassinet part, as well as the part of the frame that goes around the bassinet. The tyres need replacing, so I purchased replacement rubber from Dave from The Pedal Car Guy, who was a wealth of knowledge of all things Cyclops! He told me the bassinet part of the pram was most likely manufactured by another Australian Company, Pedigree, which is information I have not yet found on the internet.

I managed to pick up a wicker bassinet for $5 from one of my local op-shops to use as a base for the pram, which is from another Australian Company, Siesta. I may end up getting a nicer one at a later date or a pedigree one if I can find it, but this one seems like a good start if I want to build the hood and upholster the bassinet myself.

Has anyone else undertaken a restoration project lately?

Dixie
Thursday, 25 August 2016

Spinning!

So, over the weekend, I was lucky enough to have had my uncle teach me how to spin wool. He now has 4 spinning wheels, and so has agreed to lend me one, possibly for keeps if I really like it. I warned him I tend to pick up skills like this very very easily, but he still thought it would take me some time to get the rhythm of the wheel. However it only took me a matter of minutes and I was off and spinning like a pro (or at least not a complete novice) He was very surprised at my natural ability, and could not wait to tell people at the spinning guild he meets with.

It was difficult to spin and look at the camera


I had my first bobbin half filled within 30 minutes (you only half fill it, as you then ply 2 spun strands together)


I then took the wheel, its accessories and 500g of un-spun wool home. I didnt get any more spinning done that afternoon, as I was too tired, but the next morning, I was awoken early by one of my cats, and so decided to get up and see what I could manage before leaving for church. I managed to spin a second half full bobbin, ply the 2 together, wrap the yarn around the niddy noddy, then twist and tie it into a skein.

2 strands plied together

on the Niddy Noddy

My First Skein!

4 completed skeins

By the time I went back to work on Tuesday morning, I had completed 4 skeins! Out of interest, I weighed them on my kitchen scales and they average 30g each, which is a lot lighter than I thought they would be. I still need to wash each skein to set the ply so it doesnt unravel, which will shrink it a bit. I will then be dyeing them some sort of bright colour (I haven't decided what colour yet) and knit up something fabulous! I already have a cute little bolero/shrug pattern in mind.

Does anyone else spin their own yarn?

Dixie

Wednesday, 24 August 2016

Vintage McCalls 6236 in Floral

Earlier this year I managed to purchase a couple of vintage patterns that were pretty close to my size, which is pretty rare, especially within my budget. One of those was a lovely little 1962 shirtwaister style dress with some gathering details on the bodice, and a gored or slim skirt, in a 41 inch bust.

Vintage McCalls 6236

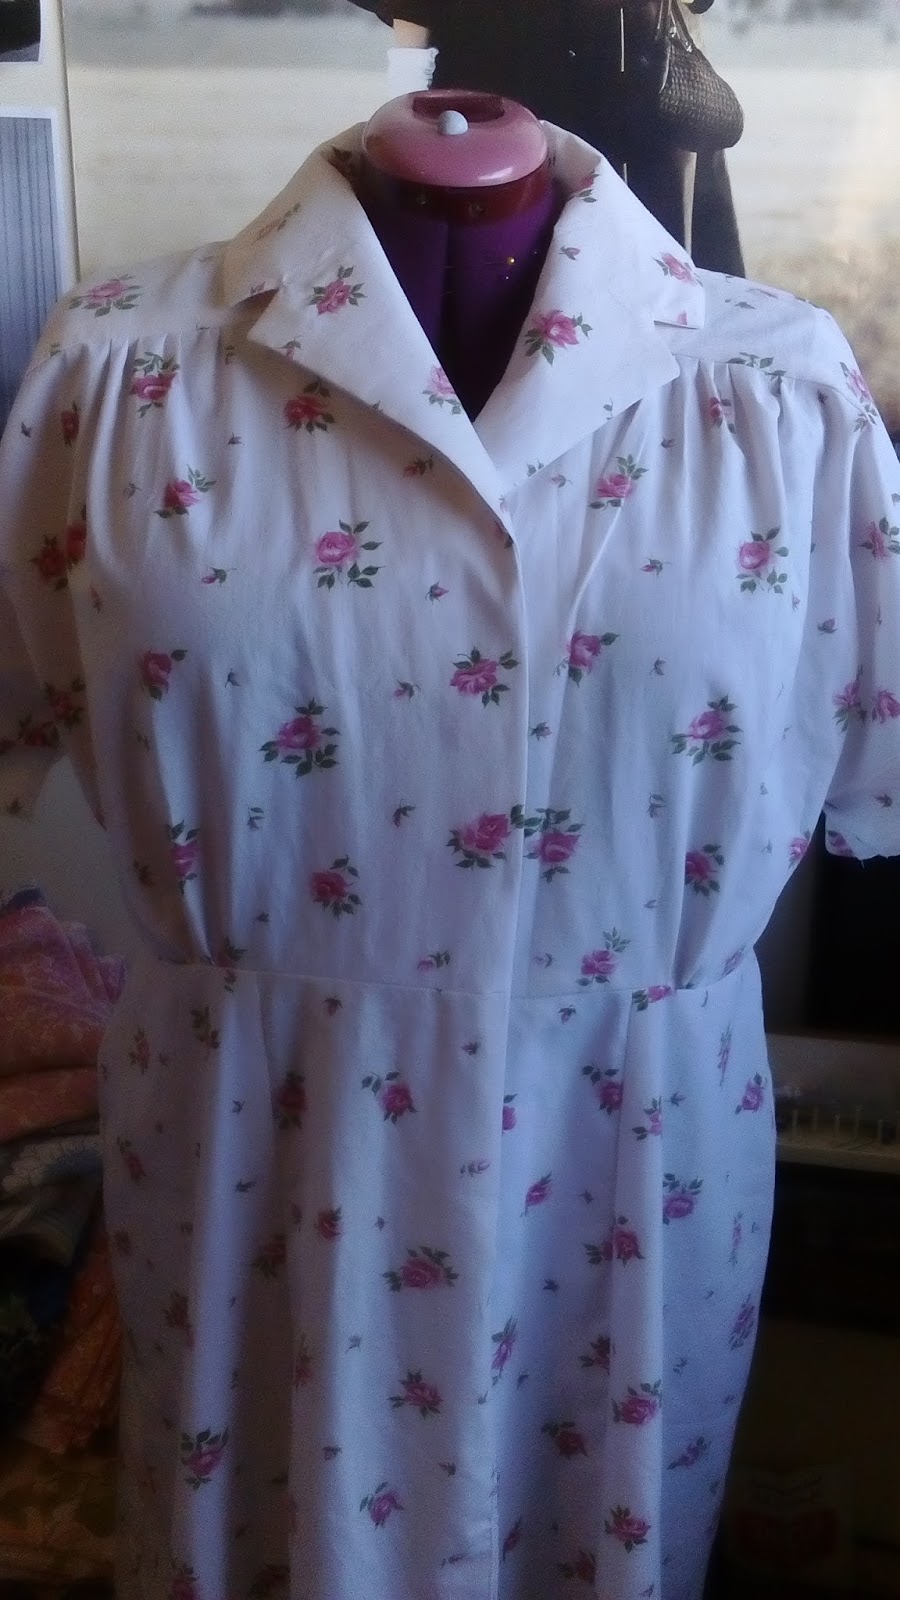
During one of my local CWA groups handicraft meetings, I decided to take this pattern, a floral sheet from an op shop, as well as some pins and scissors along with me to work on during the meeting. I got it all cut out, adding a little extra room at the side seams as I went, by the end of the meeting, and began construction of it when I got home. I changed the design slightly to be an actual shirtwaister, with the buttons going down a little way past the waist, rather than having a button front bodice with a side zip as well. I sewed together the bodice and skirt pieces, leaving only the facings, collar, hem and buttons/buttonholes left to do, and hung it up in my sewing room while I did more work on my Vintage Suit for the Sew-Along.

Floral Sheet

Once I finished my suit, and another slip, I turned my efforts back to my dress. I put it on over my clothes to check the fit, and realised I had forgotten to shorten the bodice, and so it was much too long. So I simply sewed the waistline seam again, about 1.5 inches in, then chopped off the excess with the overlocker.

Just needing the buttons and hem!

Next up I sewed in the armhole facings, then ironed interfacing on to the collar pieces and sewed them on. Then all I had left to do were the buttons and buttonholes, front seam and the hem, which I finished up within an hour or so of leaving the house. I used some pale pink buttons from my stash that aren't quite a perfect fit, but are close enough for me.

Pink Buttons from a cheap mixed
button jar

I've already worn this dress out 3 times in 4 days, as it is lovely and comfortable. I think I need more vintage styles like this one that are slightly less fitted, for those days when I feel a little bleh.

Selfie with my new Erstwilder brooch

I haven't managed to get any nice full length shots wearing this dress yet, but here are a couple unflattering ones of me wearing it while sitting and learning to spin wool (which I will be posting about soon) I've also since found a nice pink belt on my wardrobe that works well with this dress


Has anyone else made McCall's 6236? How did you like it? Or made any dresses from pretty vintage sheets?

Dixie

P.S. I am now up to 5 out of my 10 pledged makes for this years Vintage Pattern Pledge, I might just make it!

Tuesday, 9 August 2016

A Blue Princess Seam Slip

After making my last slip, I wore it nearly everyday, so I thought I should probably make myself another. Rather that use the same pattern again, I decided to use one that would count towards my Vintage Pattern pledge. I know I had a vintage slip pattern that I was in the process of grading up, but of course I could not find it anywhere. So I settled for this pattern.


While not my usual decade for vintage patterns, this one is from 1989, so it is still technically vintage. Besides, when a pattern is made up with the right materials, you can make it look like a completely different decade than when it was designed for. I chose to use a lovely royal blue satin printed with stylised pink roses, that I purchased from Spotlight, from the remnants bin, I think. I only had about 1.5m of it, so I had to shorten the slip a few inches, especially to cut out all the pieces on the bias, which I was fine with, as I found my last one does try and peek out from the hemlines of my dresses and skirts when I wear it underneath. To complement the satin, I searched through my stash for some lace and settled on this lovely soft pink design.


I began sewing by sewing the wrong sides together, as the basis for the French seams. I made the straps, using the same technique as my last slip, then pinned them on to check the fit. It was a bit roomier than I wanted, so I took it in an inch on either side seam. Once I was happy with the fit, I trimmed the seams, then turned the seams around and sewed them right sides together, then pressed all the seams flat. I once again pinned the straps on and checked the fit, which I was pretty happy with.


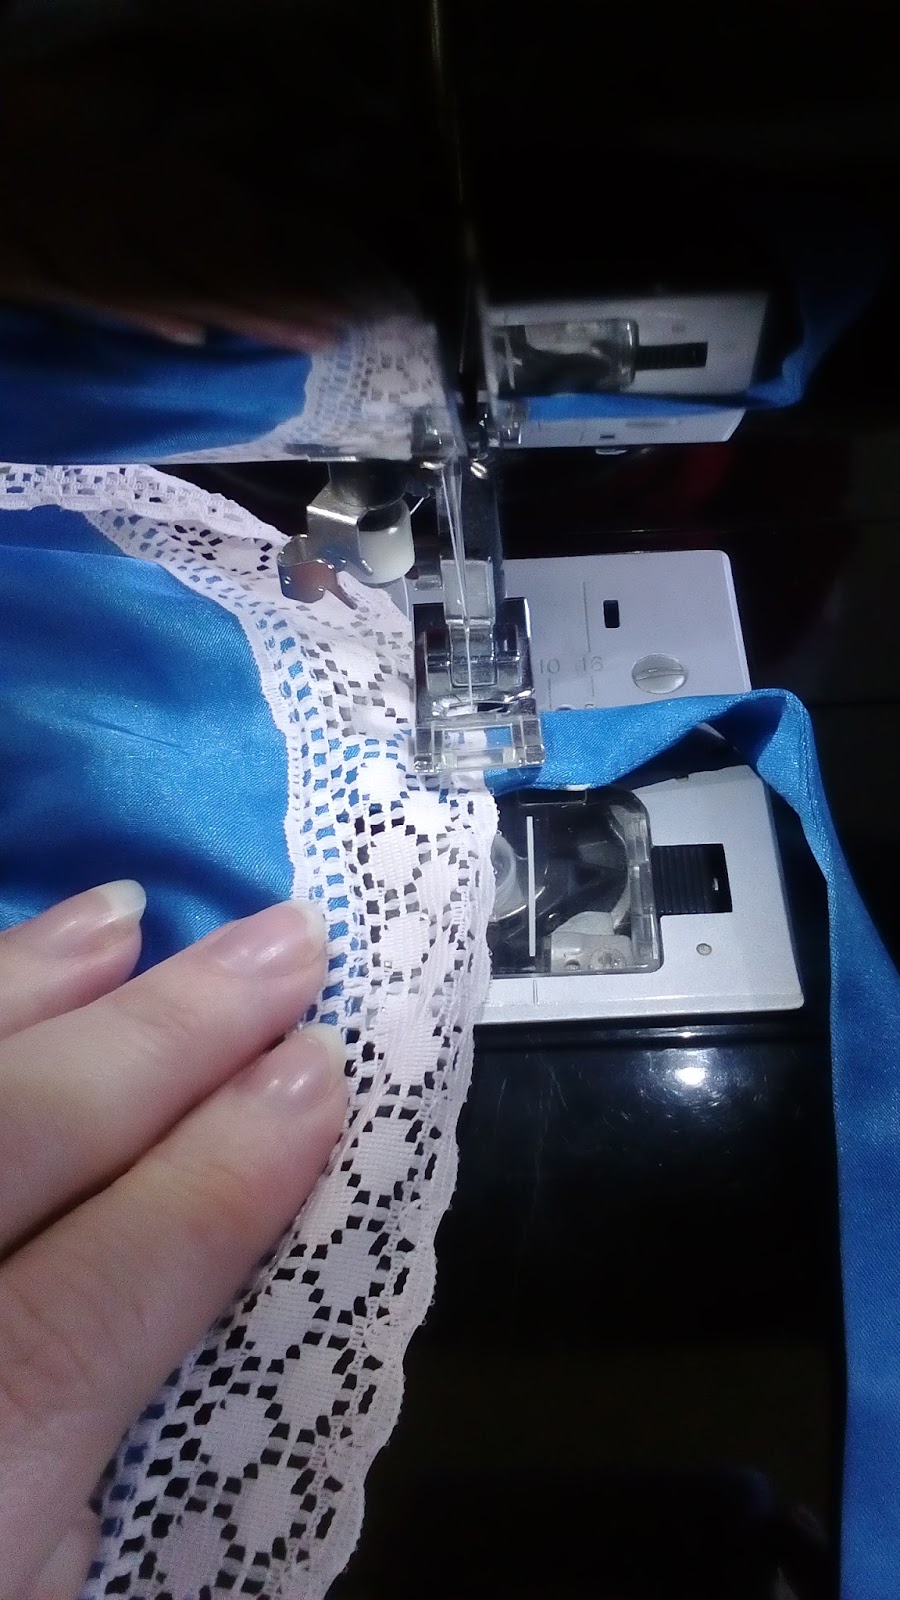
While overlocked seams would have been less bulky, I love the finish of French seams on lingerie. The next step of construction was to attach the lace along the neckline and hemline. The pattern instructions say to stitch the lace on, easing around curves and pinching extra out of the corner, then turning the raw edge down on the inside. So I decided to follow the instructions, overlocking the raw edges before adding the lace. The hemline was finished in the same way.


Unfortunately, while pressing the edges inside the slip, I accidentally melted a small part on the hemline. It's not too noticeable, but I'm still bummed I did it.


After trying it on, I realised the lace was falling down a bit along the neckline, so I stitched it in place on the straps, and that seems to be keeping it up.


While I am happy with how this slip has turned out, I think I prefer the design of the other pattern with the separate cup pieces, although I am sure I will get wear out of this one, as it will be less noticeable underneath my clothes because it is quite a bit shorter. It also looks great with my new Pale Blue Suit!


Anyone else as obsessed with making and wearing slips as I am?

Dixie

PS. This is my 4th Vintage Pattern Pledge make for 2016, so I am still a bit behind on my goal of 10