- Monday, November 30- Golden Rippy kick-off
- Tuesday, December 1- Amanda Rose
- Wednesday, December 2- Rachel from Golden Rippy
- Thursday, December 3- Creative Bug
- Friday, December 4- The Fairy Dust Bin- Rebel & Malice
- Saturday, December 5- Lulu & Celeste- Miss Dixie O'Dare
- Sunday, December 6- House of Estrela- La Casa Cactus
- Monday, December 7- Golden Rippy round-up


As a celebration of the 2nd birthday of the indie pattern brand Golden Rippy, a few sewing bloggers were asked to join in on a Remix the Stitch tour, paying homage to the patterns that they have released over the past 2 years. I was lucky enough to be one of the chosen, and have decided to ambitiously attempt a Mash-up of the flirty Calrose Skirt and the cute Delilah Top.
Seperately, these are both great patterns, and the perfect introduction to working with knit fabrics, so I thought, why not combine them both into one cute, easy to wear dress?
So if you are wanting to attempt the same here's how I did it.


For my fabric I chose to go with a super comfy easy to wear red shirt weight jersey that I had in my stash. While I occasionally feel overwhelmed by the sheer amount of fabric in my stash, it certainly has it's perks! You could totally do this mash up using a firmer stretch fabric for the skirt portion (like a stretch cotton sateen) combined with a softer stretch (like jersey) for the top, especially if you like the colour-blocking look.

I went for the short sleeve version of the Delilah top and cropped it to a length of 17 inches from the shoulder seams, curving in to a length of just under 10 inches from the bottom on the neckline of the front and 14.5 inches from the neckline on the back. As my bust measures 44" I cut the size XL which is supposed to be for a 41-43" bust, but is a relaxed fit, so I figured I could get away with it. If you are unsure what length you need to cut for your top, leave it a few inches longer than you think and you can trim it later. I measured down from my shoulder over my bust down to where I think the waistband will sit (so a bit of guesswork there) then used the waistband piece to approximate the curve that I need. I ended up cutting both of the top pieces with an extra inch at the bottom, just in case.
Cut the skirt pieces for the Calrose skirt as you normally would. For me, this usually entails cutting a larger size for the hips and going down a few sizes for the waist line. As my measurements put me at a size 20 for my hips and a 16 for my waist, and this pattern doesn't feature darts, I have decided to add a few in, rather than have such a pronounced curve on the side seam, as that most likely wouldn't sit very flat. So I've cut the hips at a 20, the waist at an 18, and have added narrow darts to take in the extra size at the waist.

Now for the waistband, which is going to be the trickiest part of this pattern hack/mash-up, but is the part that brings the whole thing together. Grab your waistband pattern pieces and some tracing paper to make your new pattern piece with. First of all take your front waistband piece and trace it.


Then flip your pattern piece up so that the curve is now at the top rather than the bottom and use it as a guide


Repeat the previous steps for the back waistband piece, then cut your waistband pieces from your fabric.
Normally with a dress I would work from the top down, but for this one, I am going to sew the skirt together first, then the top and then sew them together at the waist. This is so I can check the fit every step of the way. Once I know the pattern fits well, I would construct both the front and back separately, then sew them together down the side seams.

So firstly, darts in the skirt pieces, pressed to the centre, then sew the front waistband piece to the front skirt piece, and the back waistband piece to the back skirt piece. If your like me and overlock everything, overlock the waistband seams now and press.

Then grab your front and back and sew them together up the sides seams. Try on and check the fit, make alterations if needed, then when it's all good, overlock and press the seams. Put aside for later.

At this point I was running a bit behind, so I didn't take any more progress photos. I sewed up the top as per the pattern instructions, then ran a gathering stitch along the curved bottom edge. Once I gathered it in I stitched it to the top of the waistband using a triple stretch stitch, and hemmed the skirt using a zig zag stitch.

Dixie
So if you are wanting to attempt the same here's how I did it.

But first, a photo of my boy who thought taking a nap on my cutting table while I taped together the patterns was a good idea


I went for the short sleeve version of the Delilah top and cropped it to a length of 17 inches from the shoulder seams, curving in to a length of just under 10 inches from the bottom on the neckline of the front and 14.5 inches from the neckline on the back. As my bust measures 44" I cut the size XL which is supposed to be for a 41-43" bust, but is a relaxed fit, so I figured I could get away with it. If you are unsure what length you need to cut for your top, leave it a few inches longer than you think and you can trim it later. I measured down from my shoulder over my bust down to where I think the waistband will sit (so a bit of guesswork there) then used the waistband piece to approximate the curve that I need. I ended up cutting both of the top pieces with an extra inch at the bottom, just in case.
Cut the skirt pieces for the Calrose skirt as you normally would. For me, this usually entails cutting a larger size for the hips and going down a few sizes for the waist line. As my measurements put me at a size 20 for my hips and a 16 for my waist, and this pattern doesn't feature darts, I have decided to add a few in, rather than have such a pronounced curve on the side seam, as that most likely wouldn't sit very flat. So I've cut the hips at a 20, the waist at an 18, and have added narrow darts to take in the extra size at the waist.


Freehand a short line up from the side seam in a slight curve, going out slightly, but not as far out as the bottom of the waistband. This needs to go out slightly as this waistband will now be sitting slightly above your natural waistline, up towards your underbust area. Draw a straight line up from the top of other side of the pattern piece, roughly doubling its depth.


I moved it to a slightly different angle to help with this part.
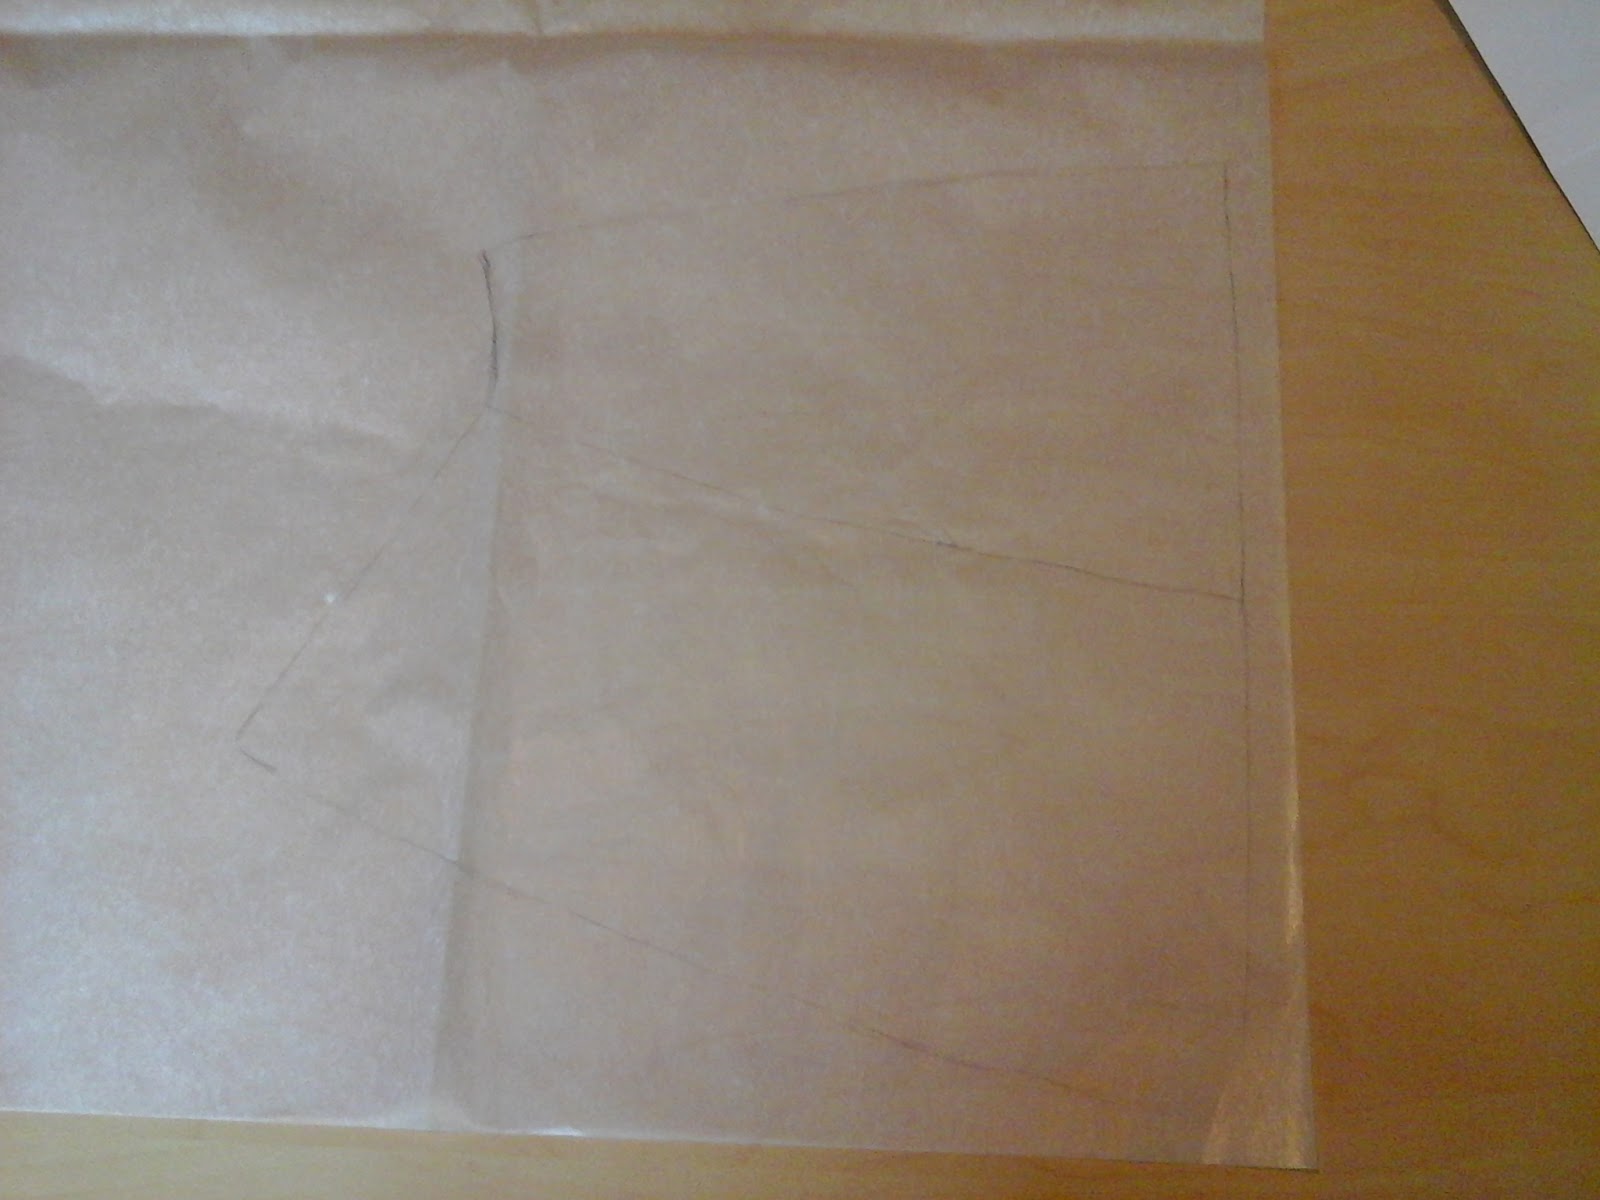
And you have 1 completed waistband pattern piece.

Normally with a dress I would work from the top down, but for this one, I am going to sew the skirt together first, then the top and then sew them together at the waist. This is so I can check the fit every step of the way. Once I know the pattern fits well, I would construct both the front and back separately, then sew them together down the side seams.

So firstly, darts in the skirt pieces, pressed to the centre, then sew the front waistband piece to the front skirt piece, and the back waistband piece to the back skirt piece. If your like me and overlock everything, overlock the waistband seams now and press.

Then grab your front and back and sew them together up the sides seams. Try on and check the fit, make alterations if needed, then when it's all good, overlock and press the seams. Put aside for later.

At this point I was running a bit behind, so I didn't take any more progress photos. I sewed up the top as per the pattern instructions, then ran a gathering stitch along the curved bottom edge. Once I gathered it in I stitched it to the top of the waistband using a triple stretch stitch, and hemmed the skirt using a zig zag stitch.

It's quite late at night, so I can only give you a dodgy mannequin photo for now, but I will do my best to take some proper ones and edit them into this post. It does look a million times better on than it does on my wonky mannequin, it even has a slight Joan Holloway look to it.
Anyway, I have thoroughly enjoyed working with these Golden Rippy patterns, the fit is pretty spot on and the instructions are so easy to understand. If you are looking for new PDF patterns, then I urge you to try a Golden Rippy pattern, I promise you will love it!
Dixie
No comments:
Post a Comment