So there is this vintage reproduction peasant top that is quite popular with fashion bloggers and people into the vintage fashion scene. I don't think I need to mention the brand, but suffice to say it is a very popular brand. I would love to have some of these tops, one in every colour if I could. Unfortunately my budget can hardly stretch enough to buy one, let alone a dozen or so.
And so I decided to make my own, using an existing peasant top pattern I already owned as the base.
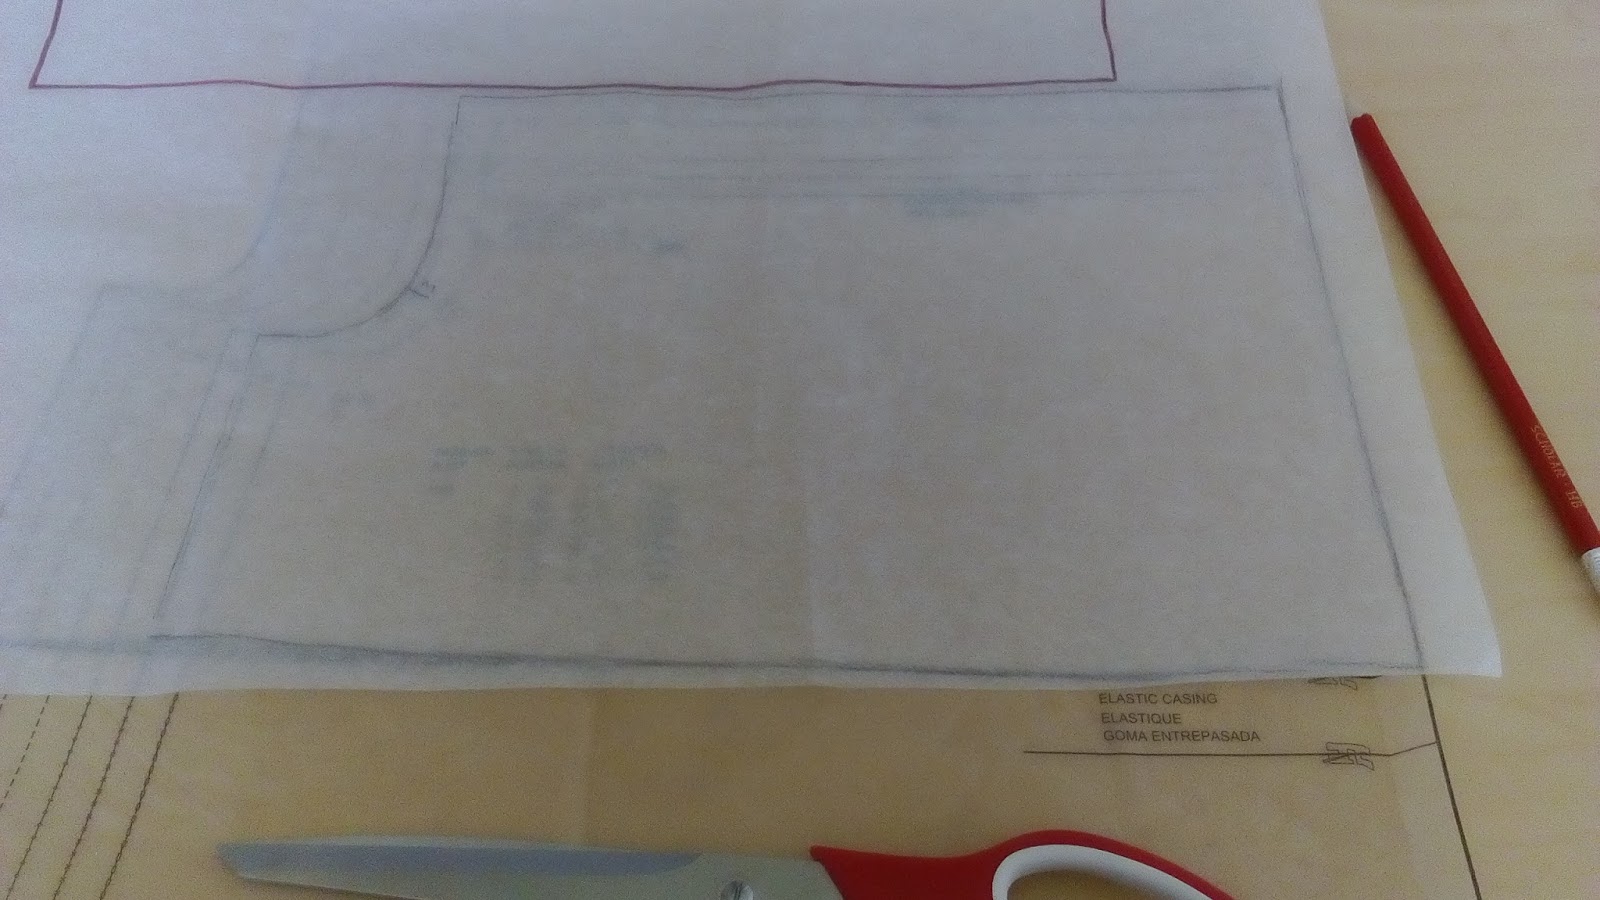
I am using Burda 6791, but nearly any peasant top pattern will work.


If anyone uses this quick pattern hack to make their own brand-name-knock-off peasant top, I'd love to see it!
Dixie
PS. Happy Easter! So far I have spent Good Friday making flat bread and seeing a movie with friends, Saturday relaxing in my pyjamas all day, and today I am just about to head out to a friend's place to go Easter egg hunting with her kids!

Now the good news for all you plus size seamstresses, is that because we are making this top out of a stretch fabric, you need to size down considerably. Which means there's bad news for all you skinny minnies out there, as you will need to grade your pattern down (which is fairly simple with this style of pattern) I usually make about an 18-20 depending on the brand of pattern. For this, I will be using the size 8! Because this pattern is meant for woven fabrics it has a lot of ease in it. The finished garments measurements for the bust is 45 1/4 inches for the size 8. My bust is 44 inches, so this seemed to me like a good size to work with. You can choose what size is best for you based on the finished garment measurements (not the size chart) on the pattern of your choosing.
To start with, I traced the sleeve piece in my chosen size. I decided to shorten it slightly by tracing along the hemming line and using that as my cutting line instead, making my sleeve pattern just under 8 inches long. You can choose a length to suit yourself, but for this style top, I don't think I would go any longer than that.

I also traced the very top part of the front and back pattern pieces. Now this pattern has a very convenient under bust line for the elastic casing, which I am going to use as my seam line, adding 1/2 inch to the bottom edge for seam allowance (which I didn't fit onto the tissue paper pattern, but will add when I cut the fabric) If your pattern doesn't have this line, just roughly measure how long you want the bust piece to be, mine is just under 8 inches long (which made things a little confusing with the sleeves later) If you have small boobs you may want a shorter length, and those ladies who are more well endowed than I will want a bit more length.
Then draft a simple waistband piece. I used the same for the front and back. Use 1/4 of your underbust measurement for the top edge, taper into 1/4 of your waist measurement, then flare out again. If your fabric is particularly stretchy, or you don't have much difference in measurement between your waist and underbust, you could just use 2 rectangles instead.

I chose a light weight stretch fabric from my stash, in a lovely teal colour, that I purchased from an op-shop for $2 (there was plenty left over, perhaps a matching skirt?)
Make sure you cut your pieces with the direction of most stretch going side to side, not up and down. Here is all my pieces cut out:

Sew the sleeves to the front and back but pieces as per your pattern instructions. I sewed all 4 sleeve seams, then the 2 side seams together, using a zigzag stitch so that the seams could still stretch, then overlocked the seam edges. I then overlocked the neckline edge, folded it over and top stitched with a zig zag, leaving a small bit open, to create an elastic casing. As I only wanted a soft pull of elastic, I decided to go with thin, round hat elastic.

Using a safety pin to help pull it though, I gathered the neckline into what looked like a good size, and tied off the elastic. I then set my straight stitch to it's longest length and sewed a gathering stitch around the bottom edge of the bust section.

Grab your 2 waist band pieces and sew them right sides together along the side seams. I chose to use a triple stretch stitch for these seams, as this part of the top will be the tightest fitting. I also overlocked along these seams.

Using the bobbin thread of the gathering stitches, pull in the bottom edge of the top section to roughly match the top of the waistband piece (doesn't have to be exact, as you can adjust it as you go)

Distribute the gathers evenly and pin the top to the waistband, right sides together, matching the side seams, and sew. I again used a triple stretch stitch, then overlocked

Now all you have left to do is the elastic casings on the sleeve edges (done the same way as the neckline) and hem the bottom edge (and probably give it a press, but hey, its a knit fabric and I'm lazy)

And here it is on. Excuse the bra straps, my only strapless bra is red, and I'm pretty sure it would have shown through the fabric a little with this top.

While it is by no means perfect, it's certainly wearable. I think next time I make one of these tops, I will go up one size, and make the arm holes a bit deeper, as they aren't deep enough to have the sleeves sit on my shoulder, only off (although I do like how it sits) I will also probably make a bit more effort to get my gathers sitting more evenly under my bust. All in all I think it is a pretty cute, wearable top, that I now need in every colour!
If anyone uses this quick pattern hack to make their own brand-name-knock-off peasant top, I'd love to see it!
Dixie
PS. Happy Easter! So far I have spent Good Friday making flat bread and seeing a movie with friends, Saturday relaxing in my pyjamas all day, and today I am just about to head out to a friend's place to go Easter egg hunting with her kids!
Now I see it I'm pretty sure I know what brand you're referring too :) Your version look great - well done!
ReplyDelete