Monday, 13 July 2015

The making of My Wedding dress

I was going through some of my photos that I backed up from my tablet before going overseas on our honeymoon, and I came across quite a few from when I was sewing my wedding dress. So I thought I might share the process of making it with you guys as suitable celebration of my 1st wedding anniversary (which was 2 days ago, I'm running a bit late....)


Look how Poofy my skirt is!!!
My Husband is a very romantic sort, so he said he didn't want to see the dress before seeing me walk down the aisle in it. So I decided to sew the dress at my grandparent's house. My Grandma was a tailoress many years ago, and they only live about 10kms away from me, so it was a great idea, and my grandparents loved seeing the dress come together. While I was not worried about managing the construction of this dress, I was very worried about marking the fabric at any point during the process. So my grandma got a large white sheet out of her linen cupboard to cover the table with whenever I would come over to work on it (which was usually a few days a week) And when it got to the point of being on my mannequin, we used the sheet to wrap around the mannequin, which I would then leave in a safe corner of the spare bedroom.

Before getting to the point where I could start any construction, I (insanely) decided to painstakingly hand bead pieces of lace appliqué, which I bought cheap from Ebay and you can still get them here. I bought 2 lots of 10 pairs, which was way more than I needed, but a few had some tiny black marks and some were a little rough. I'm guessing they are factory seconds, but I just picked out the good ones and still had way more than I needed for only $40. I used a mixture of white and clear seed beads (Lincraft), white faux pearl beads and clear swarovski crystal beads (both Spotlight), which I sewed all over my lace pieces using invisible thread. I also had to use an incredibly fine needle to get through both the small seed beads as well as the tightly embroidered lace. The amount of time I stuck the needle into my finger with the BLUNT end of the needle was a bit ridiculous, it was that fine of a needle. Any time my fingers got wet and pruney, you could see all the pin holes all over the skin of my finger tips. 

Un-Beaded lace pieces pinned to a mannequin, to give me a rough
idea of  how many I'd need. I ended up using a very different layout

My first hand beaded lace piece!
When I was finally able to start construction on the dress (or more specifically, the muslin), I started by using some rougher quality tulle from my stash for the bodice overlay and some horrid print furnishing fabric for the strapless corset part of the bodice. For the pattern I borrowed the pattern pieces from the bodice of Butterick B5605, as the seam-lines would work for the corset part of the bodice when the pieces were cut down, and when used for the tulle and lace overlay, it wouldn't require separate sleeve pieces to be inserted, as I only wanted little cap sleeves, and wanted to minimise how many seams I would need to sew in the tulle.
I originally used the size 18, but after making the tulle overlay muslin, decided to go a size smaller, as the tulle has a bit of stretch to it, and I wanted it well fitted. I also cut the front into a slight V neck, with the plan to trim the final version into a V neck that  met the top of the corset bodice.
The first muslin of the corset bodice  was tweaked in a few places, particularly the top section of the seams along the bust, where I had to take it in a bit to get it to fit well.

1st muslin
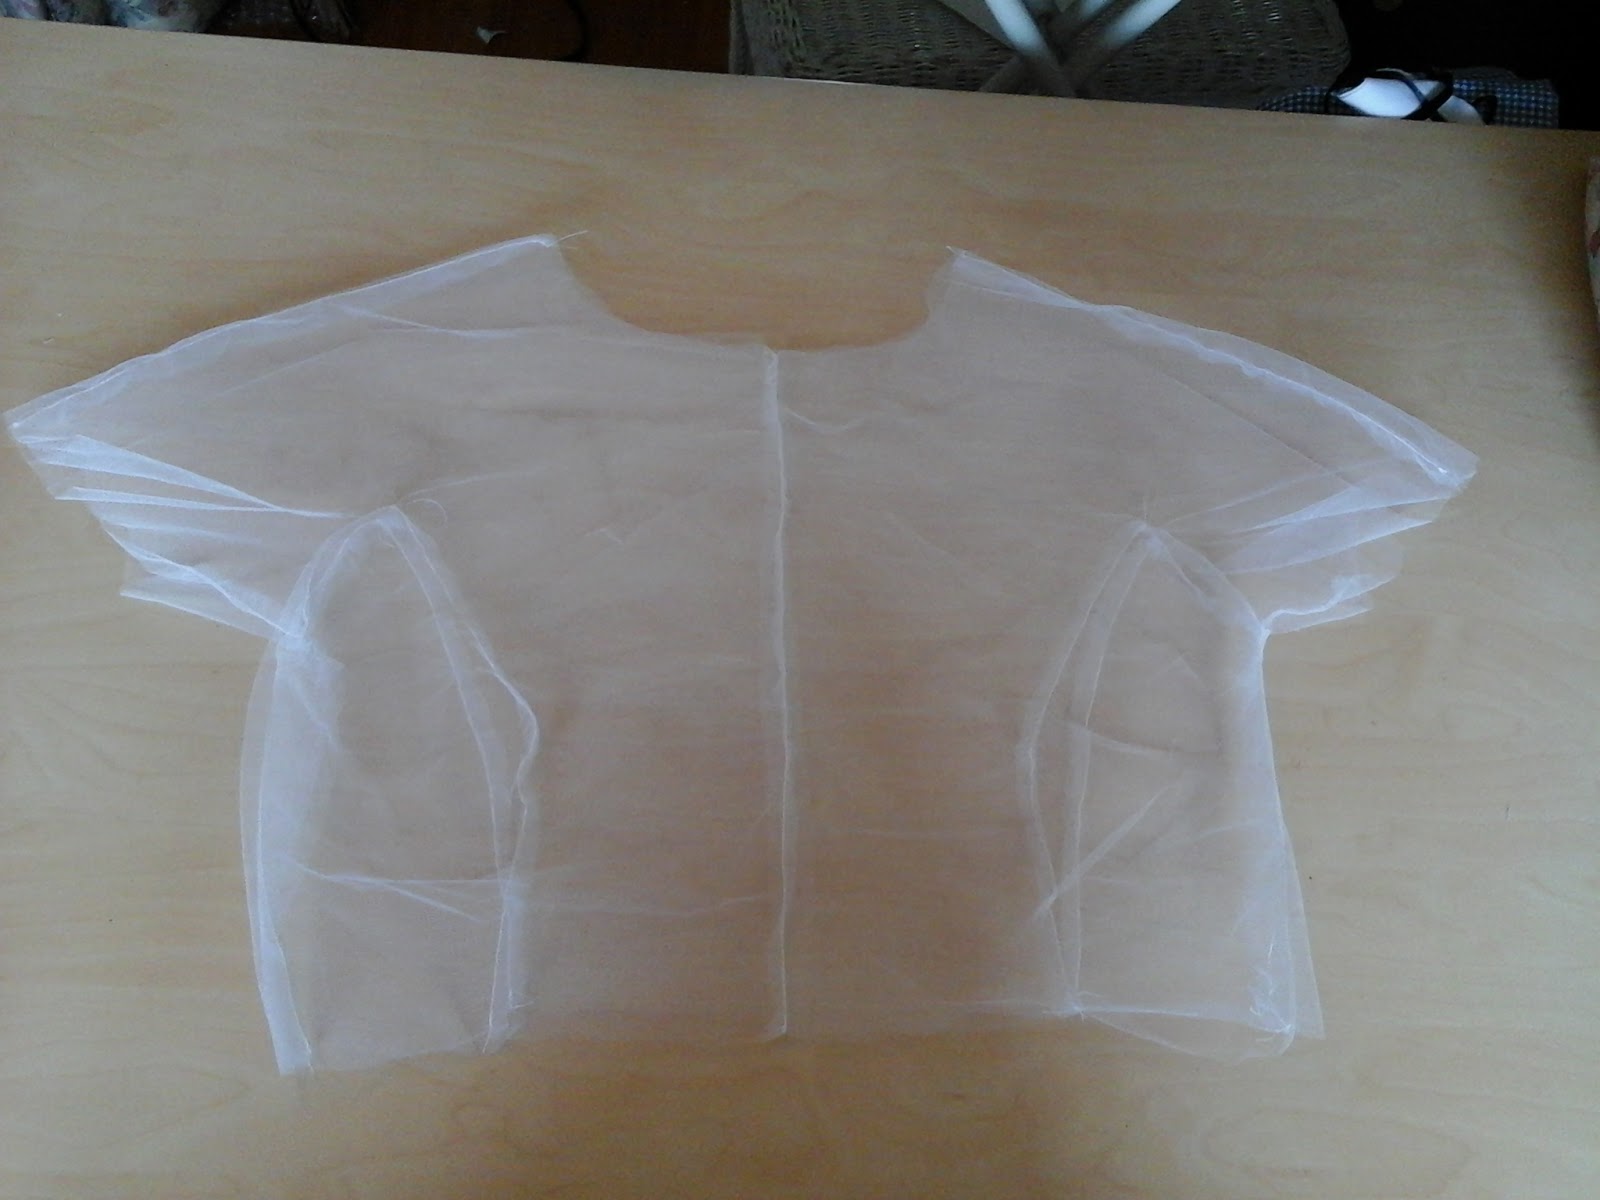
Tulle overlay muslin
I then made a wearable muslin of the bodice, using some light purple satin from my stash. I lined it and put in boning, just like I would be for my wedding dress bodice. Then, just because I could, I gave it a full length circle skirt, put a zip in the back (instead of buttons like on the wedding dress) and wore it for my hens night! (and again for my anniversary party 2 nights ago)

Hen's night, chocolate covered strawberries and cocktails
Singing Karaoke
By now I was pretty confident with my pattern, but nevertheless I was still nervous to begin cutting into my good satin. Luckily, when my dad and I went shopping for my wedding dress fabric, we made sure we had extra, just in case I stuffed up (I didn't, and now I have plenty leftover to use for other projects, like christening dresses, in the future) But I got over my hesitation, and got everything cut out. I sewed together all of the pieces for both the lining and the outer layer (the lining pieces also had interfacing ironed on to them)

The Pattern cut out, partially sewn
both layers sewn up

Then all the seams were pressed open and clipped where necessary. 


Boning channels made from single fold bias tape were then sewn along each seam on the lining, and Plastic boning was cut and trimmed to fit each channel.

Outside layer and lining layer with boning channels

Close up of Boning channels

Lining pinned to my mannequin
The outer bodice layer and the bodice lining were then sewn right sides together along the top edge, which I then clipped at the curves, turned right sides out and pressed. The bottom and back edges were left raw at this point

Bodice pinned to the mannequin
When Shopping for the fabric with my Dad, I wanted to make sure I had plenty of tulle for a lovely poofy skirt. We got a lovely fine bridal tulle (the ladies at The Fabric Shop in Robina were lovely and colour matched all the satins and tulle to my lace) I thought 20m would be a good amount to get, but I think there only ended up being 19m, so that is what we got. The tulle was a very wide width, and because I was only making a tea length dress (and I'm short) I managed to cut the width into 4 pieces that were each 28 inches wide and 19m long. I gathered 2 of these lengths up, separately, to the waist measurement of the bodice, and pinned both layers to the mannequin with the corset bodice, and it looked like this.


At this point, I decided to only use 2 layers of tulle on the dress, and to use the rest of it to create a super full tiered petticoat, which I just sewed at home, as I figured it wouldn't matter if my Husband saw it. He still stayed out of the room whenever I was working on it anyway.

Using a slightly lighter satin with better drape than the stuff I used for the bodice, I cut out a 3/4 circle skirt for the underskirt of the dress, the side seams were sewn together, then I pinned it to my mannequin, with the 2 layers of tulle and corset bodice, to let the bias hang. To give my grandparents an idea of the look I was going for, I draped a few pieces of lace over the bodice (I didn't want to put pin marks in it) tied a red velvet ribbon around the waist and sat my sparkly shoes underneath.


The final version of the tulle bodice overlay was then sewn together, and my hand beaded pieces of lace appliqué were carefully hand stitched on. Some pieces had to be cut into smaller pieces to fill gaps/not overlap but as I had reinforced my stitches between each leaf/petal on the lace, I wasn't worried about any of the beads falling off. I then basted the tulle and lace overlay to the corset part of the bodice along the waistline and back edges. It was then I tackled the pearl buttons and button loops on the back of the bodice. I used 18 off white pearl buttons (I bought 25, just in case) and for the loops, I used a store bought thin satiny rope. In hindsight, I now wish I than made fabric rouleau loops instead of using this pre-made stuff, as it was a bit too slippery, and a couple of the buttons came undone during the evening. If I had made the loops a tiny bit tighter, that may have helped as well. From doing a bit of research, I decided the best way to do the button loops was to sew them to a piece of cotton tape, then sew that tape into the back edge of the bodice, so I wouldn't be fighting with the bulk of the garment, whilst also trying to measure and make sure the button loops were all even. The other back edge was then folded in and top stitched closed, then the pearl buttons were then hand sewed about 10mm in from the edge, through the plastic boning.

The 3 layers (2 tulle and 1 satin) of the skirt were then sewn together, then the bodice and skirt were sewn together. I went to put a zip in the back of the skirt, only to realise I had forgotten to bring one with me. and my grandma didn't have one in her stash either. However, in my wedding dress supplies, I did have the bodice of my mother's wedding dress (that's all that's left after she made a christening dress from it for me and my brothers) including the back zip. so I thought it would be a good re-use of the zip (even if it was a bit long for a skirt zip) and sewed it in. Each layer of tulle was sewn separately at the back seam, leaving a gap at the top for the zip. With the dress on my mannequin I trimmed the parts of the underskirt that had stretched on the bias and now stuck out underneath the tulle, as well as any wonky bits of tulle, then took the whole thing off and hemmed the underskirt.

Now that the dress was essentially done (apart from the ribbon at the waist, which I still hadn't decided if I wanted or not) I tried it on.

Uh Oh!

The tulle overlay of the bodice was too long! Causing it to droop and excess to fold over itself at the waist. This was pretty much my pivotal moment in my sewing career when I realised that I would need to cut about 1 inch off the bottom of bodice pieces for nearly every pattern to get it to fit me right. 

Luckily, I didn't have to completely unpick the dress to fix the issue. My Grandma and I decided the best way to fix it, would be to carefully unpick the lace appliqué pieces from the shoulder seams, and take in the bodice length from there. Once the shoulder seams were taken in, the lace was trimmed to fit and re-sewn down. Then everything fit perfectly!

The few days leading up to the wedding were quite hectic, baking and decorating the cake, cleaning all the jars for the lolly buffet, taste testing the lollies for the lolly buffet, organising all the decorations for the venue (lots and lots of fairy lights, centrepieces, doily bunting, photobooth backdrop and supplies, etc)  So I didn't actually get around to hand sewing the red velvet ribbon to the waistline of my dress until the night before. But I did get it done in time, so that's all that matters, right?

Working on the cake in my pajamas the day before the wedding


Getting the candy buffet ready
Along with the dress, I also made a few other things as well. I'm not sure how I managed to fit it all in whilst sewing my dress, but I did!

In my opinion, a wedding dress is not complete without a matching veil. However, I felt the style of my dress did not lend itself to some huge tulle veil, and I wanted my hair in Marilyn Curls, so I didn't want anything that would take too much away from the hair style. So I made myself a little white birdcage veil, attached to a clear hair comb, decorated with a piece of my hand beaded lace. To finish it off, I attached a single lace flower (about 3-4cm big) that was from my Grandma's wedding dress, that I had dyed bright red, smack bang in the middle. The lace flower from my grandma's dress is one of many (about 20 if I remember correctly) that adorn the neckline of her dress. She told me she ended up using more than she originally planned, because when she was making her dress, she didn't see a small flaw in the fabric until she was finished, and it was on the front of the bodice, so she used them to cover it up. A few of these flowers have since been removed, for use in my mother's wedding and my Aunt's wedding. Looking back at photos, I don't know where my mother or Aunt used theirs (I should ask) so I really love the fact that mine was used really visibly on the top of my head.

I've drawn up a simple diagram in paint to explain how the veil part was shaped:

My veil
I also Sewed Capelets for my 2 bridesmaids and a full skirted jacket for myself. I used the free 1940's style mini Cape Pattern from Sew Vera Venus, I just doubled the length. I made them from White costume fur (about $15p/m from Spotlight) and lined them with white polar fleece, to try to keep them as warm as possible. To keep them closed, I used white ribbon for a button loop, and a large red with white polka dot button.

The Bridesmaids
My Jacket was made with Gertie's full skirted Jacket pattern, Butterick B5824. I used the size 18 and about 5m of costume fur from spotlight. In hindsight, I kinda wish I had used better quality faux fur, as this cheap stuff has now started to look a little rough and matted in spots, and was the tiniest bit sheer (which wouldn't have been such a big problem, had I not used a print for the lining) But it was $75 just for all the cheap fur I needed, so I just wasn't able to afford better quality fur at the time. Just for funsies, I lined it with a light blue satin, with a red cherry print, which I also used for the side seam pockets. Rather than attempt putting buttonholes in faux fur, a friend of mine suggested attaching buttonloops to the edge of the front. So I added 2 button loops, and 4 white buttons (2 functional and 2 not) It was toasty warm, which I was thankful for, given that our wedding was in the middle of Winter. My Bridesmaids were probably cursing me for making them wear  knee length dresses, with only stockings and capelets for warmth (Sorry) but they survived in the end, especially when we got to the reception venue with its lovely warm open fire.
Butterick b5824

As mentioned previously, I also made a tiered petticoat, that was super full at the bottom tier to balance out the bulk at the waist created by the 2 gathered layers. I won't go into construction details, as there are many tutorials out there explaining how to make tiered petticoats. Suffice to say I used a LOT of thread to gather up that much tulle.

It's a bit less poofy now, I've worn it a lot
since the wedding
But it is still pretty full!

If you've read the whole post to here, I hope you enjoyed it! If anyone is hoping to make a similar dress and you want anymore information on the construction that I didn't cover here, I would love to here from you!

Dixie


Tuesday, 7 July 2015

Birthday Goodies and Rag Curls!

Yep, I just celebrated my 25th birthday last Friday!!!

I was spoilt rotten, with flowers from both my boss and my dad, a vintage sewing machine from my husband, a Royal Albert tea cup in a 1950's design from my In-laws, lovely white tablecloths and napkins from my Grandma, Assorted goodies from my Nanna, including a pink crocheted cup and saucer, decorative thimbles and a USB drive full of knitting and crochet patterns.

Along with my flowers, I was also lucky enough to get some birthday money from my dad, so I went on a bit of a shopping spree!

 I Finally managed to get the Gertie capri pattern in the larger sizes, as well as a few other repro patterns from Spotlight, a 1946 home journal with its patterns, plus a few bonus pattern pieces from a 1935 weigels pattern. Some more bra making supplies, vintage buttons, a whole heap of beads and things (10 for $1 at spotlight) more overlocking thread, 2 vintage toy sewing machines (probably from the 70's) and some cute cherry print vintage fabric!


I've also finally figured out the secret to successful rag curls!

Before when I tried rag curling my hair, I would wash my hair and tie it up in rags when it was almost dry, but still a bit damp. No matter what I tried, I could never get them to fully dry by the next morning. Not even by using my retro Lady Sunbeam hair dryer (the type with a bonnet you put over your head) and using lots of small sections of hair. So I decided to try it a different way. I sectioned my hair into 5 sections and just used the rags to curl the ends, while my hair was dry, then showered as usual, trying my best not to get my hair wet, but not using a shower cap, so that the steam would hopefully work on my curls. After a good night's sleeps I took the rags out, brushed out the curls and had gorgeous 40's style soft curls.

At work last week, rocking some 40's curls
So Now I've been rag curling my hair nearly every night! The curls hold all day (and even the next day if I don't re-curl them or get my hair wet) I haven't even needed to use any product, and no nasty drying heat styling. I was getting a bit fed up with my longer hair, so I'm so glad I've finally found an easy style that I love!

Before Shower: about 7 sections of hair tied up in rags. I curl my sections downwards, but tie them on top as that's easiest for me. There are plenty of in depth tutorials out there, this is just a quick outline of how I do mine. I was just using 5 sections, but I was finding the back sections weren't holding the curls as good as the front was, so I changed it to 7 slightly smaller sections


In the morning: after Coffee and make up obviously!


How the curls look after I've taken out the rags, but haven't brushed them out yet:

Before brush out

Not sure why the colour went so weird in these...

Then the Brush out! I mostly use my fingers to loosen and separate out the curls, then I use a brush to lightly brush, mostly the top to smooth it a bit and the back to get rid of any knots that may have formed overnight.


And with glasses...
Excuse my dirty old mirror...

I also Coloured my hair for my birthday. I think I've been binge watching too much Bomb Girls and Mad Men while sewing, so I've been having ginger envy. I mean, do Kate Andrews or Joan Holloway ever have a bad hair day?  I just went with a cheap box colour, and it turned out really pale, and more of a strawberry blonde (perhaps as my hair was so light before) and while I really love it, I'm hoping the colour will deepen when I have to re-dye my regrowth in a few weeks.


Dixie O'Dare

P.S. I finished another dress! Butterick B6094 in a red tartan that you can see above. I will be posting about it's construction when I can convince my husband to take some photos for me.

Friday, 26 June 2015

A Pineapple full of Tea!

Ok, so this post isn't actually anywhere near as exciting as the title suggests...

But I did make a Pineapple Tea cozy, that I'm pretty proud of. Not bad for my first attempt at a crocheted tea cozy I think.

For the basic Tea Cozy pattern I used this tutorial (with a few changes) hoping the groupings of 3 double crochets would give a slight pineapple skin texture. There are many better patterns out there for novelty pineapple tea cozies, but I wanted to start simple.

The only yellow yarn I could find at home was some old Checkheaton 5 ply wool. I have no idea if wool is a good idea for tea cozies, it probably isn't, as wool can shrink when it gets wet and/or hot. Oh well.


So I began. just like the pattern says to, by making 72 chain stitches, then single crocheting back along that entire chain.


Then there is some drastic decreasing to shape it over the top, as per the pattern instructions. I stopped when I reached the lid handle.

For the leaves at the top, I started out following this pattern, but made it bigger by going around the outer edge again, as well as making one end flat instead of pointed.

I made 6 leaves and joined them to the top, overlapping each leaf at the edges.


Then I used the same pattern to make an apple tea cozy. I followed the base pattern the same way, but instead of finishing when I reached the teapot lid handle, I changed to a dark brown yarn and continued to decrease as I went up, created a stalk for the apple. I then made another leaf the same as the pineapple ones and gathered the flat edge into itself and attached to the base of the stalk.


I have been working on quite a few more Novelty Tea Cozies, which will be for sale Tomorrow (Saturday) at our CWA Winter Tea Rooms event. If your a local to the Hunter Valley, come along to our CWA rooms on Vincent St Cessnock, between 10am and 3pm to enjoy some delicious cakes and a pot of tea, and to peruse all the lovely handmade goodies that will be for sale. All money raised goes towards the many charitable organisations that CWA Supports (such as draught/flood relief funds,  Doctors without Borders, Lyme disease awareness)

I also made a rainbow one

with a coordinating rainbow button

I attempted a cake one as well....
Plus there a a few more....


Dixie


Monday, 22 June 2015

Sewing a bullet bra

I have wanted to try my hand at sewing my own lingerie for some time now, but haven't quite gotten around to it. I did muddle my way through a self drafted bullet bra when I was competing in Miss Pinup Australia, and while it looked ok for the stage, I didn't have a very good understanding of bullet bra construction, and it ended up being more like a modern bra with a pointy cover.

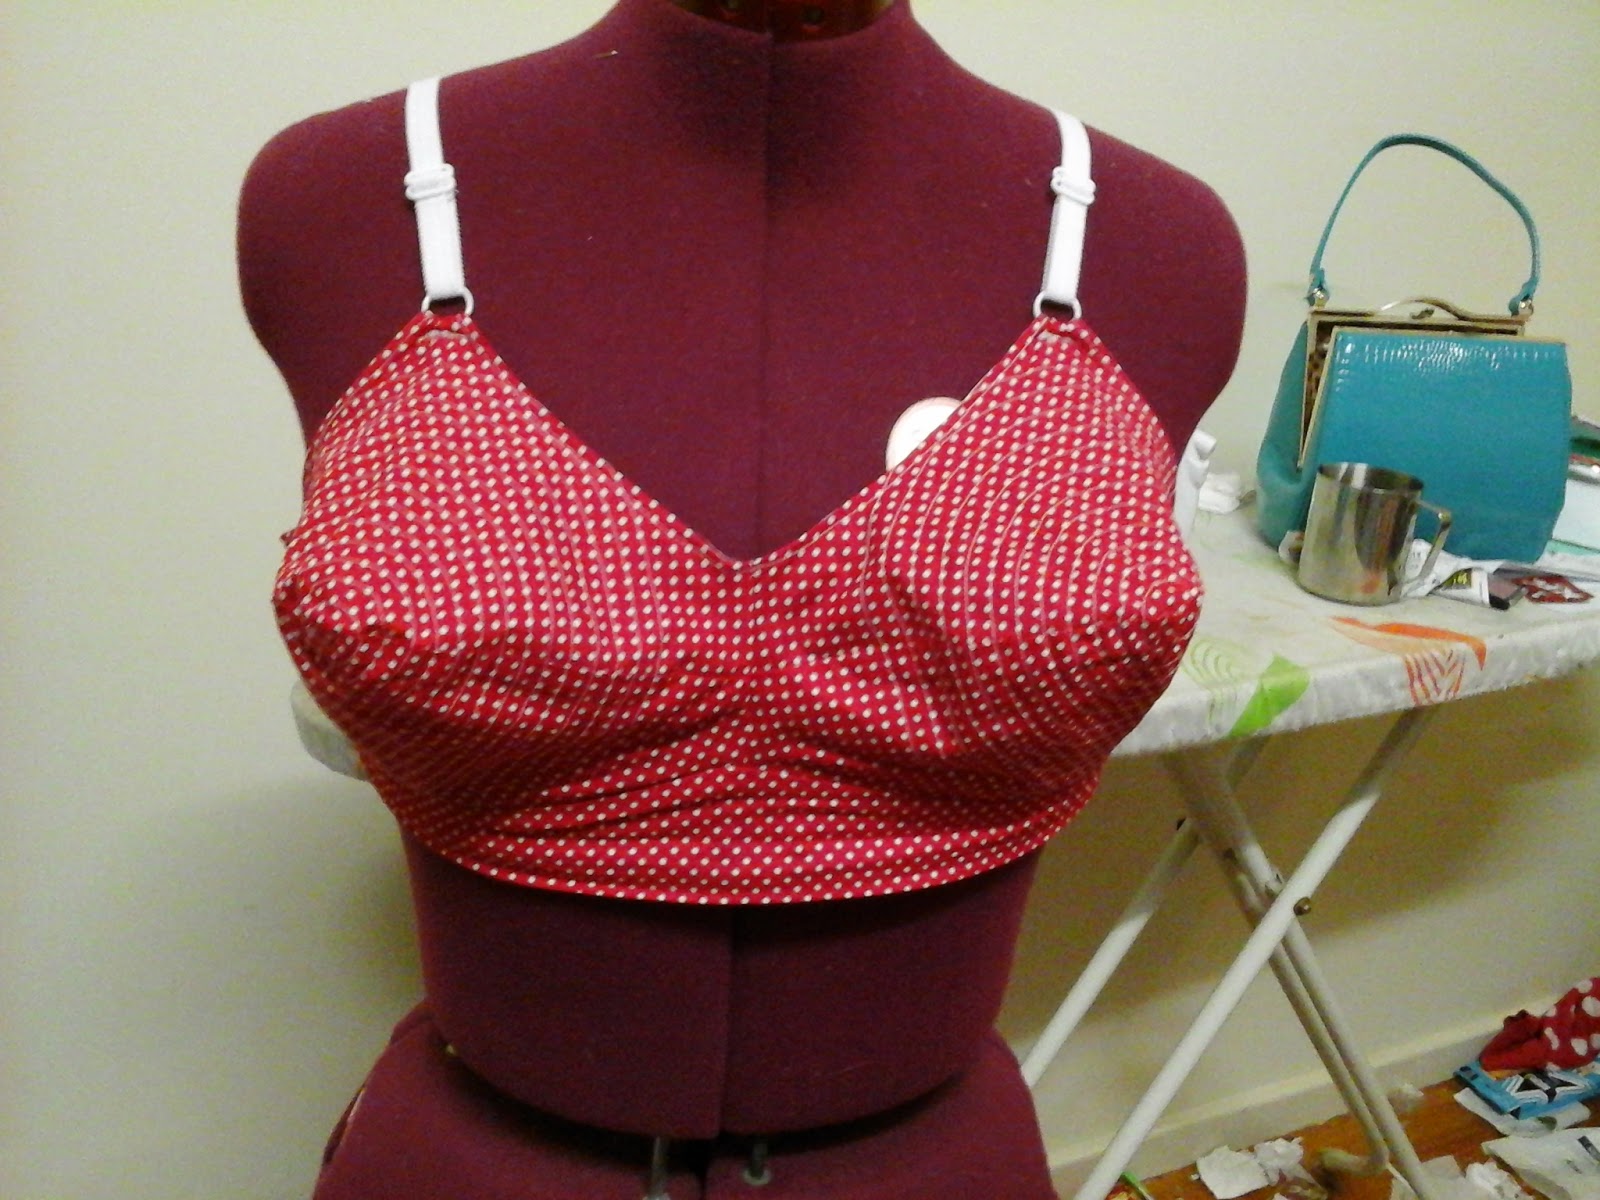
So I thought I'd have another go using the free pattern from Va-Voom Vintage using some scrap red and white polka dot cotton leftover from when I made a Minnie mouse blanket for my cousin's daughter almost 2 years ago. First of all I cut out all the pieces I needed. I was a bit short on fabric so one of the back pieces is a different red and white polka dot cotton, which has much larger polka dots, but close enough for my first go.

The cut out pieces
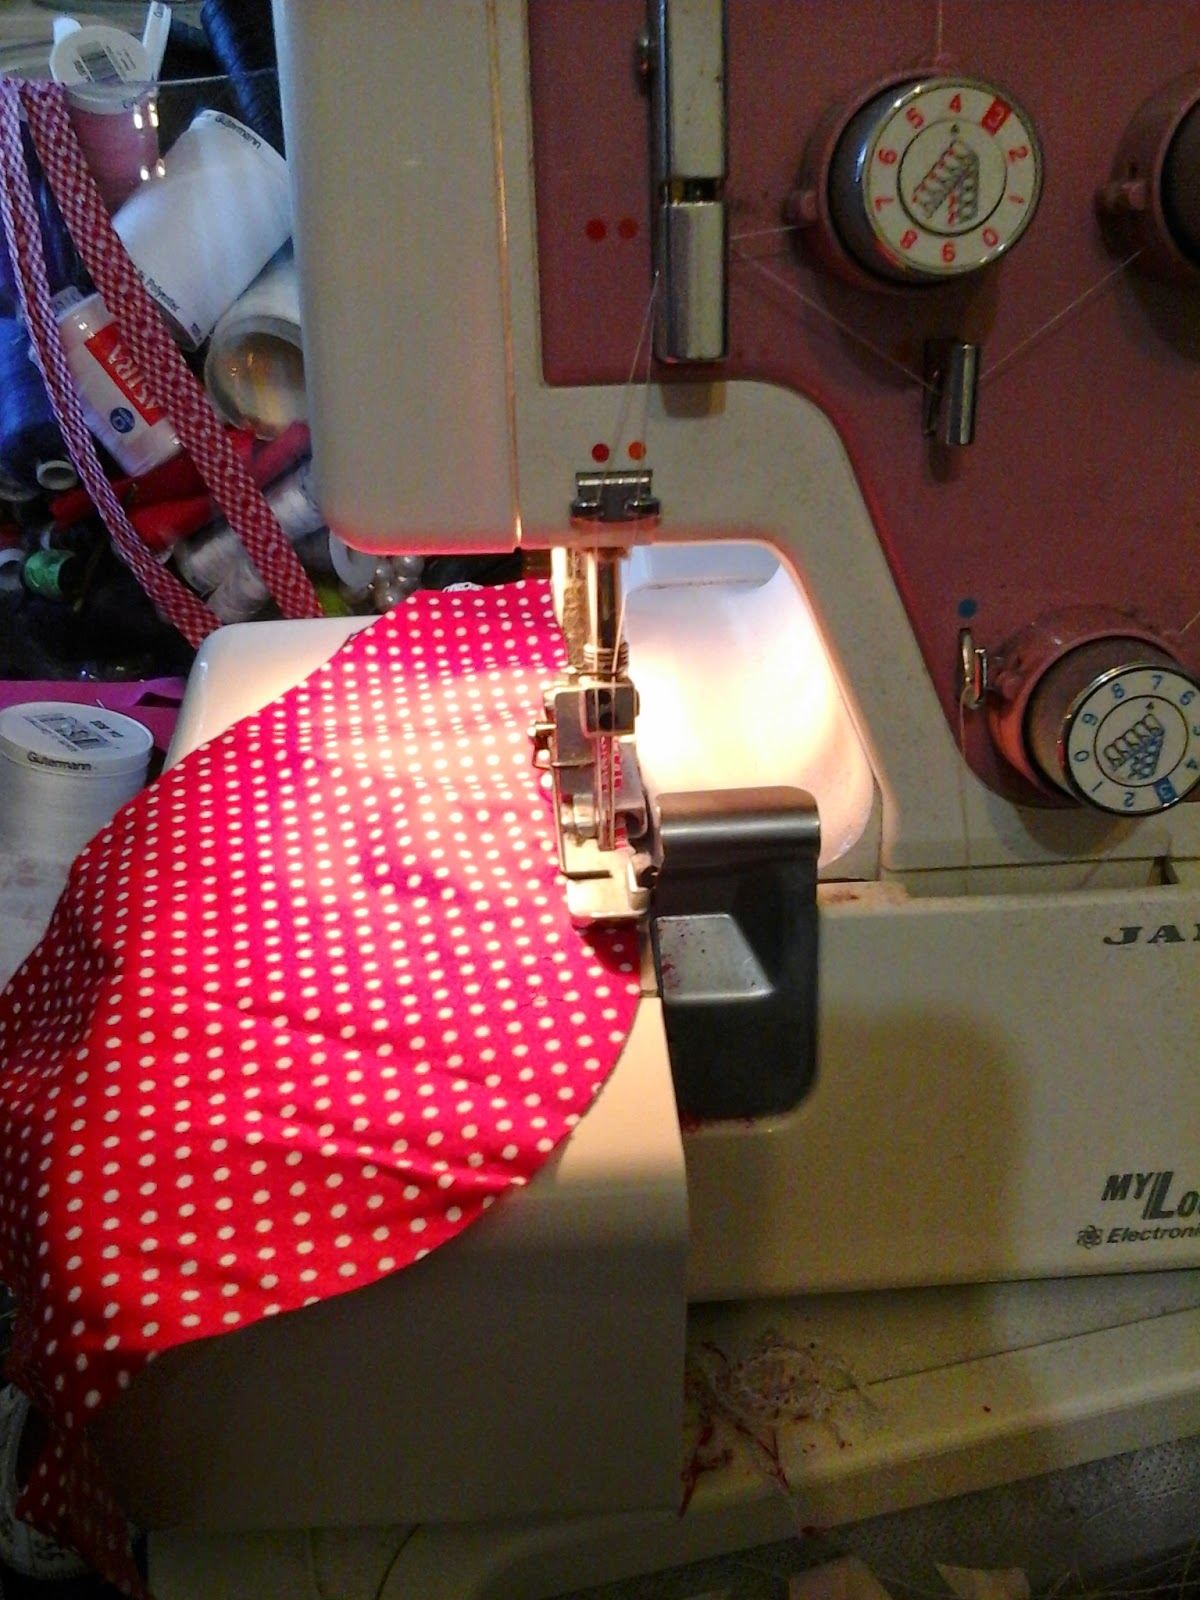
I then overlocked around the edges of the pieces and sewed the upper cup to the lower cup for both cups.

Overlocking around the edges
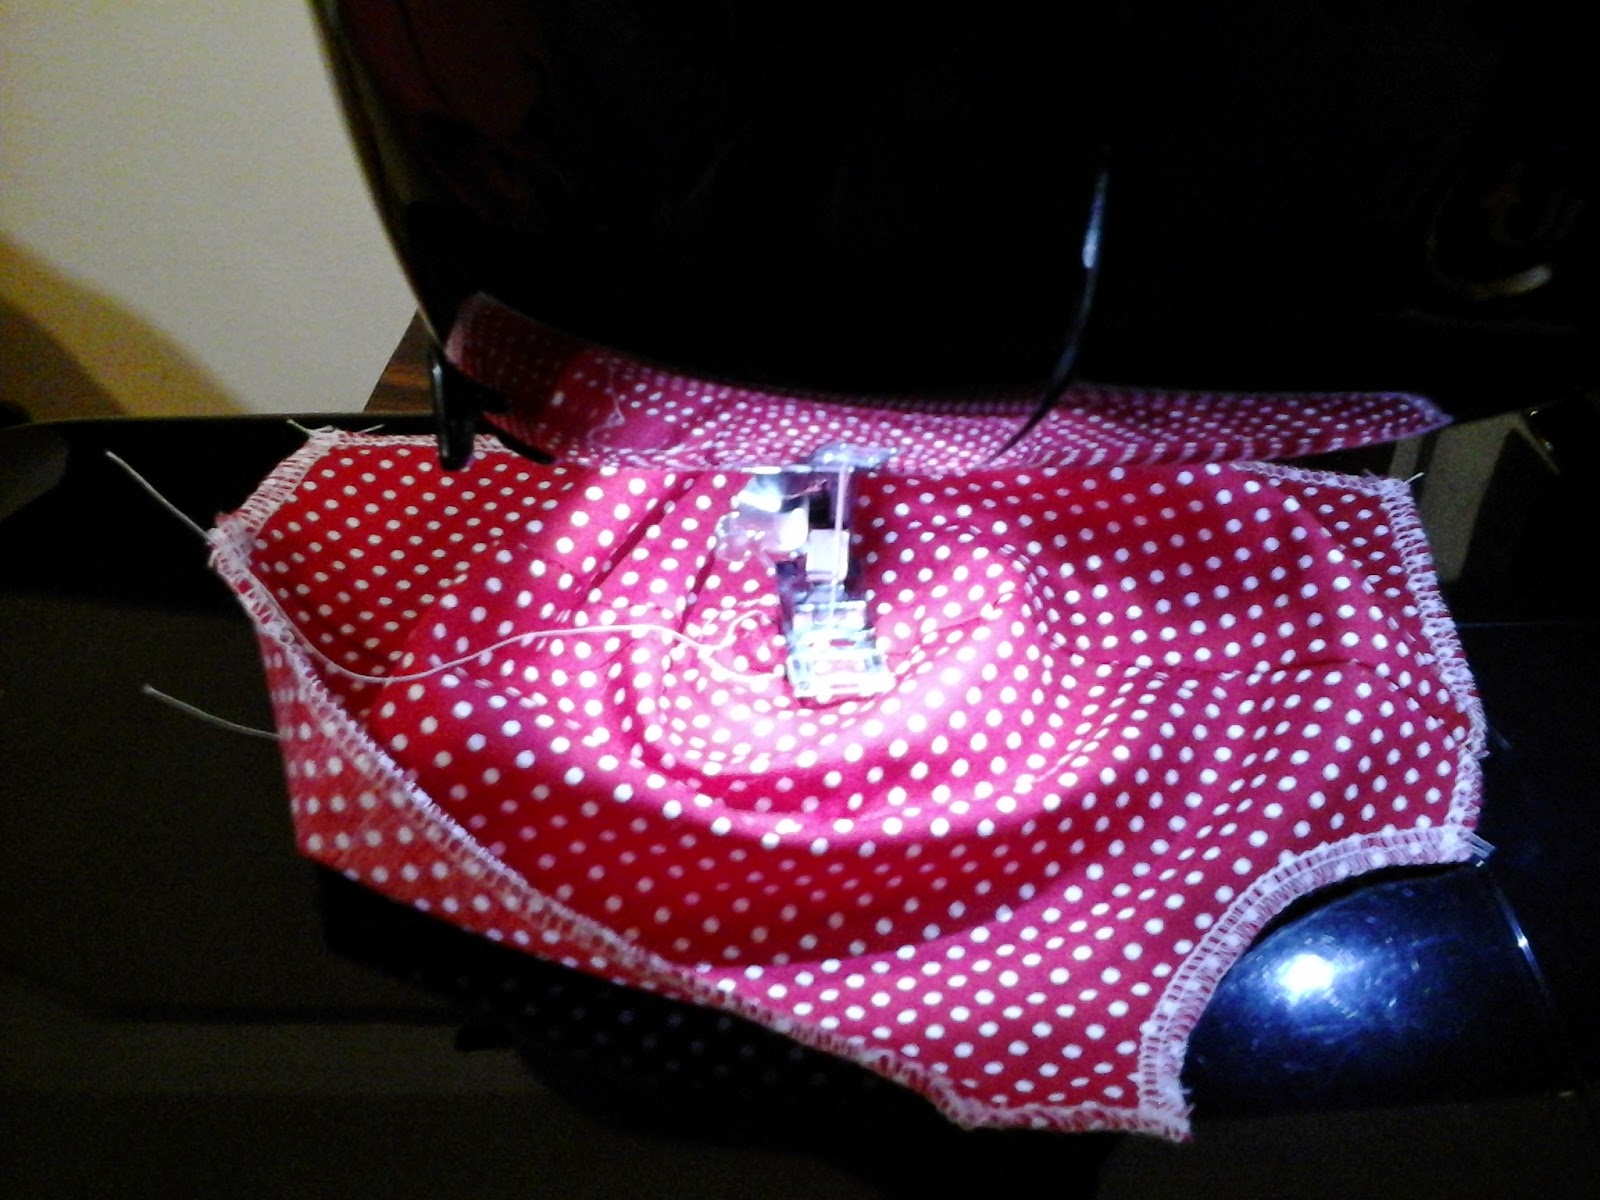
Then I did the spiral stitching which is supposed to help give the cups their bullet-like shape. starting the spiral stitching is probably the hardest part.

Starting the spiral stitching

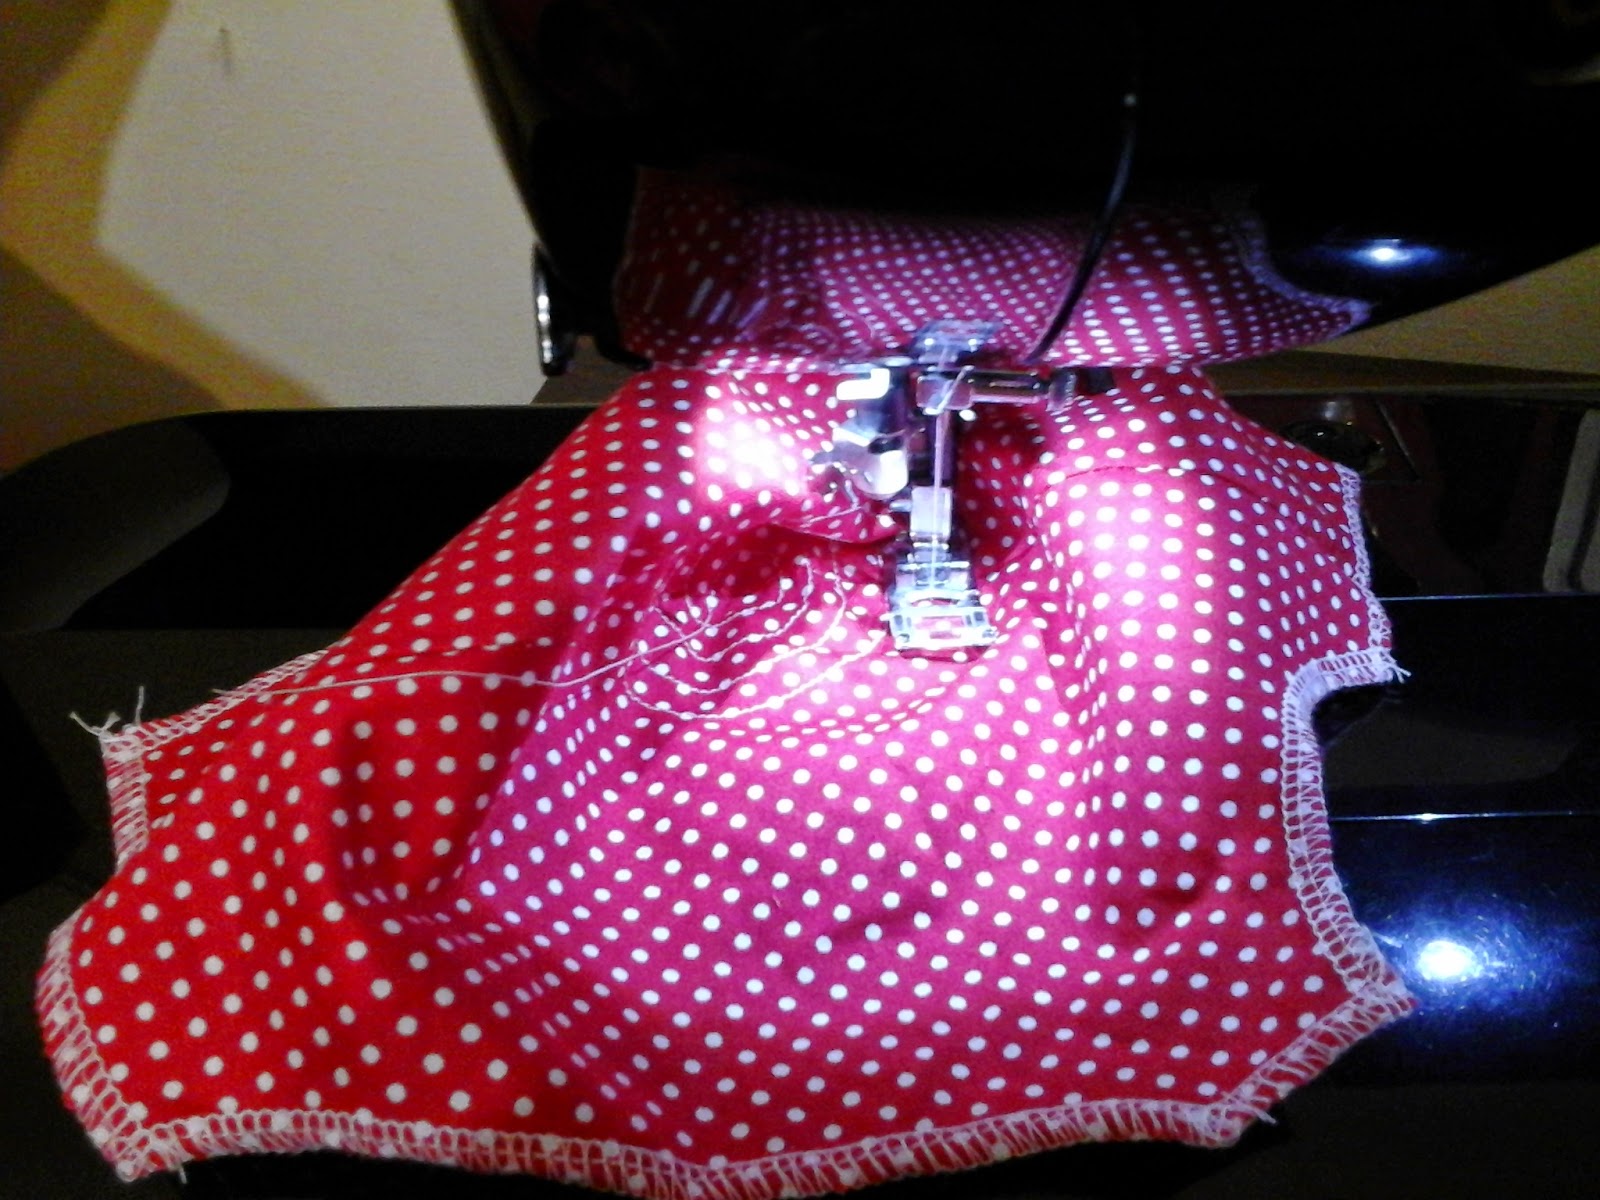
Spiral Stitching, this got easier as I got further out

Almost finished the spiral stitching on the first cup

I then repeated the spiral stitching on the second cup. Once that was done, I joined the 2 cups together using a french seam. At this point I tried it on for size and decided to trim a little bit from the bottom edge of the cups as they were fractionally too big for me. The 2 pieces of the front band were then sewn together along the long straight bottom edge, then one edge was sewn along the bottom of the cups and the other edge was handstitched along the same seam, completely encasing the bottom edge of the cups.


The back band pieces were then sewn on with french seams and the raw top edge was folded down and stitched. For the closure in the back I cheated by buying a bra extender and unpicking the stitching between the section with the hooks and the section with the eyes. Then I simply sewed the pre-made sections to the ends of the back pieces. I didn't use any elastic on the band as it was a good fit for me, but it would probably fit better with the addition of some elastic. At this point it sat on my sewing table getting covered in other projects (and a few cats) as I needed to buy a set of straps to finish it off.


I finally got myself some bra straps from Spotlight (and I may have bought a few extra sets) and attached them to the bra. I wore it for the rest of the day, and while very pointy, it was super comfortable. It is a very supportive bra, and will be especially great in summer to avoid boob sweat!
Rather than taking topless selfies, here's a few photos of the bra on my mannequin. Sorry that they look a little deflated, she isn't as well endowed as me, hehe.


I really love how it has turned out, despite the stitching being a little messy in places, and the mismatched panel. I can't wait to make more of these in cute fabrics!

Anyone else tried this pattern? Or tried sewing a bullet bra from any other pattern?

Dixie

Thursday, 18 June 2015

Finally a little bit sewing for myself....

It's been a little while since my last post, sorry! I try to post at least once a week, but sometimes my time just doesn't allow it! I have been very busy sewing for Elsie George as well as a few alterations for my boss at my day job, but I finally managed to squeeze in a quick sew for myself!

This dress was completely unplanned, and came about after I was invited to dinner and drinks for my little brother's fiancée's 21st birthday. She recently bought herself a sewing machine and a lovely horn sewing cabinet, but hadn't had the motivation to use it yet. As I was too broke to buy her a present, I just went into my sewing room and filled a gift bag with fabric, zips, patterns, thread and needles/pins. I was a bit worried she wouldn't like it, but she loved it! 

Birthday Cake!!

And Birthday Smooches

I hijacked someone else's flash.....

My Husband and I stayed over at there house after dinner (we were up til nearly 3 am drinking and watching netflicks) As there house is so near to Spotlight, I mentioned I was going to go for a bit of a shop, and my little brother's fiancée decided to come with, and spend a bit of her birthday money.

Spotlight had some pretty decent sale prices, so I may have spent more than I should have......

I Bought 2 Butterick Patterns as they were on Special for $7 each. I got B6167 a lovely gathered shelf bust sundress by Gertie and B6067 which is another Gertie pattern, but for a retro style 1 piece swimsuit. I really, really wanted B5895 (Summer top and Capris) But they only had the smaller size pattern in stock, and I couldn't justify buying it when I would have to redraft the whole thing anyway.

Yarns were 40% off, so I got myself a few balls of cotton blend for more snoods. I purchased a few printed cottons, Including a cute Paddington Bear quilting cotton for $6 per meter, which I decided was totally not too over the top for me to make and wear a dress out of. Then, as we were trying to leave, we spotted a table of $2 a meter quilting cottons, the catch being you had to purchase the rest of the bolt (most didn't have a lot left) So I bought a few meters each of a sunflower print cotton, a scotty dog print cotton, some purple starburst-like print cotton and this lovely orange and pink floral. There was also some zebra print cotton, which I told my brother's fiance I would buy if she didn't. She said she didn't need it, then we got all the way to the counter and the lady measured it out before she changed her mind and took it from me. That was kinda my plan all along.....

Pattern and Fabric

Anyway, we got back to my Brother's place to find him and my husband playing with a welder in the kitchen (That's totally normal right?) So we disappeared into the sewing room. I began cutting out the above pattern and my Brother's Fiancée decided to make herself a tote bag out of a fairly heavy weight piece of Zebra print cotton she got from the remnant bin at Spotlight, lining it with some purple floral that I had given her in her birthday goodie bag. My Husband and I went home a little after sunset after I had finished cutting out all the pieces for my dress, and not long after we got home, I got a message showing me a beautiful new fully lined Zebra Print Tote Bag!


Well Naturally that made me want to work on my own project (not my work sewing which I really should have been working on) So I began construction of the bodice. So that I was at least getting a little bit of work done, every time I had to press seams for the dress bodice, I also made myself measure and press the hem on a skirt for Elsie George. By the Time I went to bed I had the bodice outer together, the bodice lining together and 2 straps, which I pinned to my mannequin. I also had all the skirt hems pressed, pinned and ready to sew.


After work the next day, I sewed the lining to the bodice outer, attaching the straps as I went (which I had to shorten a bit) Then I sewed together the skirt pieces (with in seam pockets at the sides) gathered them at the top and sewed them to the bodice. Then it was simply a matter of putting in a zip and sewing up the back seam and hem and it was done!


While it has turned out to be a very cute dress, the fit is a bit off. The gathered bust section is too small, even though I used the D cup pattern pieces. It just seems to be not wide enough and not deep enough at the edges. It was impossible to find a bra that I could wear with it that didn't show at the sides. Yet despite the front being too small, the bodice itself was too big around, which is weird, as I usually find if I make 2 sizes smaller than the pattern says to, the fit is pretty much perfect. This one just have way too much ease under the arms. I took some in from the back when I put the zip in, But I think I'm going to have to dodgily add darts to the side seams to make the fit better. Even with these fit issues, I still wore the dress to work the next day, and received many compliments on it. Hopefully I will get some better photos of the dress soon, it has been quite miserable and raining here lately.

I have also been working on making a few dog coats for my mum's Maltese Terrier, Mango. Part way through making the first one I decided to try it on Mabel. It was a bit long on her, but she didn't actually mind having it on, as long as I was giving her attention.


Another thing I have purchased lately were some lovely plastic bangles. While I can't afford Bakelite or even Fakelite for that matter, I can afford 20c plastic bangles from my local op-shop! Check out these beauties I scored, with colours for nearly every outfit, and a cute little wicker one to wear in summer with my straw hat!


So what are some other good projects to get back into the swing of sewing things? Also, has anyone else been making dog (or cat) clothing lately?

Dixie