After making my last slip, I wore it nearly everyday, so I thought I should probably make myself another. Rather that use the same pattern again, I decided to use one that would count towards my Vintage Pattern pledge. I know I had a vintage slip pattern that I was in the process of grading up, but of course I could not find it anywhere. So I settled for this pattern.

While not my usual decade for vintage patterns, this one is from 1989, so it is still technically vintage. Besides, when a pattern is made up with the right materials, you can make it look like a completely different decade than when it was designed for. I chose to use a lovely royal blue satin printed with stylised pink roses, that I purchased from Spotlight, from the remnants bin, I think. I only had about 1.5m of it, so I had to shorten the slip a few inches, especially to cut out all the pieces on the bias, which I was fine with, as I found my last one does try and peek out from the hemlines of my dresses and skirts when I wear it underneath. To complement the satin, I searched through my stash for some lace and settled on this lovely soft pink design.

I began sewing by sewing the wrong sides together, as the basis for the French seams. I made the straps, using the same technique as my last slip, then pinned them on to check the fit. It was a bit roomier than I wanted, so I took it in an inch on either side seam. Once I was happy with the fit, I trimmed the seams, then turned the seams around and sewed them right sides together, then pressed all the seams flat. I once again pinned the straps on and checked the fit, which I was pretty happy with.

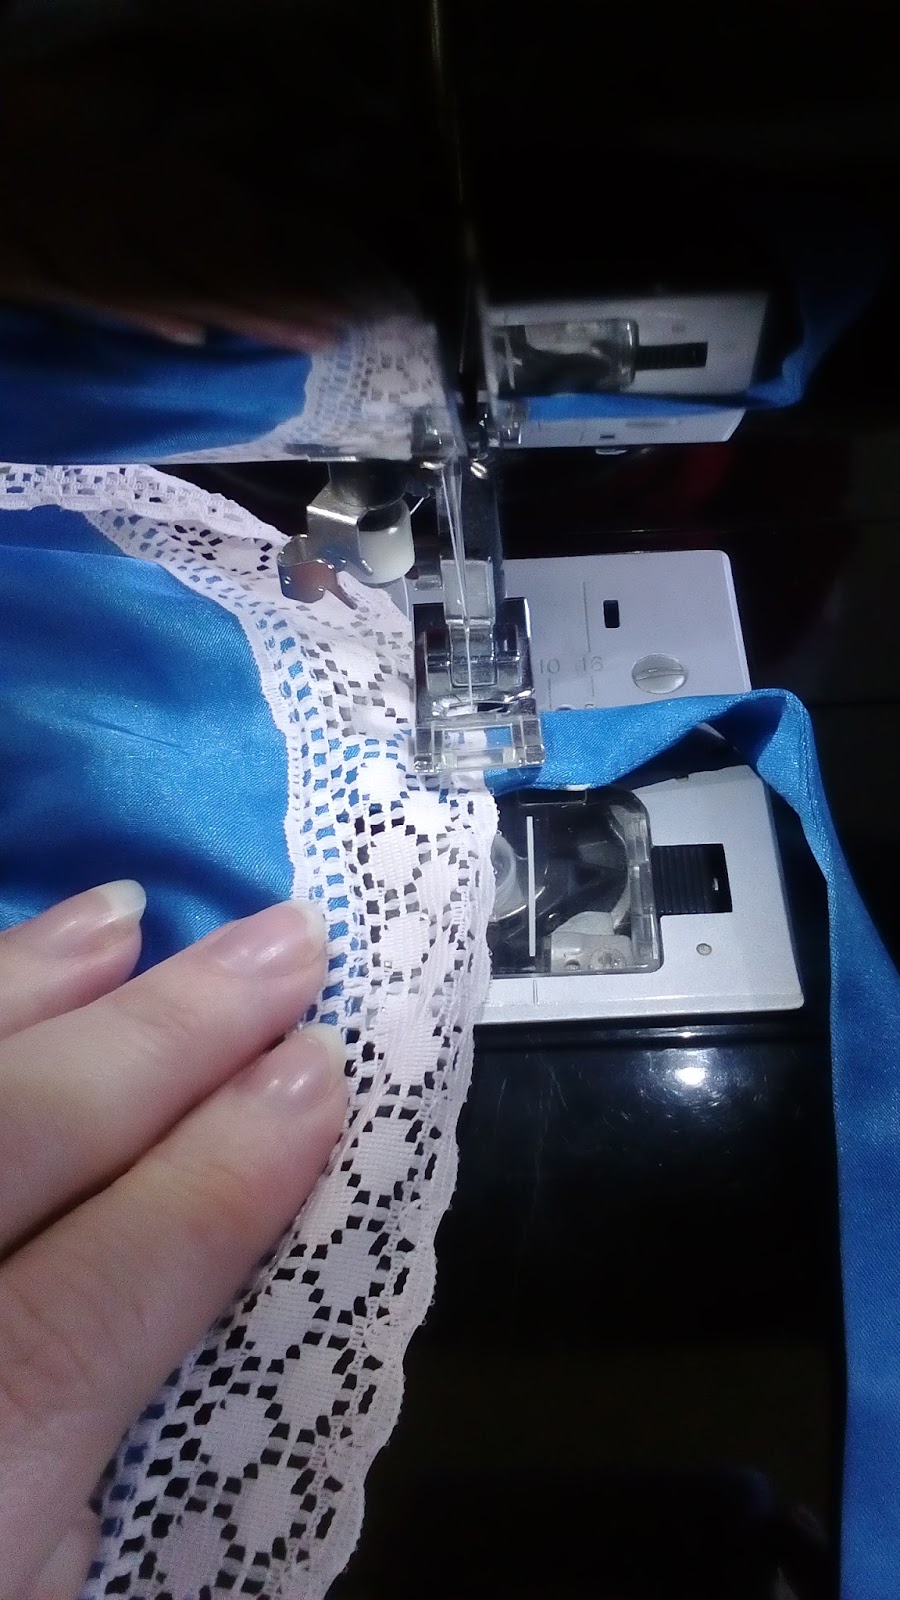
While overlocked seams would have been less bulky, I love the finish of French seams on lingerie. The next step of construction was to attach the lace along the neckline and hemline. The pattern instructions say to stitch the lace on, easing around curves and pinching extra out of the corner, then turning the raw edge down on the inside. So I decided to follow the instructions, overlocking the raw edges before adding the lace. The hemline was finished in the same way.


While I am happy with how this slip has turned out, I think I prefer the design of the other pattern with the separate cup pieces, although I am sure I will get wear out of this one, as it will be less noticeable underneath my clothes because it is quite a bit shorter. It also looks great with my new Pale Blue Suit!


Anyone else as obsessed with making and wearing slips as I am?

Unfortunately, while pressing the edges inside the slip, I accidentally melted a small part on the hemline. It's not too noticeable, but I'm still bummed I did it.

After trying it on, I realised the lace was falling down a bit along the neckline, so I stitched it in place on the straps, and that seems to be keeping it up.


While I am happy with how this slip has turned out, I think I prefer the design of the other pattern with the separate cup pieces, although I am sure I will get wear out of this one, as it will be less noticeable underneath my clothes because it is quite a bit shorter. It also looks great with my new Pale Blue Suit!


Anyone else as obsessed with making and wearing slips as I am?
Dixie
PS. This is my 4th Vintage Pattern Pledge make for 2016, so I am still a bit behind on my goal of 10
Your slip is perfection!
ReplyDeleteI've been dying to make slips but I'm afraid of wasting money on expensive fabric while experimenting with fit and styles etc. Do you have any favorite patterns?
Hi Blacey, I'm afraid I don't have a failproof slip pattern, my favourite so far has been Kwik Sew 3395, which is actually a dress pattern that I changed to be cut on the bias and left off the zip. I like it more than this one, as it is lower cut at the front. You don't need to use expensive fabrics, especially for a first go. I used a remnant for this one, and fabric from an op shop for my last one. You could even practice with cheap polyester satin.
Delete